Zum Hauptinhalt wechseln

iHome iM71SC Spring Replacement

Was du brauchst

  1. iHome iM71SC Spring Replacement, iHome iM71SC Disassembly: Schritt 1, Bild 1 von 1
    • Push down and turn the top of the speaker clockwise. This will release the clips and expand the speaker.

  2. iHome iM71SC Spring Replacement: Schritt 2, Bild 1 von 1
    • Use a #000 Phillips screwdriver to remove the four 1 mm screws from the bottom half of the speaker.

  3. iHome iM71SC Spring Replacement: Schritt 3, Bild 1 von 1
    • Flip the speaker over and use a #000 Phillips screwdriver to remove three 1mm screws . Unscrew these to unfasten the top.

  4. iHome iM71SC Spring Replacement: Schritt 4, Bild 1 von 1
    • Remove the now unfastened coverings to expose the internals of the speaker.

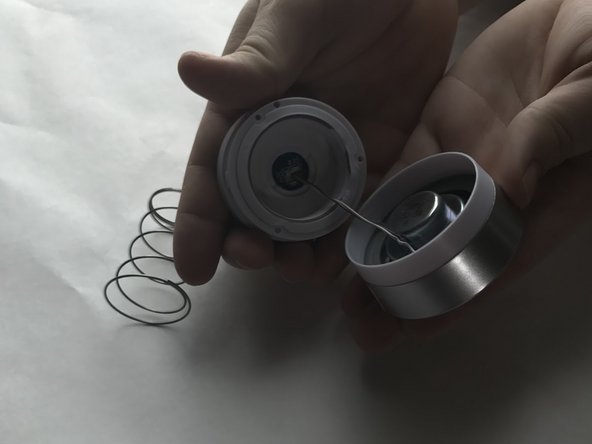
  5. iHome iM71SC Spring Replacement, Spring: Schritt 5, Bild 1 von 1
    • Pry the spring from the speaker housing using the blue plastic pry tool.

  6. iHome iM71SC Spring Replacement: Schritt 6, Bild 1 von 2 iHome iM71SC Spring Replacement: Schritt 6, Bild 2 von 2
    • Unwind the old spring from the wires.

Abschluss

To reassemble your device, follow these instructions in reverse order.

Sarah Brown

Mitglied seit: 03/21/17

301 Reputation

3 Anleitungen geschrieben

Team

UMass Dartmouth, Team S7-G5, Julie Spring 2017 Mitglied von UMass Dartmouth, Team S7-G5, Julie Spring 2017

UMASSD-JULIE-S17S7G5

5 Mitglieder

4 Anleitungen geschrieben

0 Kommentare

Kommentar hinzufügen

Seitenaufrufe:

Letzte 24 Stunden: 0

Letzte 7 Tage: 0

Letzte 30 Tage: 1

Insgesamt: 116