Zum Hauptinhalt wechseln

iLive IKBC384S Audio Speakers Replacement

Was du brauchst

  1. iLive IKBC384S Audio Speakers Replacement, Top Cover: Schritt 1, Bild 1 von 2 iLive IKBC384S Audio Speakers Replacement, Top Cover: Schritt 1, Bild 2 von 2
    • Make sure you remove all seven 3 mm screws before proceeding to the next step.

  2. iLive IKBC384S Audio Speakers Replacement: Schritt 2, Bild 1 von 2 iLive IKBC384S Audio Speakers Replacement: Schritt 2, Bild 2 von 2
    • Use iOpener or heat gun on all sides except the front.

  3. iLive IKBC384S Audio Speakers Replacement: Schritt 3, Bild 1 von 2 iLive IKBC384S Audio Speakers Replacement: Schritt 3, Bild 2 von 2
    • Be cautious when taking the top of the device off there may still be some adhesive stuck to device.

    • The top of the device will be very difficult to remove because of the adhesive holding it together.

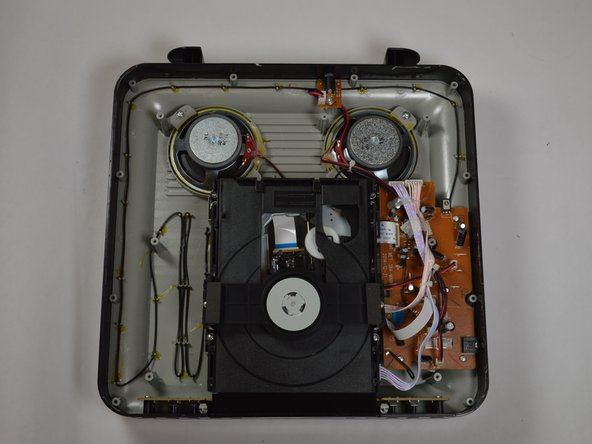
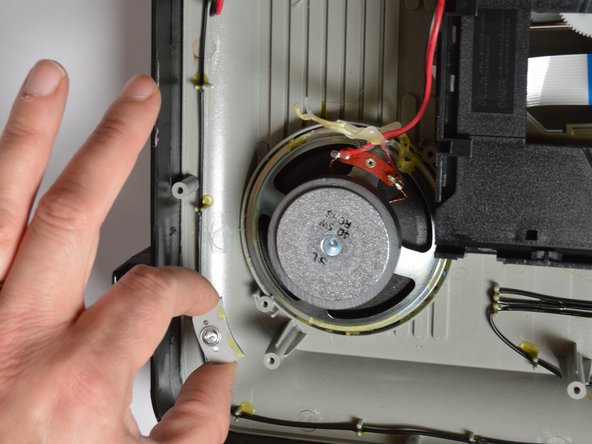
  4. iLive IKBC384S Audio Speakers Replacement, Audio Speakers: Schritt 4, Bild 1 von 2 iLive IKBC384S Audio Speakers Replacement, Audio Speakers: Schritt 4, Bild 2 von 2
    • Be sure to unscrew (3 mm) the two plastic brackets on each speaker, use iOpener or heat gun they are glued onto speakers, please do not discard.

  5. iLive IKBC384S Audio Speakers Replacement: Schritt 5, Bild 1 von 1
    • Unplug both of the speakers from the motherboard.

Abschluss

To reassemble your device, follow these instructions in reverse order.

Allen Dover

Mitglied seit: 03/21/17

401 Reputation

4 Anleitungen geschrieben

Team

Texas Tech, Team S46-G6, Bennett Spring 2017 Mitglied von Texas Tech, Team S46-G6, Bennett Spring 2017

TTU-BENNETT-S17S46G6

3 Mitglieder

6 Anleitungen geschrieben

0 Kommentare

Kommentar hinzufügen

Seitenaufrufe:

Letzte 24 Stunden: 1

Letzte 7 Tage: 5

Letzte 30 Tage: 5

Insgesamt: 430