Diese Version enthält möglicherweise inkorrekte Änderungen. Wechsle zur letzten geprüften Version.
Was du brauchst
-
Dieser Schritt ist noch nicht übersetzt. Hilf mit, ihn zu übersetzen!
-
Lay the iMac display-side down on a flat surface (putting a cloth under the screen to protect it from bumps).
-
Loosen the three Phillips screws securing the rear panel to the iMac.
-
-
Dieser Schritt ist noch nicht übersetzt. Hilf mit, ihn zu übersetzen!
-
Lift the rear panel slightly near the bottom of the iMac.
-
Pull the rear panel toward yourself and remove it from the iMac.
-
-
Dieser Schritt ist noch nicht übersetzt. Hilf mit, ihn zu übersetzen!
-
Remove the following two screws:
-
One 11 mm T10 Torx.
-
One 10.6 mm T8 Torx.
-
-
-
Dieser Schritt ist noch nicht übersetzt. Hilf mit, ihn zu übersetzen!
-
Lift the fan duct out of the chassis.
-
-
Dieser Schritt ist noch nicht übersetzt. Hilf mit, ihn zu übersetzen!
-
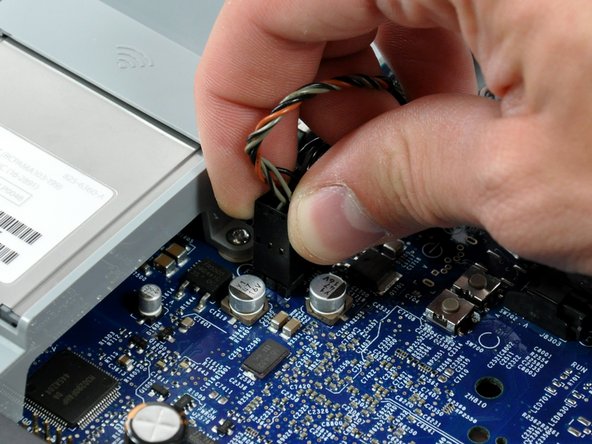
Disconnect the right fan from the logic board by pulling its connector straight up.
-
-
Dieser Schritt ist noch nicht übersetzt. Hilf mit, ihn zu übersetzen!
-
Remove the two 11.6 mm shouldered T8 Torx screws from the right fan.
-
-
Dieser Schritt ist noch nicht übersetzt. Hilf mit, ihn zu übersetzen!
-
Lift the fan near its outlet and rotate it toward yourself until its lower bracket clears the edge of the logic board.
-
Lift the fan out of the chassis.
-


Rückgängig: Ich habe diese Anleitung nicht absolviert.
6 weitere Nutzer:innen haben diese Anleitung absolviert.
