Einleitung
Beim Ausbau des Displays muss der Kleber unter dem Rand des Displays aufgetrennt werden. Danach haftet der Kleber nicht mehr und du musst neue Klebestreifen anbringen.
Einige Bilder dieser Anleitung zeigen einen 2015er iMac, der sich in kaum sichtbaren Details unterscheidet. Für die Reparatur spielen diese Unterschiede keine Rolle.
Was du brauchst
-
-
Wenn das Scharnier frei beweglich ist, wird der iMac unstabil und es ist schwer daran zu arbeiten. Durch das Einsetzen einer iMac Stütze in den Ständer ist der iMac stabiler.
-
-
-
Wenn du das alte Display wiederverwendest, musst auch hier die alten Klebestreifen auf der Rückseite des Displays entfernen.
-
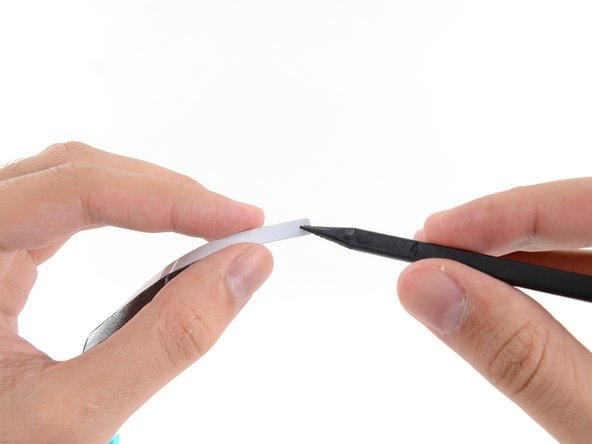
Ziehe die alten Klebestreifen mit einer Pinzette oder deinen Fingern ab. Fange unten an, und ziehe die Streifen nach oben zur Oberkante des Geräten hin ab.
-
Wenn der ganze Kleber entfernt ist, reinige die Reste sorgfältig mit hochkonzentriertem Isopropylalkohol (mind. 90%) und einem fusselfreien Tuch. Wische immer nur in eine Richtung und nicht hin und her.
The aluminum frame have a plastic zone. Could the isopropyl alcohol damage the plastic surface?
Hello! Isopropyl alcohol should not damage the plastic surface.
It’s not clear if you’re supposed to remove the black strips under the adhesives from the screen. Sometimes they come off when removing the main adhesives, but they seem to be two separate layers.
Only the adhesive should be removed—the black strips underneath them should stay in place.
“Only the adhesive should be removed—the black strips underneath them should stay in place.”
By fault I’ve removed the black strips, now there is a gap between the glass and the aluminum frame in the bottom.
the display is perfectly pasted, it’s only a matter of appearance…
If I open the computer again, what kind of adhesive tape (caption tape?) could I use to eliminate the gap between the glass and the frame?
Or it’s better to let it go…
Thanks for your support
Hi Massimiliano ,
You should be fine. The bottom edge doesn’t have black strips. It should be bare metal. However, there shouldn’t be any gaps between the glass and the frame. Make sure that the adhesive is fully adhered on the bottom edge.
Hi Arthur,
my English is not perfect…
I would mean that I removed all the black strips under the adhesives on the screen; so I believe that the glass has become too thin compared to the bottom aluminium frame.
I thought to open the Mac again and put some black strips to increase the thickness of the glass screen but I don’t know what kind of tape I should use (Kapton or other?).
And then I will put a new set of ifixit adhesives strips.
Maybe it’s a waste of time… it’ s only an aesthetic matter
Thanks again
Thanks for the clarification. Since there is always a chance to crack the screen glass when cutting the adhesive, I’d suggest not to open up the iMac again. However, if you do open it, I suggest using Tesa tape.
Thanks Arthur,
I will follow your suggestion… I will not open again my computer…
Now it works very well and fast.
So, the bit about the adhesive strips really needs to be clarified. Nowhere in the instructions is there talk about multiple layers of adhesive, one that should be removed and one that should remain. And looking at the pictures further on, clearly the wider sections where the adhesive go are completely clean of any black strips. However, on the screen side, I’ve noted that indeed there are two layers, at least on the top. And removing both layers leads to the adhesive *not* really taking hold and the screens falling out. Really wish this had been clearer. I’ve helped dozens of people upgrade their iMac but after the first time that I had to replace a screen due to it falling and breaking, I’ve been using clear strong adhesive tape externally on the corners to ensure that the screen stays in place. Ugly, but better than the risk.
I too started removing the second layer of adhesive strips before reading these comments. PLEASE update the article to reflect that the other black strips should stay!
-
-
-
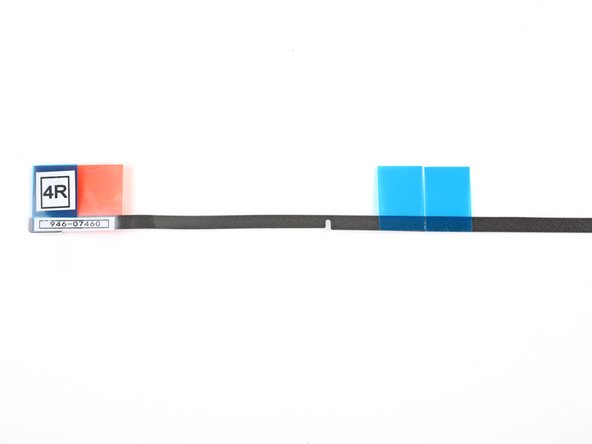
Wenn dein 4R Streifen keinen Ausschnitt hat, folge stattdessen dieser Anleitung.
-
-
-
Lege die Streifen vorher aus, damit du nicht versehentlich einen falschen Klebestreifen einsetzt:
-
Streifen 01 oben links
-
Streifen 02 oben rechts
-
Streifen 03 rechts vertikal
-
Streifen 4R unten rechts mit der dunklen Seite nach oben
-
Streifen 4L unten links mit der dunklen Seite nach oben
-
Streifen 05 links vertikal
-
-
-
Fange mit Streifen 03 an, der auf die rechte vertikale Seite des Rückgehäuses kommt.
-
Fasse die blaue Lasche und ziehe das kurze Stück Rückfolie vom Streifen ab, um einen Teil der Klebefläche freizulegen, die an das Gehäuse geklebt wird.
-
-
-
Setze die Spitze eines Spudgers in das Loch am Ende des Streifens, wo du gerade einen Teil der Rückfolie entfernt hast. Setze den Spudger von der Seite her ein, wo sich noch eine weiße Folie befindet.
-
-
-
Drücke die Spudgerspitze, die immer noch im Loch des Klebestreifens steckt, in das entsprechende Loch im Rahmen des iMac.
-
Benutze das Loch und den Spudger, um die Position des Klebestreifens zu verankern, und richte den Klebestreifen an der rechten Kante aus. Ziehe dabei vorsichtig gegen den Spudger, um den Streifen zu spannen, und klebe ihn dann am Rahmen fest.
-
-
-
Wenn die untere Hälfte des Streifens ausgerichtet ist, kannst du das längere Stück Rückfolie hinter dem Klebestreifen abziehen.
-
-
-
Richte die obere Hälfte des Klebestreifens mit der rechten Kante des Rückgehäuses aus und klebe sie fest.
-
-
-
Streiche den Klebestreifen mit deinem Finger glatt. Achte darauf, dass er korrekt mit der rechten Seite des Rahmens ausgerichtet ist und glatt liegt.
-
-
-
-
Arbeite dich gegen den Uhrzeigersinn um den iMac herum vor, und klebe in der gleichen Weise wie vorher drei weitere Klebestreifen fest:
-
Streifen 02 oben rechts
-
Streifen 01 oben links
-
Streifen 05 links vertikal
-
-
-
Fasse die rote Lasche am Streifen 4R und ziehe sie soweit ab, dass etwa 5cm der weißen Folie des Streifens sichtbar werden.
These steps instruct you to install the lower strips to the iMac frame first, as that is what Apple instructs their techs to do. If you have an iMac without a microphone hole, you can choose to install the lower strips onto the display first. Peel the blue tab instead of the red to expose the adhesive. Carefully place the adhesive along the bottom edge of the display. The L-bend on the adhesive should match the display contours.
i have no microphone hole - which is good . . . because the 4R and 4L stips must be labelled incorrectly as the L’s are on the wrong side. Also the strips don’t completely cover the bottom. And there are no holes in these strips making placement less secure. Someone certainly goofed. (Reckon I’ll use snipped off L’s to cover the open space.
Ah, the L strips don’t overlap - so they’re long enuf, but they are still reversed.
Die Löcher in den Klebestreifen passen nicht (mehr) zu den Löchern im Rahmen. Ich habe mich an den breiten Stellen orientiert und die Klebestreifen daran ausgerichtet. Das ging besser.
The holes in the adhesive strips no longer match the holes in the frame. I oriented myself towards the wide areas and aligned the adhesive strips with them. That worked better.
-
-
-
Falte die abgelöste weiße Folie in einem rechten Winkel und falze den Knick, indem du ihn mit deinen Fingern zusammendrückst.
-
-
-
Richte den Klebestreifen an der Unterkante aus, indem du den Ausschnitt für das Mikrofon über das Mikrofonloch setzt.
-
Wenn dein iMac kein Mikrofonloch hat, richte das rechte Ende des Streifens so aus, dass die L-förmige Biegung direkt neben dem rechten vertikalen Klebestreifen sitzt. Die L-förmige Biegung darf den rechten, vertikalen Klebestreifen nicht überlappen.
-
Wenn der Klebestreifen korrekt ausgerichtet ist, setze die linke freiliegende Kante auf den iMac, um die Position zu sichern.
The strips that I received from OWC do not have a notch cut out for the microphone. The instructions advise you, for 2017 and later 21.5” iMacs, to cut about 2 inches off from the left side of the strip so you do not cover the microphone hole.
As far as the remaining 2 inches I cut off, I snipped off a little more on the right side to leave a small gap for the microphone and placed that small remaining part in the center where it should have been if there was no microphone, just to complete the adhesive.
I have done quite a few of these now. It is easier to apply the bottom strips to the Display, rather than the housing. With the Red tabs folded at 90 degrees to the adhesive. You can then remove these tabs with the display kind in place, secured by painters tape on the out side before closing it up.
Don't make the mistake i just did - if you want to cut a notch, cut the BOTTOM 2/3rds section of the strip, not the top! :P
Also, here's a some pics of the mic location in the 2017 retina version from iFIXit: Muffled Microphone - iMac 21.5" (mid 2017) - Following Adhesive Strips.
-
-
-
Ziehe die weiße Schutzfolie hinter dem Streifen ab, um den restliche Kleber freizulegen.
-
-
-
Fahre mit deinem Finger von links nach rechts die ganze Länge des Klebestreifens entlang, um sicherzustellen, dass er glatt und gerade sitzt, und drücke ihn dabei fest, um den Klebestreifen am iMac festzukleben.
-
-
-
Wiederhole die vorherigen Schritte für den 4L Klebestreifen, und platziere ihn an der unteren linken Kante des iMac.
-
-
-
Setze das Display vorsichtig auf den iMac und richte ihn sorgfältig aus.
In my experience, it is easier to lay the Mac flat on its back, especially if you do not have a wedge, because the display will tilt up and down and you do not want that happening. With the Mac on its back, I removed all the front adhesive strips and then angled the display (not a big angle) against the chin making sure it was even on both sides. Then reconnect the video cables and gently bring the display down into the proper position. Step 23 below seems too much of a hassle to try and get the bottom adhesive strips out while the display is resting on them, and taping the bottom of the display in Step 19 also seems to be a hassle.
-
-
-
Benutze Malerklebeband, um die Unterkante des Displays zeitweise am iMac Gehäuse zu befestigen.
Noooo!! I followed this step and promptly cracked my screen!!!! You need to be extremely careful NOT to wrap the tape around the back of the computer. These images make it look like it's wrapped around, but if you do that, you won't be able to lift the screen at all to attach the display cables. Why?!!!!!
Oh no! I'm so sorry to hear this! Thank you for sharing your experience—I'm going to add a warning into the step.
-
-
-
Setze das Display-Stromkabel in seinen Anschluss auf dem Logic Board.
I am powering the unit back up to test all is working. Screen is black but fan is running loud. I’ve decoupled the power and confirmed both the display cables are connected. Note - I replaced both the HDD with a SSD as well as upgraded the RAM from 8GB to 16GB.
-
-
-
Benutze eine Pinzette oder deine andere Hand, um den Stecker des Displaydatenkabels vorsichtig in seinen Anschluss auf dem Logic Board zu stecken.
-
Klappe den metallenen Sicherungsbügel am Displaydatenkabel nach unten in Richtung Logic Board.
While the previous step refers to “cables,” plural, this step suggests that only the display cable needs to be reinstalled in order to test working order. In my experience (iMac 21-1/2" Retina 4K Display, late 2015), I found that I had to also reconnect the camera/microphone cable in order for the screen to work. [6/7/21]
-
-
-
Setze das Display wieder auf das Rückgehäuse des iMac zurück.
-
Stecke nun deinen iMac ein, schalte ihn an und teste deine Reparatur, bevor du mit dem endgültigen Verschließen des Computers weitermachst.
At this point I tested everything to make sure it worked, including the microphone. It was a bit muffled so I poked it with a pin to try and clear it. This was incredibly stupid because (a) the muffling was due to the backing which I was about to remove from the strip (b) poking with a pin broke the microphone.
I’m not going to buy a new microphone (£72 apparently) and a new set of strips, so I’ll get an external USB microphone instead.
But to anyone else, if the microphone sound is muffled, don’t worry!
-
-
-
Wenn du bestätigt hast, dass dein iMac korrekt funktioniert, trenne die Displaykabel ab und klappe das Display vorsichtig nach vorne.
-
Entferne die Schutzfolie von den beiden unteren Klebestreifen, indem du von oben mit einer Pinzette hineingreifst, und die blauen Laschen gerade von der Unterkante des Gehäuses nach oben ziehst.
-
-
-
Halte das Display mit einer Hand fest, während du den Schutzfilm in den folgenden Schritten entfernst, oder lehne es leicht gegen das Gehäuse des iMac.
-
-
-
Entferne die Schutzfolie von Streifen 01, indem du ihre Lasche gerade nach oben ziehst.
-
-
-
Wiederhole die vorherigen Schritte, um die Schutzfolien der restlichen Klebestreifen zu entfernen.
-
-
-
Um sicherzustellen, dass alles gut festklebt, kippe den iMac vorsichtig auf seine Rückseite (das Display zeigt gerade nach oben) und drücke vorsichtig aber fest auf die vier Kanten des Displays.
-
Entferne das Klebeband, mit dem das Display am Rückgehäuse befestigt wurde.
Yo lo pongo sobre una manta con la pantalla apoyada sobre la manta.Pongo trapos o papel de cocina doblado alrededor de la pantalla y lo sujeto con pinzas de tender ropa.Lo dejo así 24 horas y queda perfecto. Saludos y gracias por el tutorial.
-


Entsorge deinen Elektromüll fachgerecht.
Hat die Reparatur nicht ganz geklappt? ln unserem Forum findest du Hilfe bei der Fehlersuche.
Entsorge deinen Elektromüll fachgerecht.
Hat die Reparatur nicht ganz geklappt? ln unserem Forum findest du Hilfe bei der Fehlersuche.
Rückgängig: Ich habe diese Anleitung nicht absolviert.
45 weitere Nutzer:innen haben diese Anleitung absolviert.
Besonderer Dank geht an diese Übersetzer:innen:
100%

Diese Übersetzer:innen helfen uns, die Welt zu reparieren! Wie kann ich mithelfen?
Hier starten ›

10 Kommentare
I have spotlights bleeding from the bottom of the screen after opening. Could this be a tape issue on the screen itself?
Correction it’s a stage light issue for the post above. Any recs?
Hello Adam. Did you solve your problem? I just found a Youtube video about that. It is some kind of “dust” between the display and the glass screen and needs to be cleaned very carefully .
Rafael -
First time i see this thing about the microphone, i did the cutout.
And microphone doesn’t work anymore.
Hello! I would suggest checking if the microphone cable was disconnected from the motherboard.
Very good explanations, excellent !