Einleitung
Diese Anleitung zeigt dir, wie du die rechte Antenne an deinem iPad Air austauschen kannst.
Sei äußerst vorsichtig, wenn du den Akku mit einem Akkutrennstück ("Akkublocker") abtrennst: Die Kontakte am Akku sind sehr empfindlich und können dauerhaft beschädigt werden. Wenn du trotzdem den Akku auf diese Weise isolieren willst, dann befolge die Warnhinweise ganz genau und arbeite sehr sorgfältig. Wenn du aber weiterarbeitest, ohne den Akku zu isolieren, dann vermeide den Gebrauch von Metallwerkzeugen, außer wo unbedingt notwendig (z.B. um Schrauben zu entfernen). Dadurch beugst du einem Kurzschließen des Akkus und der empfindlichen Elektronik vor.
Was du brauchst
-
-
Erhitze den iOpener für dreißig Sekunden.
-
Im Verlauf der Reparatur kühlt sich der iOpener wieder ab. Erhitze ihn dann noch einmal für dreißig Sekunden.
-
-
-
Halte den iOpener an einem der flachen Enden und vermeide die heiße Mitte, während du ihn aus der Mikrowelle nimmst.
-
-
-
Fülle einen Topf oder eine tiefe Pfanne mit ausreichend Wasser, um den iOpener komplett damit bedecken zu können.
-
Erhitze das Wasser (ohne den iOpener) bis es kocht. Schalte die Wärmezufuhr (Platte) aus.
-
Lege den iOpener für etwa 2-3 Minuten in das heiße Wasser. Stelle sicher, dass der iOpener komplett mit Wasser bedeckt ist.
-
Nimm den iOpener mit einer Küchenzange aus dem Wasser heraus.
-
Trockne den iOpener gründlich mit einem Küchen- oder Handtuch ab.
-
Der iOpener kann jetzt verwendet werden. Solltest du den iOpener erneut erwärmen müssen, erhitze das Wasser nochmal bis zum Siedepunkt, schalte die Wärmezufuhr aus, und lege den iOpener wieder für 2-3 Minuten vollständig in das Wasser.
-
-
-
Wenn dein Touchscreen gebrochen ist, vermeide weitere Brüche und verletze dich nicht beim Berühren des Glases.
-
Klebe Paketband über den Touchscreen des iPads, sodass die ganze Oberseite bedeckt ist.
-
Bitte befolge die restliche Anleitung wie beschrieben. Wenn das Glas einmal gebrochen ist, wird es während der Reparatur weiter brechen. Eventuell benötigst du einen Metallspatel, um das Glas zu entfernen.
If you add clear packaging tape, it will create bubbles and the suction cup will become inefficient. To me it was impossible to remove the glass with the suction cup. Since the glass was very cracked, I had to resort to some tweaking with strong tape and pull the this off.
If your screen is significantly cracked to the left edge, abandon this entire setup, prepare yourself for a 5-6 hour repair, expect a lot of patience, a lot of cursing and some good old American ingenuity. The suction cup and picks will not work. You have to carefully crack the glass yourself (w/out damaging the panel underneath and carefully pull it apart from the inside to the outside edges. Use a hairdryer to soften the glue under the cracked panel along the edges. Then use an exacto-knife to separate the pieces of the glued panel from the frame body, all the way around the device. Watch out for the home button ribbon connector when using the exacto-knife. There will be glue residue left over, carefully apply some goo-gone to a small area of a paper towel and wipe gently around the frame body to loosen the glue. Then use the plastic spudger tool to scrape off the excess glue.
The iPad repair is VERY difficult. If you are a working adult, hire a pro. This is not for the faint of heart.
The hairdryer option was way faster and easier than the iOpener. Be VERY careful not to damage the LCD- one small mistake will cost you an extra $100!
but I’m not American
If your digitizer is shattered, the tape will help, but you’re going to need extra picks. Or a razor blade. See below.
Friendly observation that the image on this step is actually of an older ipad model as the side bezels are far too big. I don't know if that matters to anybody but a noob might see it and think this manual doesn't apply to them. : )
Thank you! Yes things like this matter so much. I successfully replaced an iPhone 6LCD&Screen from the guide. Next was my iPad 2 and the guide said nothing about the power flex cable. They were only stressing about not severing the wifi cable. I followed instructions carefully. Got the screen off and bam. Power flex severed because it was left out of the guide. I saw it in the comments after. I’ll never follow a guide here again without reading the comments. I did receive a discount code for my next purchase but it still caused a lot of inconvience.
I had the same experience. My glass was cracked all the way to the left side and the suction cup would not pull the glass up. The packaging tape also didn't help. The heat caused it to lift. I finally abandoned the tape, used a heat gun aimed very carefully at each broken piece of the screen. The picks did work with patience, but I just pulled off each broken part of the glass. I also found that pulling up on one broken part while heating in front of me would let the next piece pull up. I continued heating and breaking all the way around. Do the right side last. Took about 1 hour to get it off, and another hour to clean the old glue off the frame. BTW thanks to this web site and all the comments! No way I would have done this without all the help here! I am now clean and waiting for my new digitizer. I couldn't free the battery (below), so I left it powered up, and verified it till worked before throwing away the old glass. Vince
Taping with package tape doesn't work. You'll need a very large piece of tape if you go this route.
Just finished successful repair. I would add this: most folks will be here because of cracked screen. This is not easy; believe the 'complex' rating on this repair. I put tape on my screen because it was badly cracked. This made the suction cup useless, because it just sucked the tape off the scree.n. I used the razor blade technique which worked great, it should be used in the demo, and a good blade should be in the kit.
I thought this shouldn’t be too hard - I only had some cracks in the glass, but then at every spot I worked on, the glass turned into nothing but tons of tiny shards. I had to use the points of the tweezers plowing along only the outer edge all the way around, sometimes with a razor blade and often using a hair dryer up close (briefly, over and over). After I got every bit of glass out, I used ordinary rubbing alcohol and Q-tips but I had to rub hard and quickly 100 times on each area to slowly dissolve the glue. I only scratched the LCD once slightly with a tweezer slip. The large chucks of display held together by the packing tape needs something under it to protect the LCD while you are working.
Using Goo Gone to get rid of the adhesive residue is 20 times faster than using rubbing alcohol, even if it is 91% isopropyl alcohol.
Skipping the iOpener and using a hair blowdryer, and using Goo Gone in place of the rubbing alcohol are 2 simple changes that will make this job much much easier than the default instructions if the screen is shattered.
I found the hair dryer is far more effective and less dangerous than using the iopener. If you overheat the iopener you end up pulling a hot plastic bag spewing hot glycerine out of your microwave! Not fun!
I have an Ipad with touch screen issue, if i replace this part it should be Ok?
Packing tape won’t do anything. You need to use duct tape to prevent glass shards from spraying everywhere. If your screen is only partially cracked (mine was the top only), modify the directions and focus on the areas that aren’t cracked first. I was able to get the lower 90% of the screen off, and then worked the cracked pieces with a heat gun and metal razor spudger. The entire repair took around 3 hours, and prob 2 hours and 30 min of that was getting the shards out and pieces off. And lots of cursing. I also told my kids if they crack another screen they are out of luck. I am not doing this again.
-
-
-
Lege den erhitzten iOpener auf die lange Seite links des Home Buttons.
-
Lass den iOpener für mindestens eine Minute liegen, um den Kleber zu erhitzen und zu lösen.
The iOpener doesn't work because the heat isn't strong enough. I used a hair dryer which proved to be much more efficient.
“At least a minute.” Bullshit. Get the iOpener good and hot, place it on the area you’re going to work on clear side down, and cover it with a towel. Walk away for 2 minutes. Make yourself a drink — you’ll need steady hands later.
I've done this with an iOpener and at least in my case, it worked fine. You may have to modify the heating instructions though, since not all microwaves are created equal.
ii i just did this and it took a while but i figured it out it is true this thing doesnt get hot enough BUT heat it 2 times and then the 3rd time when u place it on the ipad put the ipad box on top and then maybe a second ipad on top of the box so it kinda smashes i down but not too much for it to break and then wait for it to turn warm THEN use the succion THEN the gap appears. the glue is super strong on the ipads so yea it will take some time lol
Doesn't work. Perhaps include more copy on exactly how to do it?
The iOpener does not work. It simply it is not hard enough to soften the glue. The heat hair dryer method does not work either.
The goal is simply to weaken the glue enough that you can use your suction cup to open up a tiny gap under the glass, so you can insert an opening pick and slice through the adhesive. It doesn't actually take all that much heat; the picks will do most of the work once you get them in there. iOpeners, hair dryers, heat guns all work fine in my experience—the iOpener is just a bit more foolproof because it won't get hot enough to cook the display panel underneath.
If using a hair dryer or heat gun make sure it is not too high heat. My heat gun has two settings, one 750 degree and an 1100. After using it on high I discolored the digitizer and warped the LCD slightly (only shows on pure white backgrounds). Low worked for the rest of the repair just fine. Also using a razor blade or something besides the pick works nice for the initial pry. Once you have a gap big enough, insert the pic and you’re all set.
I don’t have an iOpener, my heat gun wasn’t handy. The last time I did something like this it was a 90-100 degree day, so I just put it out in the sun for a while, and it worked great. This time it’s fall, so I used a 420W halogen Light that I have for photography. (A standard heat lamp would probably work too, but might take longer.) I held it close to the light until it felt hot to the touch, just a couple minutes, then I left is sitting about 16” below the light for 5-10 minutes to sink in and warm uniformly. It worked great.
For me, steps 8-31 were basically one step "Carefully pry off the digitizer glass with the plastic tools" took all of 30 seconds.
Although very hard this does work. The first time opening the ipad after buying it 8+ years ago it took about 3 times of heating the iopener. It did require an amount of pressure I did not expect but it did come open as instructed. I did add a towel and apply pressure to the iopener to make sure the heat transferred.
The iOpener didn’t work for me at all, zero, it literally did nothing. I resorted to my heat gun on low and yeah you need to be super careful, but once I started the adhesive came off pretty easy.
I used a 2-level heat gun, too. Supposedly 707 degrees/923 degrees.
I kept the heat gun about 1” away from the glass and used only the low setting. Even so, I did alter the digitizer pretty quickly in a few locations around the edge. It still functions fine, and you only see it under certain circumstances, so not a huge deal. But irritating. Be cautious about too much heat. It just looks like sort of a faint, polarized grid.
Don’t be afraid to put tension on the glue and just hold it. If it is warm enough, the glue will relax under sustained tension. This isn’t a speed event. Don’t try to rush it, or you’ll break something.
Now that those infrared surface thermometers have become so inexpensive, it would be great if someone posted a target temperature for softening the glue without damage. That would take some of the guesswork out of this process.
If you heat the iOpener somewhat longer than they recommend, and get it about as hot as your hand can stand, then place it on the iPad and cover with a towel for at least 3 minutes. Then really be patient. I got a bit impatient, and took a chance and slipped a really fine “exacto-type” of blade vertically beside the suction cup as I lifted, and thankfully that worked. That made enough room to get one of the “guitar pick” wedges in. The rest went fine.
I used the iOpener to soften the adhesive. I was extra careful and it took me about 90 minutes to get to Step 30. With my acquired experience I would say, it may be done in about 30 minutes. Most important: Be patient! You may have to reheat the iOpener a few times until you will be able to do Step 9. Once I had this part done, it was a lot easier. So I would say the first 60 minutes I spent on steps 1 through 9.
I’ve been using a heat and isopropyl alcohol combo on iPhone screens with no problem. This specifically says “only” heat. I feel like she’s trying to tell me to keep a lid on my IA. Because I don’t know what other methods some rogue might be trying in their efforts to compromise adhesive.
-
-
-
Wenn du die einzelnen Schritte ausführst, pass besonders an folgenden Stellen auf, wenn du das Glas entfernst:
-
Frontkamera
-
Antennen
-
Display und Touch Screen Kabel
Don't assume anything!! I thought I was pulling on the screen connector and I was pulling on an antenna component instead. Didn't ruin its connection range but I sure remember doing it and now my iPad has a little internal flaw only I'm aware of.
I’ve been using a heat and isopropyl alcohol combo on iPhone screens with no problem. This specifically says “only” heat. I feel like she’s trying to tell me to keep a lid on my IA. Because I don’t know what other methods some rogue might be trying in their efforts to compromise adhesive.
-
-
-
Drücke den blauen Griff zurück, um die Arme zu entriegeln.
-
Lege das iPad so auf einen Gegenstand, dass es waagrecht auf gleicher Höhe zwischen den beiden Armen liegt.
-
Bringe die Saugheber mittig nahe an der linken Kante des iPads an, einen auf der Vorderseite, den anderen auf der Rückseite.
-
Halte die Anti-Clamp unten gut fest und drücke fest auf den oberen Saugheber, damit er sich festsaugt.
-
-
-
Drücke den blauen Griff vorwärts, um die Arme wieder zu verriegeln.
-
Drehe den Griff eine volle Umdrehung im Uhrzeigersinn, bzw. so weit, bis du merkst, dass sich die Saugheber dehnen.
-
Achte darauf, dass sich die Saugheber weiterhin gegenüber stehen. Wenn sie sich nicht mehr gegenüber stehen, dann löse die Saugheber ein wenig ab und schiebe sie in die richtige Position.
-
-
-
Warte eine Minute, damit sich der Kleber allmählich ablösen kann und sich ein Spalt bilden kann.
-
Wenn das Display nicht heiß genug ist, dann erwärme die linke Kante des iPads mit einem Haartrockner.
-
Wenn der Spalt groß genug ist, dann setze ein Plektrum unter das Display ein.
-
Überspringe die nächsten zwei Schritte.
-
-
-
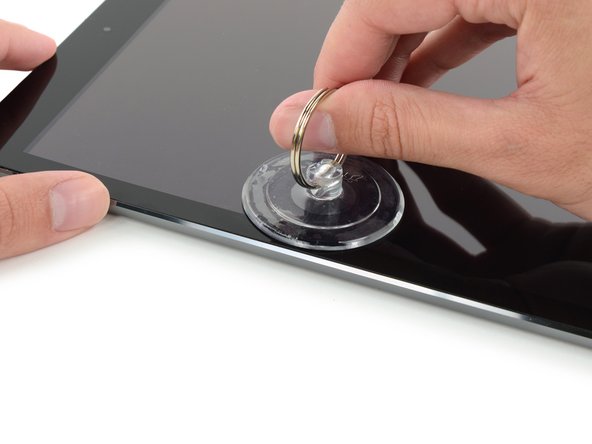
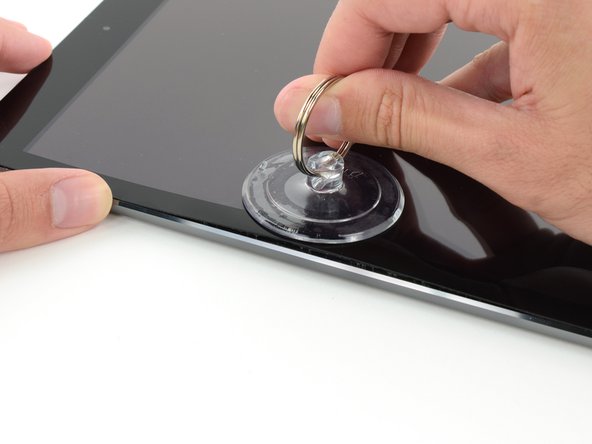
Befestige einen Saugheber auf der linken Seite in der Mitte des iPads.
-
Drücke den Saugnapf flach auf den Touch Screen.
-
Halte das iPad mit der einen Hand fest und hebe mit der anderen vorsichtig den Touch Screen vom Gehäuse.
In this picture above, the glass isn't cracked at all so it helps the suction cup to be effective as it is hermetic. With cracked display, it won't work.
Suction cup would not work for me. No amount of heating with iOpener or hair dryer would allow even the slightest gap to form. I ended up looking at some YouTube videos and used a razor blade. I put the razor blade perpendicular to the top glass, right at the edge of the glass and pushed down until the blade went down 1/4". Then heated some more and pried up the glass enough to put in an opening pick. I spent a lot of time working with the suction cup. Glue was just too strong.
It's funny that iFixit changed the image they used. Even they themselves realized how stupid it was to try a suction cup on taped up surface. C'mon guys! You should at least make foot notes for your readers and let them know what to do if the glass is already shattered. It's a slow methodical process that involves working with a iOpener type tool. I personally have one that looks like a prison shank (lol)
Not sure what you are referring to there—I see no evidence in the document history of the photos having been changed. Suction cup + packing tape can work, but it depends how badly the glass is broken and the quality of the tape. Sometimes it takes a couple attempts. You can also skip the suction cup and try using tape alone to pull on the panel, if your tape is sticky enough. There are no guarantees though, which is why we have the disclaimer right in Step 4 that the procedure can be pretty fussy if you're working with a shattered panel. Depending on where it's broken and how badly, you're going to have to improvise.
Jeff, the change is evident from image 4, where all the surface is taped up. In this picture you show a clean not broken surface and yes, the suction cup works...
Ah, I see what you're saying! I can understand why you guys would assume that, but in reality the entire guide was originally photographed using an intact panel. We later added a step showing how to protect yourself if you have a shattered panel (with photos to go along with, obviously). I'm afraid it wouldn't be practical to re-shoot the entire guide every time we make a small change like that.
The suction cup is useless if your glass is shattered. Use a new, sharp razor blade, and insert it vertically between the edge of the glass and the metal back of the iPad. Don’t worry about pressing too hard — there’s a lip that stops the blade from going in too far and damaging anything. You’ll probably have to do this several times, but eventually the blade will “bite” into the edge of the glass well enough for you to pry it up. Insert a pick underneath the razor, then remove the razor and continue as directed.
After having to read several comments on this screen removal and the clear packing tape, I too have to agree that the tape method does not work well at all if your screen is already shattered. I combined several methods, with lots of patience to remove the screen on my iPad Air 2. What I found it very helpful was the heat gun used for paint removal. The heat gun generates a lot of concentrated heat at lower air velocity, unlike generic hair dryer, so you must be very careful not to ruin the electronics, and risk burning your hands and anything around it. My heat gun that I purchased from Home Depot had a nozzle to direct and focus the heat on a small area. That was helpful in working small area at a time. This method work thoroughly well.
It would work if you leave iopener in microwave for 1 minute.
Don’t trust the instruction from ifixit.
you can put iopener in microwave for 1 minute without any harm.
Note. you have to make sure that it is in cold position before you put it into microwave.
Suction cup didn’t work for me either, went the razor blade route (using an exacto knife blade) with very minimal damage to the aluminum shell. Be warned, if your screen has cracked along the edge (as it almost 100% certainly has if you’re reading this guide), the screen will continue to shatter and splinter as you make your way around the edge. That’s when having the screen taped up well will be to your advantage. There’s also a good chance you’ll have to re-insert the razor blade on the other side of a fracture and start the lifting process again, but keep going, being sure to avoid the points called out in this guide and you should be fine.
Also, do not apply the suction cup to an area of the screen with cracks and no tape. If you’re near the edge you run the risk of brutally shattering that area of the glass if the glass gives before the suction cup.
In order to get this to work for me I had to heat the IOpener to over 104 C - I needed to get the screen over 40 C before the adhesive would loosen.
Also I had to put the ipad on a towel - the granite countertop it was on was sucking the heat out too fast.
This step was brutal on my nerves - read about too many people ruining their iOpener and I don’t have a heat gun. I had to keep heating the iOpener incrementally hoping I wouldn’t pop it. … but if you’re patient, persistent, and cautious, you can definitely tell when you’re seeing separation. The iOpener ended up being WAY hotter than 30 seconds was getting me - borderline scorching my hands.
As the others noted, the suction cup is useless on a cracked screen, especially if you’ve applied tape (like the instructions say you should). The screen I was working on was busted up pretty bad, I ended up removing it and then going back to remove the edge glass and adhesive. When you have a really busted screen just take your time and use a heat gun or good hot hair dryer and it will eventually come off.
I used an iSesame tool vs a razor to pry the edge (from a previous replacement project) but again, the iOpener and suction cup are useless.
Thank you for the comments above. I was using the iOpener unsuccessfully, then turned to the hair dryer and heated it up for over 3 minutes. This gave me the gap I needed to insert the opening pick and begin the process. So, with patience and a hair dryer, I was able to get the digitizer off.
You really need a lot of patience here (30-45min). But then it works. The best way was with this plastic "crowbar" to get the beginning. You really have to press hard to get in between.
I've passed on the iOpener as suggested in these comments and have tried to use a hairdryer. heating on high at medium speed for 1 minute then trying the suction cup. heating for another minute then using the suction cup. Been doing this for 1/2 an hour but it isn't working. Need to take a break because I'm afraid I'm going to hurt in internal components of the iPad 6 (just trying to replace a dead battery) Any suggestions ???
LOL...i tried the pastic clear tape to hold the cracked glass then apply the hairdryer. It melted the plastic tape glue and thus making the handle with the duct tape useless and the duct tape just pulled the melted glue from the plastic packing tape up like butter. But the screen still not budging. I've tried the hair dryer for 5 mins and nothing. I've tried the iOpener and that's useless. I'm heating it up 30 secs a time. I tried 1 min. The screen is welded shut.
brian -
-
-
-
Platziere den Opening Pick in dem entstandenen Spalt.
-
Löse nun den Saugnapf vom Touch Screen.
This is an amazing tip! After trying for 10 minutes to use the pick with no luck, I grabbed a small razor blade and that worked perfectly to get me started!! Thanks!!
The suction cup also didn’t work to create a gap - it cracked the screen when i tried to lift (the screen was already cracked). This was after rotating between the iOpener and a microwavable hot pack for food. The iOpener was around 175 degrees, it brought the surface of the iPad to 130. I was finally able to lift the glass using a razor blade and then the picks like donprius. I continued to use the iOpener to loosen the glue around the rest of the iPad but I think a heat gun would have been more efficient.
You have to heat the glue really much, or you will, as i did, crack the glass.
Best bet is to mark the pick with a sharpie line on how far your maximum limit is so you don’t damage the LCD.
The iOpener works well, be patient and keep reheating until you can see the screen start to give a little. I kept putting mine in the microwave and it worked faster when the iOpener was hotter. 40 second intervals did the trick for me eventually
I spent an hour trying to lift the screen of an iPad Air first gen. The trick I found was that its a combination of lifting the screen a millimetre and then wiggling a razor blade vertically in the slot between the screen and the metal frame (yes its a microscopic slot). I used a hair drier on a section of the edge of the middle of the screen as above. The middle area allows for a bit of flexibility in the rail - we’re talking 0.5mm which is just enough for the razor.
So hit a section of the screen edge with the drier till its hot to touch, do the suction cap thing as above, insert the blade vertically and wiggle it *ever so slightly* in the slot as you don’t want to break anything. Keep repeating this until you see even the slightest rise in the screen under the cap. At this point, remove the razor and insert the blue pick. It should easily dig in and under the screen, but no further than the black border.
Remember, small wiggly steps will avoid breaking anything. Better a number of small heat and wiggles than a lift and snap.
for those who need to open more than one iPad, the iflex is safer and more effective than a razor blade. i use it to get started then switch to a pick
Yea, this suction cup cracked my glass. This made it near impossible to slide the picks around. I may try again another day, but I suspect it’s toast at this point.
I should have noted the difficulty rating before thinking I could replace the battery myself. I could have saved myself the cost of replacing a cracked screen, which happened when I attempted this step. I did not want to overheat the iOpener but consequently, I could not get a pick inserted underneath the screen. (I think the glue must take a lot more heat than expected to melt.) So just a warning to more novice tinkerers—this repair wasn't the same as fiddling with screwdrivers and a million small parts.
-
-
-
Erhitze den iOpener erneut und lege ihn erneut auf die linke Seite.
This says "Always wait at least two minutes before reheating the iOpener", however the iOpener itself has a warning printed upon it that says wait at least 10 minutes. And that 10 minutes warning is also mentioned in Step 2 above.
Sorry about that! We fixed the text on this step. The two-minute interval was for an older version of the iOpener—the text printed on your iOpener will have the correct interval, which is indeed ten minutes. It can burst if overheated or reheated too quickly.
It still says 2 Minutes up there in the warning
-
-
-
Platziere nun einen weiteren Pick in dem entstandenen Spalt und ziehe diesen zur unteren Ecke. Dabei sollte sich der Kleber lösen.
You guys really need to show how it's done when your iPad isn't perfect like the one pictured above.. C'mon..
This is for BATTERY REPLACEMENT not CRACKED SCREEN REPLACEMENT!!
How do you slide the picks when the glass is broken? Even with the glass taped, it pulls away from the tape rather than the housing. I've just further shattered the glass with my attempts.
With my shattered screen, I was able to remove it using the suction cup slightly and a metal pry, had to break the edge glass some for removal also but it didn’t do damage. More layers of shipping tape helped to make the screen stay together better and come off more intact.
-
-
-
Führe den Pick an der Seite des Displays entlang, um den Kleber zu lösen.
-
Wenn der Pick am Kleber festhängt oder stockt, dann "rolle" den Pick an der Seite entlang, um den Kleber weiter zu lösen.
This gives a false illusion to the difficulty of these repairs when you guys make guides using perfect devices. What about devices with dinged corners? A reader is gonna slap on a new screen and shatter it the second they apply pressure thinking it will fit into a dented corner lol
-
-
-
Führe nun den ersten Pick hinauf bis zur oberen Ecke des iPads.
-
Siehst du den Pick durch das Glas? Keine Panik – ziehe es einfach wieder etwas raus. Meistens wird dadurch nichts beschädigt. Versuche dies aber zu vermeiden, weil der Kleber sonst das LCD oder Glas berühren könnte und sehr schwer zu reinigen ist.
I managed to get a couple of fingerprints on the LCD.
What's the best way to clean 'em off?
What's the safest way?
What I’ve read, and seems to work, is gentle circular pressure with a very clean, dry microfiber cloth. Lacking that, use a TINY drop of water ON THE CLOTH, not on the LCD. Small amounts of alcohol can be used, in my experience, but only if the above don’t work, and with better results if used in small amounts and applied to the cloth, not the LCD.
Can confirm. Microfiber with a little isopropyl worked great to clean off any adhesive or fingerprints from mine. Thanks for the tip.
Robert -
If you dare to use alcohol on your device, at least use isopropyl alcohol, not ethanol!!!
-
-
-
Erhitze den iOpener erneut und platziere ihn auf dem oberen Rand des iPads über der Frontkamera.
-
-
-
Schiebe das Opening Pick um die obere linke Ecke herum, damit der Klebstoff gelöst wird.
I broke the screen glass of my ipad just right when I moved the guitar pick towards the upperleft corner of the screen as depicted in your instructions. (Whereas my ipad screen was in perfect condition : no scratches, not broken at all...). There must be something wrong here. Be advised: move the pick towards the corner with caution !!!
-
-
-
-
Ziehe das Opening Pick entlang der oberen Kante bis kurz vor die Frontkamera und halte dann an.
-
-
-
Ziehe das Opening Pick leicht heraus und schiebe die Spitze sehr vorsichtig am oberen Rand des iPads auf Höhe der Frontkamera entlang.
At this point I’d use paper tape on the margins of the screen to mask off areas where you should use caution with the pick. Its just a visual reminder not to run the picker too deep in these areas. They are: the camera lens, lower right hand side and where the two antenna are along the base. Step 6 third image highlights these areas.
-
-
-
Lass das Opening Pick gleich hinter der Frontkamera stecken.
-
Nimm ein zweites Opening Pick und setze vor der Frontkamera erneut an. Nun schiebe das Opening Pick in die linke Ecke, um den Klebstoff an diesem Rand vollends zu lösen.
-
-
-
Nun kannst du das erste Opening Pick wieder tiefer hineinschieben und von der Kamera weg bis in die Ecke ziehen.
-
-
-
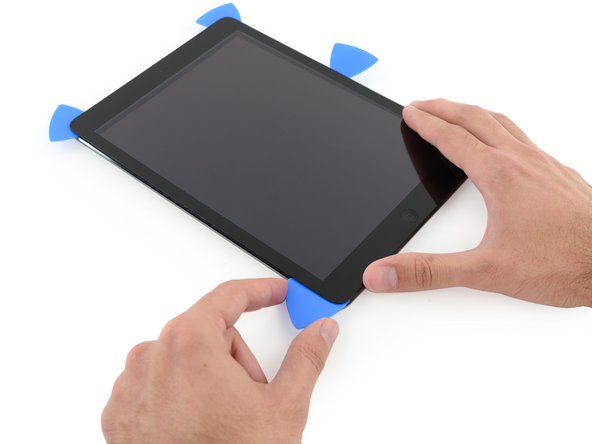
Behalte die drei Opening Picks in den Seiten des iPads an denen der Kleber schon gelöst wurde, sodass dieser sich nicht erneut verklebt.
-
Erhitze den iOpener und platziere ihn auf der letzten unbearbeiteten Seite.
-
-
-
Schiebe den Opening Pick in die obere rechte Ecke des iPads, um den Kleber dort vorsichtig zu lösen.
-
-
-
Führe einen neuen Opening Pick in das iPad ein und schiebe ihn in die Mitte der rechten Kante des iPads, um den Kleber der Kante entlang zu lösen.
Why there’s such an obsession with not damaging the cables is beyond me. Be careful, so as not to damage what the cables are connected to. But the cables are part of the replacement digitizer, so if you nick or even slice through them (like I did with the one closest to the bottom) don’t worry about it.
Keep in mind that some people are here to open an intact display to replace internal components! In those cases, keeping the cables un-harmed is quite important ;)
My digitizer WAS ok and I was only replacing the battery I wasn't careful enough when coming around the side with the pics and got a hold of the cable just enough with the pic to pull it off the underside of the panel. The battery replacement went great other than now I have to replace the digitizer. :(
BE CAREFUL WITH THIS STEP!!!
I also damaaged the digitizer cable while doing a battery replacement. Use just the tip of the opening pick.
People need to realize iFixit routinely duplicates instructions for more than one type of repair/replacement. However, all of the comments are combined, which leads to confusion.
-
-
-
Lasse die Opening Picks an Ort und Stelle und lege den erneut aufgewärmten iOpener auf die Seite des iPads mit dem Home Button.
-
-
-
Schiebe den unteren linken Opening Pick in die untere linke Ecke, um den Kleber auf dieser Ecke zu trennen.
-
Lasse den Opening Pick in der Ecke. Gehe damit kein Stück weiter und entferne nicht den Opening Pick aus dem iPad.
-
Die folgenden Schritte führen dich so, dass du Schäden an den Komponenten vermeiden wirst. Verwende Hitze und Hebelwirkung nur da, wo es von dir in der Anleitung verlangt wird.
-
-
-
Schneide mit einem neuen Opening Pick vorsichtig über die linke Antenne, stoppe kurz vor dem Home Button.
-
Lasse den Opening Pick an Ort und Stelle und springe zum nächsten Schritt.
-
-
-
Nimm ein neues Plektrum und schiebe es an die Stelle des vorherigen Plektrums.
-
Fahre am Home Button und der rechten Antenne nur mit der äussersten Spitze des Plektrums entlang, um den Kleber zu entfernen.
-
-
-
Wenn der Kleber gelöst ist, kannst du das Plektrum in der Nähe der rechten Ecke einsetzen. Schiebe das Plektrum nach links und halte kurz vor dem Home Button an.
This step needs a BIG CAVEAT to not insert the pick far enough to damage the home button/touch ID cable, as it is DIRECTLY above where you’re directing people to insert the pick. I just ruined a ribbon cable by following this guide too closely.
I also damaged the home button cable. Check the placement of the cables in steps 37-44.
-
-
-
Erhitze den iOpener und lege ihn auf die Seite der Lautstärketasten des iPads.
-
-
-
Auf der den Lautstärketasten gegenüberliegenden Seite solltest du ein Plektrum in jede Ecke eingesteckt haben. Drehe die Plektren um die Scheibe leicht an zu heben - so löst du auch den letzten Kleber entlang der Kante mit dem Displaykabel.
You will end up having to scrape the outter ledge to remove the old screen. I bled and got glass shards everywhere. Good luck!
-
-
-
Hebe langsam und vorsichtig das Display an, um den Kleber entlang der Kante mit dem Displaykabel zu lösen.
This is very tricky if the screen is cracked (which I would assume most people are replacing the screen because of a crack). Use duct tape to try and secure the shards as much as possible, but be prepared for shards flying everywhere. Search for videos on cracked screen removal, there’s a good ifixit one. Maybe they can link it here? I finally was able to get it all by using a heat gun and metal spudger/razor like the guy in the video.
-
-
-
Während du das Front Panel Glas hebst, nutze ein Plektrum, um auch den letzten Kleber zu lösen.
Detailed pictures that better indicate the difference between the remaining adhesive and the two mylar cables (the very cables you are trying to avoid damaging!) would be much appreciated. On my unit the two were VERY hard to distinguish.
The front camera has a black bezel cover but it is attached to the broken glass digitizer. Peel it off and save it. I plan to tack glue it to the camera instead of gluing it back to the new digitizer glass. It has two alignment bumps so maybe it doesn’t need gluing to either side but I found it on the ground when it came off of the the broken digitizer. I almost tossed it as part of the broken glass.
-
-
-
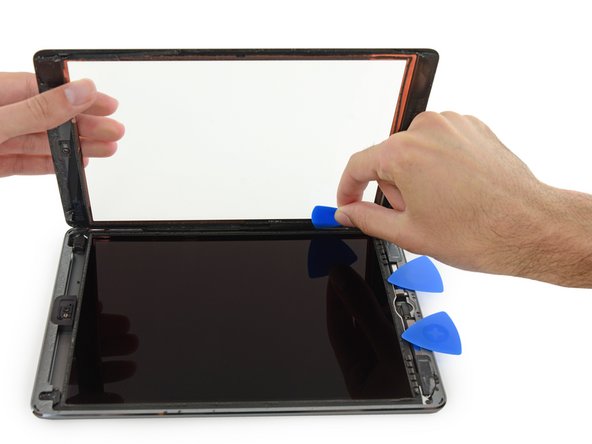
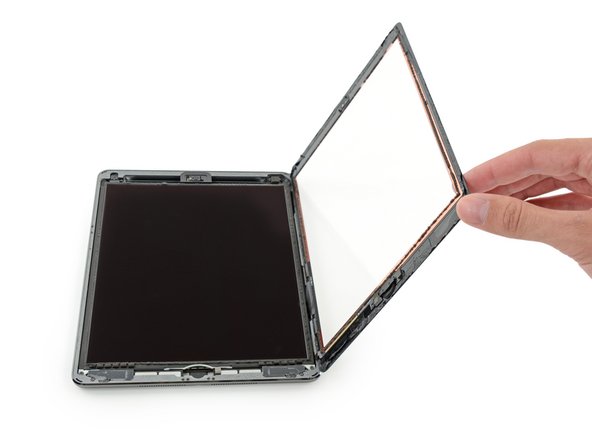
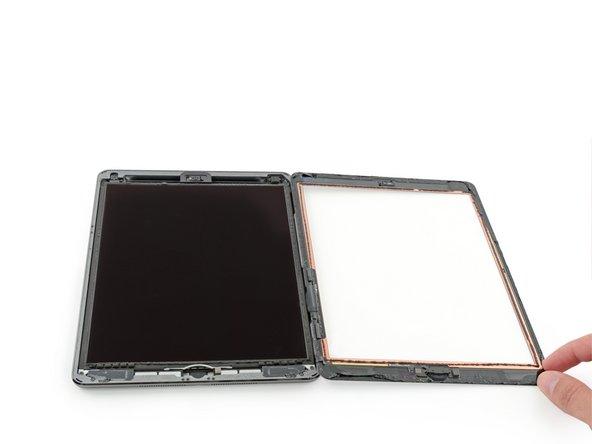
Wenn erst einmal jeglicher Kleber entfernt bzw. gelöst wurde, kannst du die Frontglasscheibe wie eine Buchseite öffnen und auf die Arbeitsfläche ablegen.
It looks like I have the same or similar question: the “hinge” part of the digitizer cables (the flap portion) looks like it is supposed to tuck into the crevice between the LCD panel and the side of the aluminum body - my replacement (from iFixit) has sticky contact on the upper side of this flap, making me think that its supposed to adhere to the side of the LCD panel, but the instructions do not make this clear - is my assumption correct?
Or, does the flap adhere to the underside of the front panel’s right edge?
I tried to put it ‘inside’ the case but was not able to - at the end, I just glued it against the front glass.
I must have done something wrong with the new home-button assembly as the fingerprint sensor does not work anymore - However, I am not going to go through that repair again so passcode it is.
My screen from ifixit had the rigid flaps with adhesive also. I removed adhesive and adhered it to the new glass, it worked fine and solved the problem with the flaps not pushing down.
if there is adhesive glue on the inside of the digitizer and the top of the LCD what do you recommend to clean it.
Isopropyl alcohol (and certainly not ethanol!!!)
Don’t throw away your old screen until you take the home button off of it! My screen was shattered and I kind of have a phobia of broken glass, so I bundled it all up and threw it into the trash can immediately. Next day when I went to continue the job I was sad that my roommate had finally taken out the trash for once and my home button was halfway to the dump by then.
Cleaning with isopropyl alcohol is not really working well. I am using it with a qtip. Is there a certain way you recommend in order to actually the adhesive off?
Yes, the flap seemed to want to be attached to the glass, not go down the slot. All went together well, except that my home button doesn’t work. I suspect the connections wasn’t right, although I did my best to (gently but firmly) push it in. Too late to do anything about it now.
I got my repair kit yesterday, had a go at it today on my iPad Air 1 (A1474). I’ve opened up phones before (the kind that open up easily), but first time dealing with a glued-together device. Anyway I got there, and now I’m putting things back together. I have a question regarding the pre-cut adhesive to hold the glass back on. Is it meant to be applied to the glass, or the frame?
Ok never mind - I just looked at the digitizer for this iPad and saw that the adhesive is preapplied to the glass, which confirms my suspicions. Now I can proceed and bring this repair to a conclusion.
SHL -
And it’s done! Doing the battery calibration now, but I’m relieved that the battery is working. I did turn on the iPad prior to removing the blue strips on the adhesive to make sure it was working before committing to fix the glass in place.
To reiterate the point, the adhesive strips go on the glass. The way they are packaged with the clear plastic makes it go very smoothly.
There are 2 oversize pieces of plastic sandwiching the adhesive sections. These keep the strips in their original shape free of dust off until you are ready to use them. Once you remove these, there is another clear plastic strip which has an inside edge that matches the adhesive section’s inside edge. This plastic allows you to position the adhesive accurately on the glass while keeping your fingers away from it. This is especially important on the right side where the digitizer cables are. Once you remove this clear plastic, there is still the blue film with pull tabs. You can leave these on to do a power up test, then remove them. …cont
SHL -
… After doing the power on check, you can also check that all the buttons work, home button, camera, speakers etc. Then I turned it off (probably wasn’t necessary), removed the blue strips and pressed the glass in. For this last step I suggest lining up the left edge of the glass with its corresponding edge in the aluminum shell, and then gently pressing down on the right side. ALSO: while doing this last step, look carefully at the right side for the ribbon cables there. In my case (reusing original digitizer), they were protruding just a smidge, so I used the spudger to just nudge it a bit and they got into place, and then I pressed the right side down. I then pressed down all around the edges of the glass.
SHL -
quick question... if this is a replacement, why are we worrying about the digitizer cables? My glass is shattered pretty bad on the to the left of the home button where he says to work. So I can't apply suction cup there. I don't understand the need to be concerned about the cables if the digitizer is going to be trashed...
-
-
-
Entferne die folgenden Kreuzschlitzschrauben, die das LCD befestigen:
-
Drei 4,0 mm Schrauben
-
Eine 4,8 mm Schraube
-
-
-
Benutze das flache Ende eines Spudgers um das LCD aus seinem Bett zu lösen. Hebe grade soweit an, bis du es mit den Fingern greifen kannst.
-
Klappe das LCD um wie die Seite eines Buches, hebe es in der Nähe der Kamera an und Klappe es in Richtung des Home Buttons auf die Rückseite.
-
Lege das LCD auf seine Vorderseite, um an die LCD-Kabel heranzukommen.
-
-
-
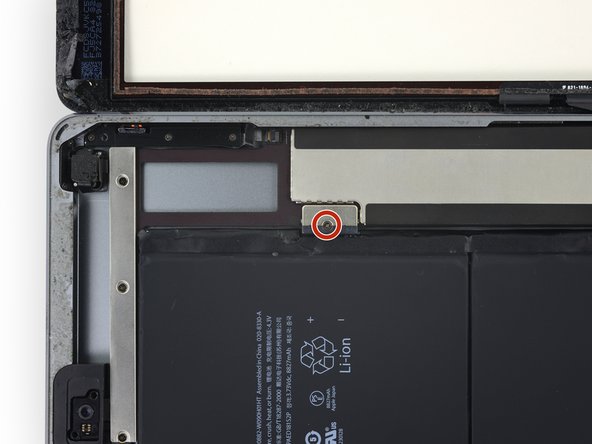
Entferne die einzelne 2,3 mm Kreuzschlitzschraube , mit der der Akkustecker am Logic Board befestigt ist.
-
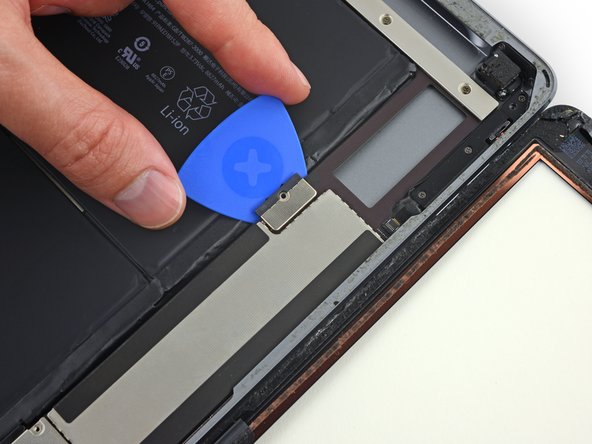
Schiebe ein Akkutrennstück unter den Bereich mit dem Akkustecker auf dem Logic Board, und lasse es dort während du arbeitest.
-
Wenn es schwer fällt, das Akkutrennstück unter das Logic Board einzusetzen, dann probiere, den Akku mit einer Spielkarte abzutrennen.
-
-
-
Entferne die drei 1,4 mm Kreuzschlitzschrauben von der Halterung des Displaykabels.
-
-
-
Mit dem flachen Ende eines Spudgers kannst du ganz vorsichtig die Halterung des Displaykabels senkrecht aus der Hauptplatine heben.
-
-
-
Entferne vorsichtig das Klebeband, welches den Anschluss des Home Buttons schützt.
-
-
-
Nutze die flache Seite des Spudgers, um die Abdeckung des ZIF-Anschlusses zu öffnen.
-
Entferne jetzt das Kabel aus dem Anschluss, indem du vorsichtig und gleichmäßig in horizontaler Richtung daran ziehst.
-
-
-
Nutze die flache Seite des Spudgers (oder einen Fingernagel), um die beiden Digitizer-Kabel vom Logic Board zu lösen.
-
-
-
Löse vorsichtig das Home Button Kabel aus der Verklebung, die es am Gehäuse fixiert.
-
-
-
Entferne nun das Frontglas.
-
Wenn du Probleme mit dem neuen Touchscreen des iPads durch Phantomauslöser hast, kannst du an den markierten Stellen auf der Rückseite sehr dünnes Isolierklebeband befestigen, so wie z.B. unser Kaptonband (Polyimidband). Ersatzteile von iFixit sind schon mit geeigneter Isolierung versehen, bei ihnen sollte das nicht nötig sein.
-
-
-
Schiebe einen Spudger unter das Antennenkabel nahe dem Rand des iPad und hebe es hoch, um den Verbinder des Antennenkabels zu lösen.
Skip to the step 98 or even 100 if you just need to replace the power button - I think you should even consider this to replace volume buttons. I am fixing mine right now and screwed up the speaker cable. I did follow the instruction but totally missed the cable right below the tape. I proceeded further, but I just realized I didn't have to go through all the troubles. I wish ifixit.com can manage this type of direction clearly so that dis-assembly is minimum.
After you replace the Digitizer if you are getting random key presses it is likely to be because Kapton tape has not been applied to the edges of the digitizer. You need to cover the silver strip around the edge of the digitizer with kapton tape before reassembling. Works every time.
This is my first ipad and when the battery dies, it will be my last, way overrated and no options like memory cards or mini usb ports, and the battery thing is ridiculous,I wish I would have never bought this knowing this stuff , and way over priced.
It always helps to Google something before buying it. "iPad Air reviews" in Google would have saved you. I just find it funny how in this day and age, people STILL make "purchase mistakes" because they didn't take the time to research the several-hundred-dollar device they are about to commit to purchasing. You should have seen the amounts of research I did before buying my $1,399 Asus G751JY laptop. I'm absolutely pleased with it and am happy I don't deal with issues other people have. Just be weary, buddy. ALWAYS GOOGLE.
Scott S -
If you just want to replace the battery, skip to step 99. You can easily get to most sides of the battery without removing all other components. It worked for me. Good luck!
I wish I read this comment. Would have saved me a lot of time.
leo -
I followed your piece of advice and went to step 99. My new battery works just fine without removing all those components including the logic board - thanks a lot!!
An important note - as per the comments lower down, you can skip ahead to step 95 (unsticking the battery) just fine if you're just changing the battery, but after you've unstuck the battery you will need to go back to step 88 and soften the logic board adhesive so you can pry it up about a cm and lift the battery terminal up and over the post to remove it. I didn't realise the post was there, and broke off a piece of the original battery terminal that got stuck under the logic board. This prevented a good connection with the new battery, and caused random restarts after I put everything back together until I realised and went back to recover it.
Don’t skip to 99 because you need to remove the logic board.
I have successfully replaced the Battery without removing any components other than the Screen Assembly and LCD. You can skip steps 44 thru 99 by using a spudger as a wedge to lift & hold the Logic Board high enough to lift the battery contact over the post that holds it in place… this will save you a lot of time and frustration and makes the repair sooo much easier.
My goal was to replace the battery. As some suggested I skipped some steps. I did Step 46 and left out 47 to 100. But I think Step 46 can be skipped too. iFixit probably does not recommend skipping these steps because it is riskier to bend the batteries and damage them. But if you work carefully enough and make sure the adhesive has been softened well, you should be fine. It was no problem for me. It saved me quite some time. (I will write a comment in Step 102 to help you get the batteries out without Steps 46-100.)
-
-
-
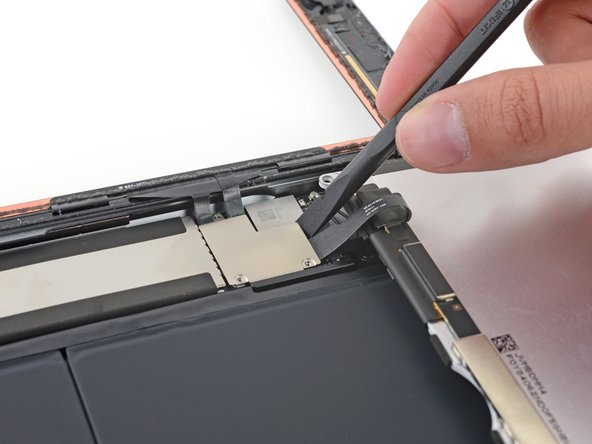
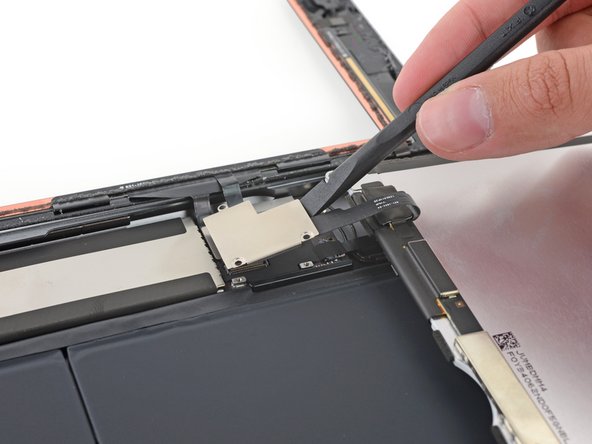
Zwei große Stücke Klebeband sind um das rechte Antennenkabel gewickelt und befestigen es am Gehäuse.
-
Löse das Klebeband vom Gehäuse.
You may partially skip steps 46 to 100, as it is not really mandatory to remove all those parts in order to remove the logic board and the battery.
-
-
-
Setze sorgfältig ein Plektrum zwischen Lautsprechergehäuse und der Klammer am Antennenkabel.
-
Schiebe das Plektrum in Richtung Home Button, um die Klebeverbindung zu trennen.
-
Schiebe die Klammer weg vom Lautsprecher, bis sie das Band darunter freigibt.
The pick was not thin enough but the razor worked.
In my view there is a few destructive steps here. I have been able to remove this entire assembly by lifting only the adhesive tape anchoring it to the back without touching this fine metal bracket as touched in in Step 46 & 63 or tearing the foam in Steps 48 & 65 on both the left & right sides. Remove the screws as in Step 47 & 57 and the one’s either side of the charging port in 64 & 71. Once removed, the only thing securing these to the rear is adhesive tape. Lift the tape and walk the units out by nudging them from side to side.
Thanks. Made the whole next chunk much simpler :)
-
-
-
Entferne die drei Kreuzschlitzschrauben PH000, die die rechte Antenne befestigen:
-
Eine 2,3 mm Schraube
-
Zwei 1,4 mm Schrauben
I would strongly advise not to follow this step and following ones: removing the 2 Wi-Fi antennas is not required for complete disassembly of the motherboard and battery, and you may potentially destroy your antennas: I scrupulously and foolishly followed this tutorial step by step and now I have severe Wi-Fi problems on my iPad because one of the 2 antennas has been damaged during the process (and by reading all the comments on this page you'll see that I'm not the only one to have this issue...).
=> As someone else already mentioned it in the comments, just skip most of these steps and go directly to something like step 79.
-
-
-
Setze das flache Ende eines Spudgers zwischen Antenne und Lautsprechereinheit.
-
Schiebe den Spudger in Richtung Home Button, um den geklebten Schaumstoff, der die Antenne festhält, zu trennen.
Este paso es innecesario, ya que con solo quitar los tornillos es suficiente, no hace falta despegar la goma espuma que mantiene la antena de la bocina.
tout a fais il n'est pas nécessaire de décoller l'antenne du haut-parleur ! Il faut juste enlever les vis et continuer le démontage du haut-parleur en laissent l'antenne fixer a lui !!!
Faire de même pour le deuxième haut-parleur !
-
Um dein Gerät wieder zusammenzusetzen, folge den Schritten in umgekehrter Reihenfolge.
Um dein Gerät wieder zusammenzusetzen, folge den Schritten in umgekehrter Reihenfolge.
Rückgängig: Ich habe diese Anleitung nicht absolviert.
6 weitere Nutzer:innen haben diese Anleitung absolviert.
Besonderer Dank geht an diese Übersetzer:innen:
100%
Diese Übersetzer:innen helfen uns, die Welt zu reparieren! Wie kann ich mithelfen?
Hier starten ›


