Diese Version enthält möglicherweise inkorrekte Änderungen. Wechsle zur letzten geprüften Version.
Was du brauchst
-
-
Wenn dein Displayglas Risse aufweist, dann musst du die Bruchstellen sichern und Verletzungen verhindern, indem du ein Klebeband auf die Glasscheibe klebst.
-
Lege überlappende Streifen durchsichtigen Klebebands über das Display des iPad, bis die ganze Scheibe bedeckt ist.
-
Tu dein Bestes, den Anweisungen genau zu folgen. Wenn das Glas jedoch zerbrochen ist, wird es wahrscheinlich weiter brechen, während du daran arbeitest. Du musst möglicherweise einen Metallspatel und eine Pinzette verwenden, um Glassplitter herauszuziehen.
-
-
-
Das Display wird von 14 Metallklammern am Gehäuse gehalten. Achte darauf, dass du mit dem Spatel um diese Klammern herum arbeitest und ihn nicht durch sie hindurch schiebst.
-
-
-
Setze einen Metallspatel zwischen die Oberkante der Display-Einheit und die Rückwandbaugruppe ein.
-
Drehe den Spatel von dir weg, um die Laschen entlang der oberen Kante des Bildschirms zu lösen.
-
Setze einen zweiten Metallspatel zwischen die Oberkante der Displaybaugruppe und die Rückwandbaugruppe ein, damit die Laschen nicht wieder einrasten.
-
-
-
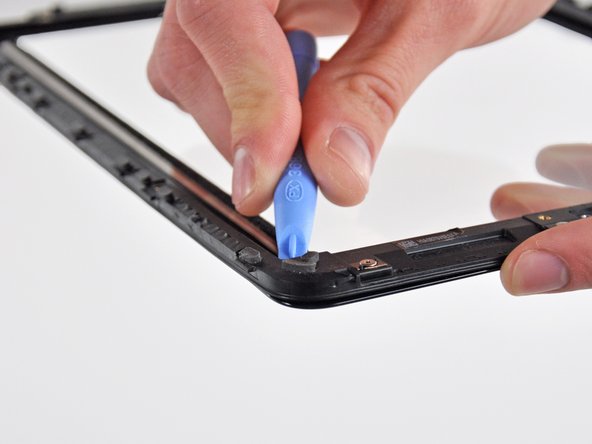
Arbeite dich mit einem Spudger an der rechten Kante des iPads entlang.
-
Die Frontplatte wird durch Metallklammern oben, unten und links am Aluminiumrücken gehalten. Die rechte Seite hat Plastiklaschen, die in Aussparungen in der Rückplatte gleiten.
-
Sobald die Clips gelöst sind, hebe die linke Seite der Frontplatte nach oben und schiebe sie nach links, um die Laschen von der Aluminium-Rückplatte zu entfernen.
-
-
-
In den folgenden Schritten trennst du die drei Kabel, mit denen die Display-Einheit am Logic Board befestigt ist. Die Kabel sind für folgende Komponenten vorgesehen:
-
Touchscreen
-
Umgebungslichtsensor
-
Display Datenkabel
-
-
-
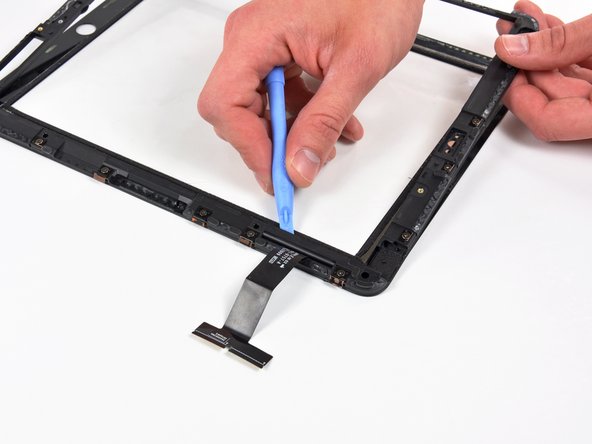
Verwende die Kante eines Kunststofföffnungswerkzeugs, um die Halteklappen, die die Touchscreenkabel in ihren Buchsen auf dem Logic Board halten, hochzuklappen.
-
Ziehe die Touchscreen Flachbandkabel gerade aus den Sockeln heraus.
-
-
-
Verwende ein Kunststofföffnungswerkzeug, um den Verbinder des Umgebungslichtsensors aus seinem Sockel zu entfernen, indem du ihn vorsichtig nach oben hebelst.
-
-
-
Löse das Display-Datenkabel von der Hauptplatine, indem du die Metallsicherung an der schwarzen Plastikzuglasche hochklappst.
-
Ziehe den Verbinder aus dem Sockel.
-
-
-
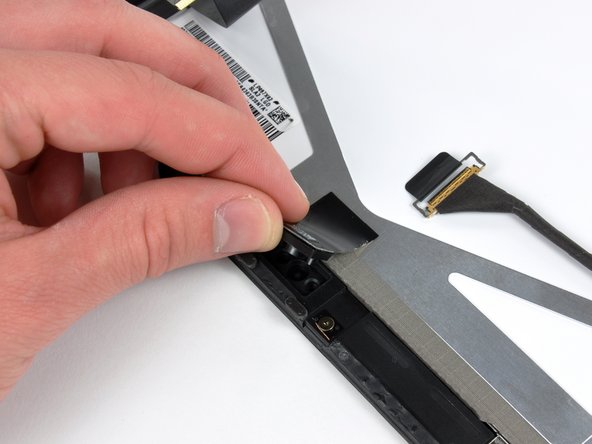
Löse die Klebeverbindung der Umgebungslichtsensoreinheit am Displayrahmen vorsichtig mit der Kante eines Plastiköffnungswerkzeugs ab.
-
Wenn du sie ausreichend gelöst hast, kannst du sie ganz vom LCD entfernen.
-
-
-
-
Drücke das Touchscreen Kabel nach unten und ziehe sorgfältig das Stück Klebeband, welches das Touchscreen Kabel am Displayrahmen befestigt, ab.
-
-
-
Entferne die drei Torx T5 Schrauben, die die Klammern und LCD Halterungen, welche mit Abschirmband bedeckt sind, in der Nähe des Home Schalters befestigen
-
Ziehe sorgfältig die Displayklammer und das daran befestigte Klebeband vom schwarzen Plastikrahmen des Displays ab.
-
-
-
Entferne die restlichen T5 Schrauben, die das LCD am schwarzen Displayrahmen aus Plastik befestigen.
-
-
-
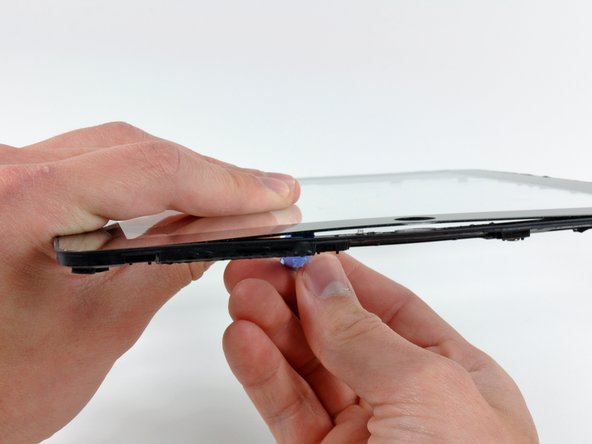
Setze ein Plastiköffnungswerkzeug unter eine der Ausbuchtungen am metallenen LCD Rahmen.
-
Verdrehe das Werkzeug vorsichtig, um das LCD aus der Klebeverbindung zur Frontscheibe zu lösen.
-
-
-
Wiederhole diesen Schritt für alle drei Seiten gegenüber der Seite des Displays mit dem Touchscreen Kabel, um das Display hochzuheben.
-
-
-
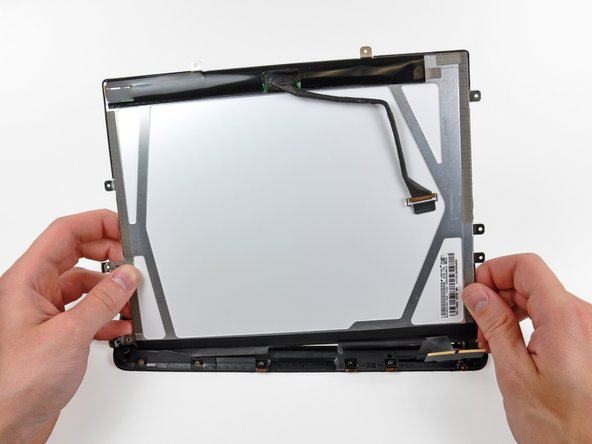
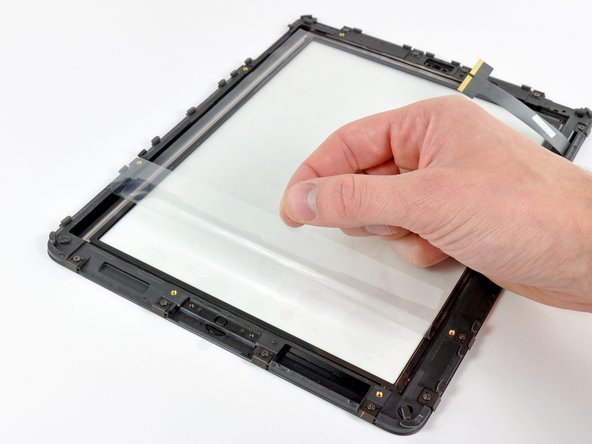
Hebe das LCD an der freien Seite hoch und entferne es aus dem Displayrahmen.
-
Ziehe sorgfältig das Klebeband ab, welches das LCD an der langen Seite am Displayrahmen befestigt, entferne dann das LCD.
-
-
-
Wenn es dann immer noch am Front Panel festhängt, musst du den Streifen Abschirmband in der Nähe des Sockels des Umgebungslichtsensors entfernen.
-
-
-
Wenn sie noch in gutem Zustand sind, kannst du die Klammern samt Abschirmband unten am LCD auf das neue LCD übertragen.
-
-
Dieser Schritt ist noch nicht übersetzt. Hilf mit, ihn zu übersetzen!
-
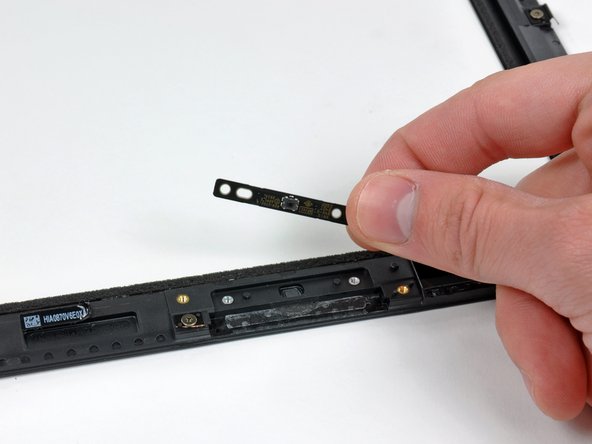
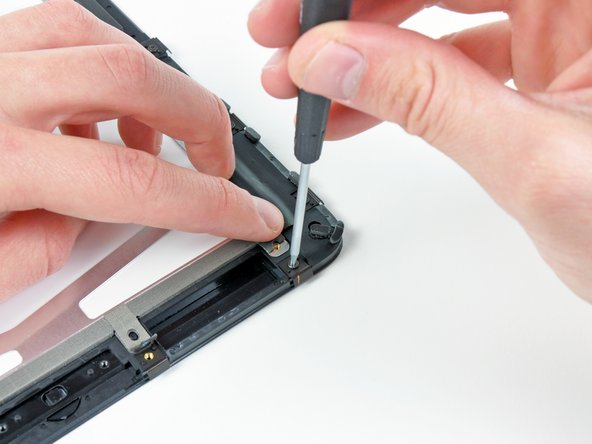
Remove the two T5 Torx screws securing the home button switch to the plastic display frame.
-
Remove the home button switch board from the front panel assembly.
-
-
Dieser Schritt ist noch nicht übersetzt. Hilf mit, ihn zu übersetzen!
-
If you are reusing your LCD, use the edge of a plastic opening tool to lift up a corner of the foam tape attached to the LCD.
-
Remove the tape from the perimeter of the glass face of the LCD.
-
-
Dieser Schritt ist noch nicht übersetzt. Hilf mit, ihn zu übersetzen!
-
Remove the piece of yellow tape securing the digitizer cable to the inner face of the front panel assembly, being careful not to rip the cable in the process.
-
Peel the protective sheeting off the inner face of the front panel assembly.
-
-
Dieser Schritt ist noch nicht übersetzt. Hilf mit, ihn zu übersetzen!
-
Stick the tape down along the long edge of the LCD to the frame of the front panel assembly.
-
Carefully lower the LCD down into its recess in the front panel frame, being sure it is properly positioned.
-
-
Dieser Schritt ist noch nicht übersetzt. Hilf mit, ihn zu übersetzen!
-
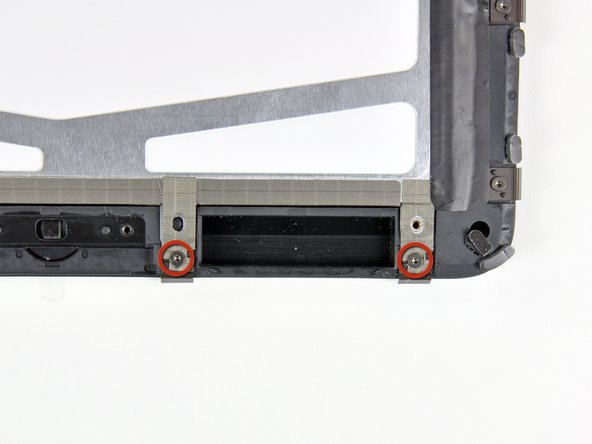
Hold back the strips of EMI tape along the lower edge of the LCD as you remove the two T5 Torx screws securing the retaining clips shown.
-
Stick the tape down against the new clips and reinstall the two T5 Torx screws.
-
-
Dieser Schritt ist noch nicht übersetzt. Hilf mit, ihn zu übersetzen!
-
Use a heat gun to gently heat the plastic display frame near the home button from the inner side of the front glass panel.
-
-
Dieser Schritt ist noch nicht übersetzt. Hilf mit, ihn zu übersetzen!
-
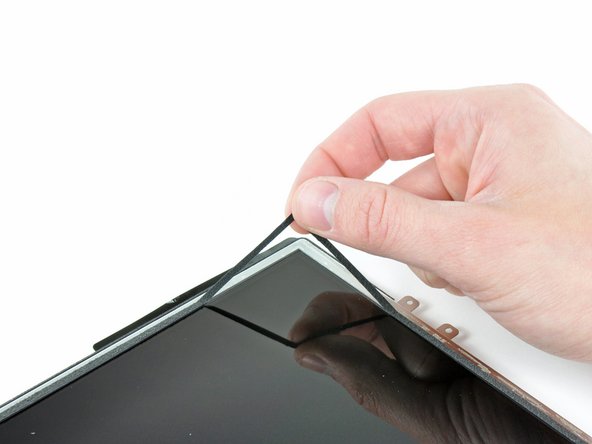
When the adhesive has been adequately heated, use the edge of a plastic opening tool to gently pry the plastic display frame away from the front glass panel.
-
Run your tool under the plastic display frame to separate it from the front glass near the home button area.
-
-
Dieser Schritt ist noch nicht übersetzt. Hilf mit, ihn zu übersetzen!
-
Heat the lower right corner (as viewed from the front of the iPad) of the plastic display frame to soften the adhesive securing it to the front glass panel.
-
Use your plastic opening tool to continue to pry the plastic frame away from the front glass panel, being careful not to damage the rubber strip around the glass panel's perimeter.
-
-
Dieser Schritt ist noch nicht übersetzt. Hilf mit, ihn zu übersetzen!
-
Continue to heat and pry the plastic display bracket along the lower half of its right edge until it is freed from the front glass panel.
-
-
Dieser Schritt ist noch nicht übersetzt. Hilf mit, ihn zu übersetzen!
-
Lightly heat the rubber connection area. Use a plastic opening tool to separate the plastic display frame from the front glass panel enough to access the rubber area.
-
While holding the display frame away from the front glass, use a razor blade to carefully cut through the many rubber "dots" attaching the frame to the front panel.
-
-
Dieser Schritt ist noch nicht übersetzt. Hilf mit, ihn zu übersetzen!
-
Continue to heat and pry the top edge of the frame until it separates from the glass panel.
-
-
Dieser Schritt ist noch nicht übersetzt. Hilf mit, ihn zu übersetzen!
-
To separate the ribbon cable side of the display bracket, begin by heating near the lower left corner of the panel (as viewed from the front of the iPad).
-
Carefully separate the lower edge of the ribbon cable side of the frame until you reach another area where rubber connects the frame to the glass panel.
-
Repeat the process outlined in previous steps to cut through the rubber "dots" connecting the two pieces.
-
-
Dieser Schritt ist noch nicht übersetzt. Hilf mit, ihn zu übersetzen!
-
Use a heat gun to soften the adhesive next to both sides of the digitizer cable, being careful not to melt the cable.
-
Pry the final section of the plastic display frame away from the front glass.
-
-
Dieser Schritt ist noch nicht übersetzt. Hilf mit, ihn zu übersetzen!
-
Remove the display frame from the front glass, being careful not to rip the digitizer cable in the process.
-


Rückgängig: Ich habe diese Anleitung nicht absolviert.
36 weitere Nutzer:innen haben diese Anleitung absolviert.
