Diese Version enthält möglicherweise inkorrekte Änderungen. Wechsle zur letzten geprüften Version.
Was du brauchst
-
-
Falls das Displayglas gesprungen ist, halte die Bruchstücke zusammen und vermeide Verletzungen während des Reparaturvorgangs, indem du das Glas mit Tape zusammenhälst.
-
Lege sich überlappende Streifen von durchsichtigen Klebestreifen über das Display des iPhones, bis die gesamte Vorderseite bedeckt ist.
-
-
Dieser Schritt ist noch nicht übersetzt. Hilf mit, ihn zu übersetzen!
-
Remove the 2 Phillips #00 screws at the bottom of the iPhone, located on both sides of the dock connector.
-
-
Dieser Schritt ist noch nicht übersetzt. Hilf mit, ihn zu übersetzen!
-
Attach the small suction cup to the iPhone, above the home-button.
-
-
-
Dieser Schritt ist noch nicht übersetzt. Hilf mit, ihn zu übersetzen!
-
Use a spudger to disconnect ribbon cable(s) 1, 2, and 3.
-
Just a reminder. The 3rd cable is actually connected to the board by a port, which requires an inset connector.
-
-
Dieser Schritt ist noch nicht übersetzt. Hilf mit, ihn zu übersetzen!
-
After connectors 1, 2, and 3 are detached, you can lift the display assembly off completely, and set apart the case for the iPhone, you will only need the assembly for now.
-
-
Dieser Schritt ist noch nicht übersetzt. Hilf mit, ihn zu übersetzen!
-
It will be easy to locate the home-button assembly from here.
-
Make sure the cable that runs into the home button assembly is not damaged or loose. This cable is indicated in the image here with a rectangular marker.
-
-
Dieser Schritt ist noch nicht übersetzt. Hilf mit, ihn zu übersetzen!
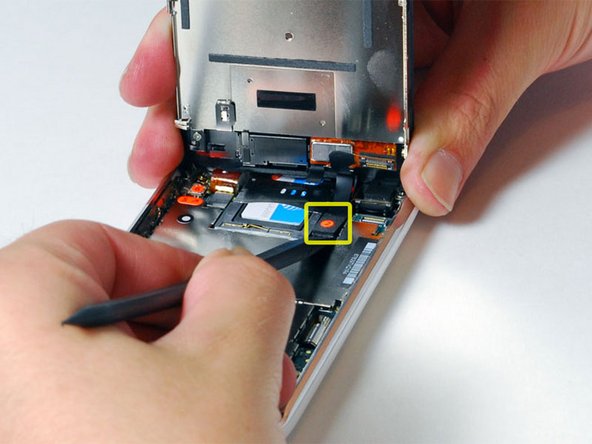
-
If this STILL doesn't work, check the pins on the cables connected to the home-button (marked with a red marker in second image.) Again, if any pins are broken, you might want to buy new cables, or a new home-button, because these pins are very fragile and hard to fix.
-
-
Dieser Schritt ist noch nicht übersetzt. Hilf mit, ihn zu übersetzen!
-
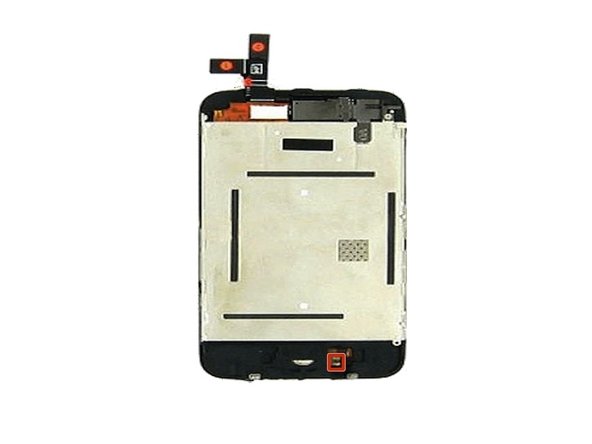
If any cables or pins are broken , you could buy new cables, as mentioned before. However, if the home-button screws are broken or missing, or the home-button is completely broken, you might want to buy a new home button assembly. This assembly is displayed on this step's adjoining image.
-


Rückgängig: Ich habe diese Anleitung nicht absolviert.
41 weitere Nutzer:innen haben diese Anleitung absolviert.

Team

5 Kommentare
Please add comments to help me figure out what to improve about my guide!
hmm, but how do i REALLY get the home button changed? sad.
So following your instructions I found that one of the "springs" on the home button assy was missing. I ordered a replacement assembly but I can't figure out how to replace that assembly. Do I need to take the whole display apart?
Any inputs would be greatly appreciated.
Cheers,
Hans
fix3g on my LG phone