Diese Übersetzung enthält möglicherweise noch nicht die neuesten Änderungen der Original-Anleitung. Hilf mit, die Übersetzung zu aktualisieren oder sieh dir die Original-Anleitung an.
Einleitung
为您的iPod Classic 更换新的硬盘来提升存储空间。
Was du brauchst
-
-
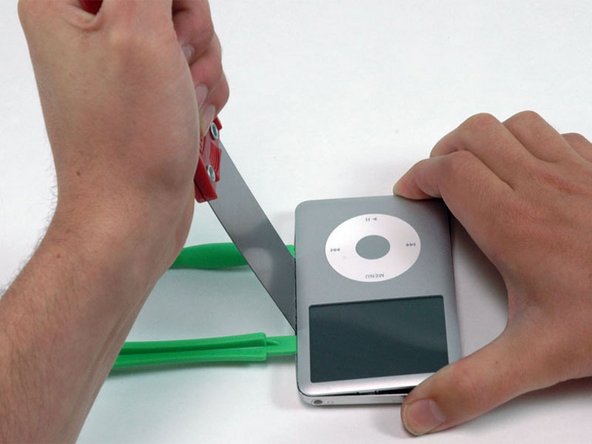
在一个角度上,请仔细地将一个油灰刀插入两个打开工具之间的缝中约1/8英寸。
-
一旦油灰刀已经清除了后面板的唇缘,就可以将油灰刀旋转,使其垂直,并小心(但牢固地)将其向下摆动到打开工具之间的间隙中。
-
-
-
-
在一个角度上,请仔细地将一个约1/8英寸的油灰刀插入两个打开工具之间的缝中。
-
一旦油灰刀已经清除了后面板的唇部,将油灰刀倾斜使其垂直,并且仔细(但牢固地)通过塑料打开工具之间的间隙将其向下摆动到iPod中。
-
用手指推在油灰刀后面的后面板上,以减少弯曲。 如此轻轻地弯曲油灰刀,以确保iPod的这一侧的大部分金属片脱开。
-
-
-
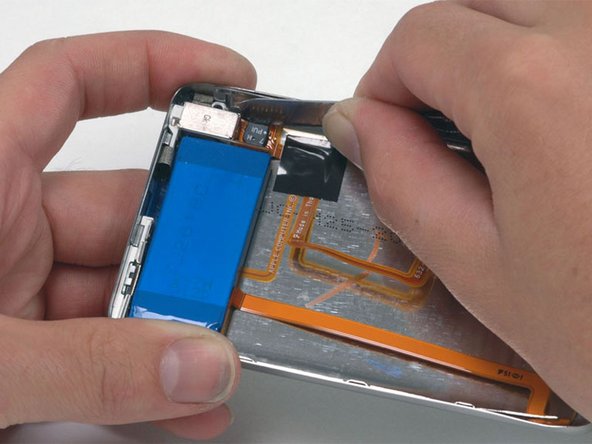
用一只手握住前面板组件,将另一只手握住后面板。
-
轻轻(轻轻)通过将前面板和后面板的顶部拉开彼此(将iPod的底部看作铰链),使后面板上的其余夹子脱开,注意不要损坏排线 将ipod两部分拿好。
-
-
-
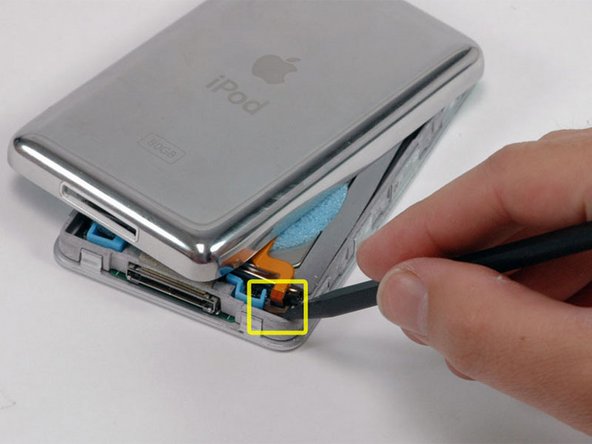
用一只手提起硬盘,以便您可接触到下面的耳机插孔排线。
-
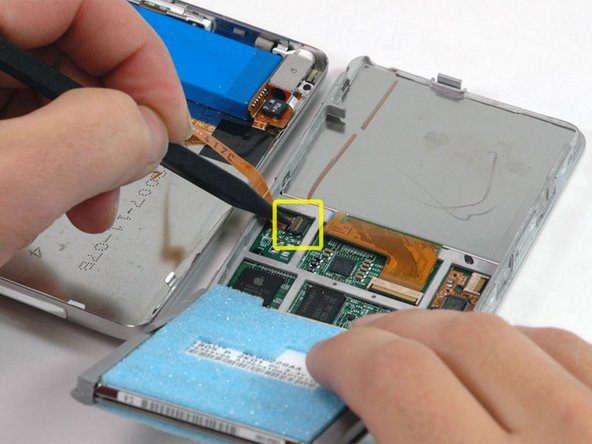
使用撬棒将固定耳机插孔色带的塑料卡舌向上翻转。 标签将旋转90度,释放带状电缆。
-
将橙色耳机插孔线缆从其连接器中滑出。
-
后面板正式可以从iPod上分离开来了。
-
-
-
现在修复由iPod Classic内部部件拆除所造成的损坏! 背壳体中的金属卡扣中的至少一个已经很可能向上弯曲。 这些夹子必须全部朝下,才能重新安装后面板。
-


在你把盖子盖回去之前,确认测试设备能否正常工作。要重新组装您的设备,请按照本指南的相反顺序进行操作。
在你把盖子盖回去之前,确认测试设备能否正常工作。要重新组装您的设备,请按照本指南的相反顺序进行操作。
Rückgängig: Ich habe diese Anleitung nicht absolviert.
324 weitere Nutzer:innen haben diese Anleitung absolviert.
Besonderer Dank geht an diese Übersetzer:innen:
96%


Diese Übersetzer:innen helfen uns, die Welt zu reparieren! Wie kann ich mithelfen?
Hier starten ›

48 Kommentare
The instructions worked like a charm. This is not for the faint of heart and requires some modicum of skill, but I saved a buttload of money by doing it myself. You will definitely need the recommended tools.
It worked like a charm... Just need to follow the instructions carefully and you can avoid to spend 200 something € to buy a new iPod!
Thanks iFixit
i couldn't get the plastic opening tool in between the 2 sections. i ended up using two razor blades instead of the plastic tools and the putty knife, i was able to replace the hard drive with very little struggle and almost no cosmetic damage(not that i care what the thing looks like)
Thanks for a highly useful guide. Slowly and methodically, using a single-bladed, razor blade, I was able to open the case, following this procedure. Patience is, indeed, a virtue, in this case.
I was able to successfully replace the hard drive and battery.
The only snag I encountered was that the headphone jack ribbon was glued to circuit board adjacent to the connector under the hard drive. (I just left this ribbon be, not wanting to risk damaging the ribbon.) It was a bit awkward straightening the case edges, but I managed.
Overall, I'd give this guide a grade of "A"....it was nearly perfect and very clear. Bravo!
Well I managed to get it apart, though it wasn't all that difficult with the right tools, but getting it back together has been a nightmare. Just saying "reverse the process" is reall not quite enough in this case. All the little pieces of shock padding keep falling off, it's almost impossible to get the two wires plugged back in as well as keeping them in place, but I got there in the end. Or so I thought . Now my ipod has no sound (except from dock output) - and on investigating I find I have severed the orange cable near the jack itself- either by bending it or catching it on something. So another part to buy. So it's a warning to be very careful.