Was du brauchst
-
-
Using a 4mm flat head screw driver, remove the screw holding the battery cover.
-
-
-
-
Lift battery out of the casing
-
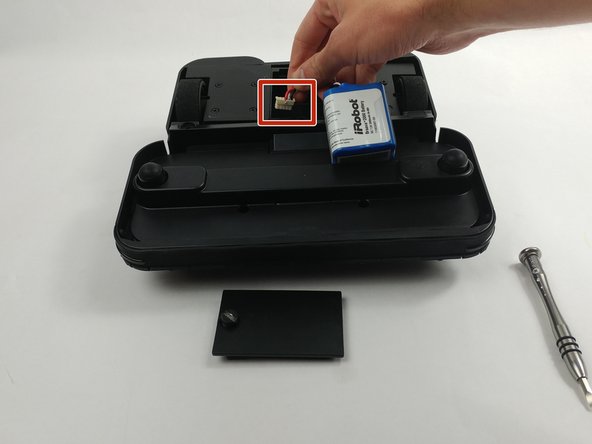
Gripping the cord close to the base, gently disconnect it by pulling straight up.
-


To reassemble your device, follow these instructions in reverse order.
To reassemble your device, follow these instructions in reverse order.
Rückgängig: Ich habe diese Anleitung nicht absolviert.
8 weitere Nutzer:innen haben diese Anleitung absolviert.
Team

USF Tampa, Team S7-G3, Cagle Spring 2017 Mitglied von USF Tampa, Team S7-G3, Cagle Spring 2017
USFT-CAGLE-S17S7G3
4 Mitglieder
2 Anleitungen geschrieben