Zum Hauptinhalt wechseln
Gemeinsam reparieren - Jetzt registrieren

iRobot Roomba 560 "Clean" Button Replacement

Was du brauchst

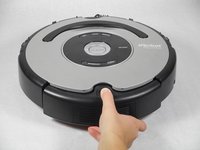
    1. iRobot Roomba 560 "Clean" Button Replacement, Clear Sensor Lens: Schritt 1, Bild 1 von 1
      • Rotate the Roomba so the bumper is in front of you.

      Frag FixBot

      Kommentar hinzufügen

    2. iRobot Roomba 560 "Clean" Button Replacement: Schritt 2, Bild 1 von 1
      • Using the Phillips #1 driver, remove the ten 10 mm screws on the bumper that run along the outer edge of the Roomba.

      Frag FixBot

      Kommentar hinzufügen

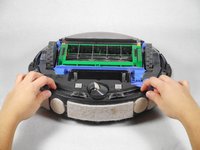
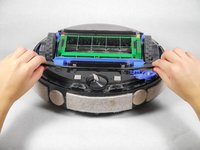
    3. iRobot Roomba 560 "Clean" Button Replacement: Schritt 3, Bild 1 von 2 iRobot Roomba 560 "Clean" Button Replacement: Schritt 3, Bild 2 von 2
      • Lift the thin top cover that holds the bumper in place.

      Frag FixBot

      Kommentar hinzufügen

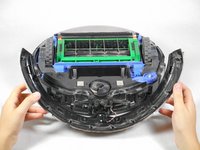
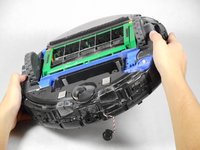
    4. iRobot Roomba 560 "Clean" Button Replacement: Schritt 4, Bild 1 von 1
      • Gently lift the device upwards from the bumper to detach these two pieces.

      • There are wires connecting the bumper to the device. Be careful while lifting the device off the bumper as to not damage these wires.

      Frag FixBot

      Kommentar hinzufügen

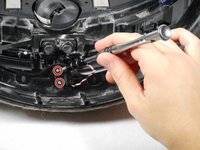
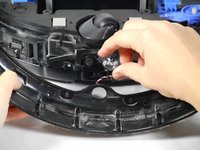
    5. iRobot Roomba 560 "Clean" Button Replacement: Schritt 5, Bild 1 von 2 iRobot Roomba 560 "Clean" Button Replacement: Schritt 5, Bild 2 von 2
      • Lift the bumper upwards for easier access.

      • Unscrew the two 5 mm screws that connect the red and white wires to the device using the Phillips #1 driver.

      • The sensor can be unplugged from the motherboard so the bumper isn't hanging off the Roomba.

      Frag FixBot

      Kommentar hinzufügen

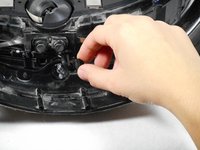
    6. iRobot Roomba 560 "Clean" Button Replacement: Schritt 6, Bild 1 von 2 iRobot Roomba 560 "Clean" Button Replacement: Schritt 6, Bild 2 von 2
      • Lift the circular black panel off the lens.

      • Lift the clear lens that is on the other side of the bumper and replace it with a new lens.

      Frag FixBot

      Kommentar hinzufügen

    1. iRobot Roomba 560 "Clean" Button Replacement, Top Panels: Schritt 7, Bild 1 von 2 iRobot Roomba 560 "Clean" Button Replacement, Top Panels: Schritt 7, Bild 2 von 2
      • Turn the device over so that it is face up with the vacuum bin in front of you .

      • Press the button of the vacuum bin and pull out the bin from the device.

      Frag FixBot

      Kommentar hinzufügen

    2. iRobot Roomba 560 "Clean" Button Replacement: Schritt 8, Bild 1 von 1
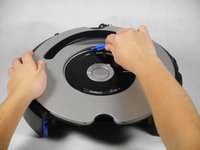
      • Use your hands to unhook the snaps between the silver panel from the black panel located where the vacuum bin was.

      Frag FixBot

      Kommentar hinzufügen

    3. iRobot Roomba 560 "Clean" Button Replacement: Schritt 9, Bild 1 von 3 iRobot Roomba 560 "Clean" Button Replacement: Schritt 9, Bild 2 von 3 iRobot Roomba 560 "Clean" Button Replacement: Schritt 9, Bild 3 von 3
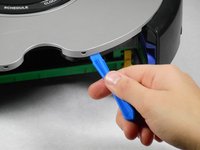
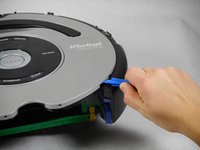
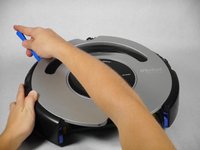
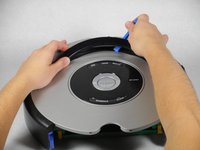
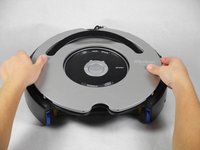
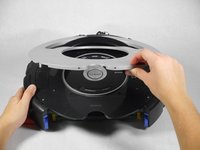
      • Using the plastic opening tool, go around the outer edges of the silver panel and unhook the snaps holding it in place.

      • When prying open the top panel from the inner casing, do so gently. Never "force" the top panel to snap off, or you could risk breaking pieces.

      Frag FixBot

      Kommentar hinzufügen

    4. iRobot Roomba 560 "Clean" Button Replacement: Schritt 10, Bild 1 von 2 iRobot Roomba 560 "Clean" Button Replacement: Schritt 10, Bild 2 von 2
      • Lift the black handle and use the plastic opening tool to unhook the snaps underneath it.

      • Use the same tool to pry the silver cover from the black central control board.

      Frag FixBot

      Kommentar hinzufügen

    5. iRobot Roomba 560 "Clean" Button Replacement: Schritt 11, Bild 1 von 3 iRobot Roomba 560 "Clean" Button Replacement: Schritt 11, Bild 2 von 3 iRobot Roomba 560 "Clean" Button Replacement: Schritt 11, Bild 3 von 3
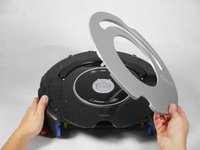
      • Lift the silver panel off of the black panel.

      Frag FixBot

      Kommentar hinzufügen

    6. iRobot Roomba 560 "Clean" Button Replacement: Schritt 12, Bild 1 von 1
      • Use a Phillips #2 screwdriver to remove the following screws:

      • Two 7.5 mm-long screws at either end of the semicircular handle

      • Ten 5 mm-long screws

      • Use a Phillips #1 screwdriver to remove the 5 mm-long screw at the bottom of the control board.

      Frag FixBot

      Kommentar hinzufügen

    7. iRobot Roomba 560 "Clean" Button Replacement: Schritt 13, Bild 1 von 1
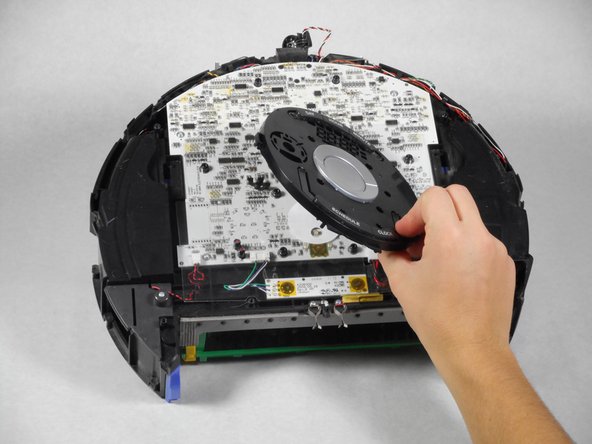
      • Lift the black panel off the device.

      • This will provide access to the motherboard and black circular control panel.

      Frag FixBot

      Kommentar hinzufügen

    1. iRobot Roomba 560 "Clean" Button Replacement, Side Sweeper: Schritt 14, Bild 1 von 1
      • Flip the Roomba upside down.

      • Unscrew the single 5 mm screw on the yellow side sweeper using the Phillips #2 driver.

      Frag FixBot

      Kommentar hinzufügen

    2. iRobot Roomba 560 "Clean" Button Replacement: Schritt 15, Bild 1 von 1
      • Lift the yellow side sweeper, removing it from the device.

      Frag FixBot

      Kommentar hinzufügen

    1. iRobot Roomba 560 "Clean" Button Replacement, Battery: Schritt 16, Bild 1 von 1
      • Using the Phillips #2 driver, remove the four 10 mm screws that hold the back panel in place.

      Frag FixBot

      Kommentar hinzufügen

    2. iRobot Roomba 560 "Clean" Button Replacement: Schritt 17, Bild 1 von 1
      • Lift up the back panel to remove it from the device.

      Frag FixBot

      Kommentar hinzufügen

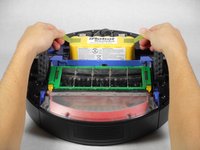
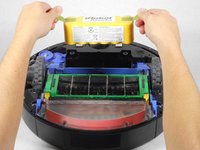
    3. iRobot Roomba 560 "Clean" Button Replacement: Schritt 18, Bild 1 von 2 iRobot Roomba 560 "Clean" Button Replacement: Schritt 18, Bild 2 von 2
      • Lift up the yellow battery by pulling up the green tabs on its side.

      • Handle the battery with care.

      Frag FixBot

      Kommentar hinzufügen

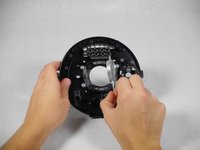
    1. iRobot Roomba 560 "Clean" Button Replacement, "Clean" Button: Schritt 19, Bild 1 von 3 iRobot Roomba 560 "Clean" Button Replacement, "Clean" Button: Schritt 19, Bild 2 von 3 iRobot Roomba 560 "Clean" Button Replacement, "Clean" Button: Schritt 19, Bild 3 von 3
      • Remove the outer silver circle, black plastic cover, and black film from the central control board in that order.

      • All of these elements are easy to remove and do not require a specialized tool.

      Frag FixBot

      Kommentar hinzufügen

    2. iRobot Roomba 560 "Clean" Button Replacement: Schritt 20, Bild 1 von 2 iRobot Roomba 560 "Clean" Button Replacement: Schritt 20, Bild 2 von 2
      • Using the Phillips #1 driver, unscrew the four 10 mm screws that surround the clean button.

      • Remove the top of the control board.

      Frag FixBot

      Kommentar hinzufügen

    3. iRobot Roomba 560 "Clean" Button Replacement: Schritt 21, Bild 1 von 2 iRobot Roomba 560 "Clean" Button Replacement: Schritt 21, Bild 2 von 2
      • Flip the control board over.

      • Using the Phillips #1 driver, unscrew the two bottommost 5 mm screws.

      • Lift off the button, and repair/replace the damaged plastic portion of the "clean" button.

      Frag FixBot

      Kommentar hinzufügen

Abschluss

To reassemble your device, follow these instructions in reverse order.

Rückgängig: Ich habe diese Anleitung nicht absolviert.

8 weitere Personen haben diese Anleitung absolviert.

Team

Cal Poly, Team 1-22, Maness Fall 2015 Mitglied von Cal Poly, Team 1-22, Maness Fall 2015

CPSU-MANESS-F15S1G22

4 Mitglieder

49 Anleitungen geschrieben

2 Kommentare zur Anleitung

This guide is also applicable to the 600 series

kjkj kjkjk - Antwort Teilen

Thanks! This guide is just what I need to fix the ‘CLEAN’ button on a Roomba 652 that doesn’t work even though the ‘SPOT’ and ‘DOCK’ buttons do. I figure there’s some plastic part of the button that’s physically snapped. The robot is charging up and running as it should otherwise.

Leslie Michel - Antwort Teilen

Kommentar hinzufügen

Seitenaufrufe:

Letzte 24 Stunden: 1

Letzte 7 Tage: 15

Letzte 30 Tage: 95

Insgesamt: 8,441