Zum Hauptinhalt wechseln

iRobot Roomba 880 Side Wheels Replacement

Was du brauchst

  1. iRobot Roomba 880 Side Wheels Replacement, Battery: Schritt 1, Bild 1 von 2 iRobot Roomba 880 Side Wheels Replacement, Battery: Schritt 1, Bild 2 von 2
    • Start with your Roomba upside down, with the wheels facing up.

    • Using a JIS driver in #1 size remove the two 15mm screws holding the battery cover in place.

  2. iRobot Roomba 880 Side Wheels Replacement: Schritt 2, Bild 1 von 1
    • Remove the battery cover and place it off to the side.

  3. iRobot Roomba 880 Side Wheels Replacement: Schritt 3, Bild 1 von 2 iRobot Roomba 880 Side Wheels Replacement: Schritt 3, Bild 2 von 2
    • Remove the battery using the green tabs on either side of the battery.

  4. iRobot Roomba 880 Side Wheels Replacement, Side Wheels: Schritt 4, Bild 1 von 3 iRobot Roomba 880 Side Wheels Replacement, Side Wheels: Schritt 4, Bild 2 von 3 iRobot Roomba 880 Side Wheels Replacement, Side Wheels: Schritt 4, Bild 3 von 3
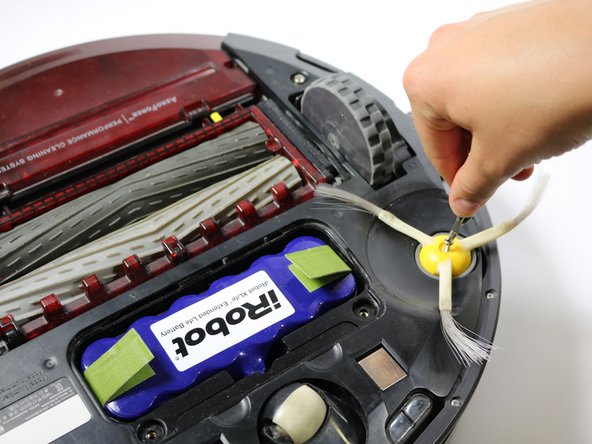
    • Loosen the side brush screw with a screwdriver.

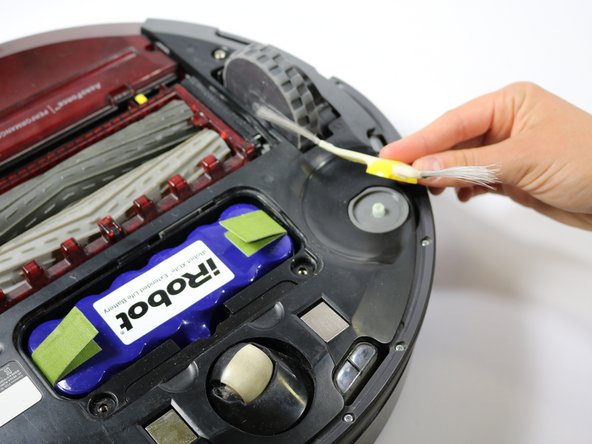
    • Remove the side brush

  5. iRobot Roomba 880 Side Wheels Replacement: Schritt 5, Bild 1 von 3 iRobot Roomba 880 Side Wheels Replacement: Schritt 5, Bild 2 von 3 iRobot Roomba 880 Side Wheels Replacement: Schritt 5, Bild 3 von 3
    • Loosen the single screws that retains the side wheel to the Roomba.

    • Remove cover over the wheel that was held in place by the screws.

    • Remove the wheel module.

Abschluss

To reassemble your device, follow these instructions in reverse order.

3 weitere Nutzer:innen haben diese Anleitung absolviert.

Team

Cal Poly, Team S17-G4, Banghart Spring 2017 Mitglied von Cal Poly, Team S17-G4, Banghart Spring 2017

CPSU-BANGHART-S17S17G4

5 Mitglieder

5 Anleitungen geschrieben

Ein Kommentar

Kommentar hinzufügen

Seitenaufrufe:

Letzte 24 Stunden: 0

Letzte 7 Tage: 4

Letzte 30 Tage: 20

Insgesamt: 14,020