Zum Hauptinhalt wechseln

iRobot Roomba S9 Plus Corner Brush Replacement

Was du brauchst

  1. iRobot Roomba S9 Plus Corner Brush Replacement, Corner Brush: Schritt 1, Bild 1 von 2 iRobot Roomba S9 Plus Corner Brush Replacement, Corner Brush: Schritt 1, Bild 2 von 2
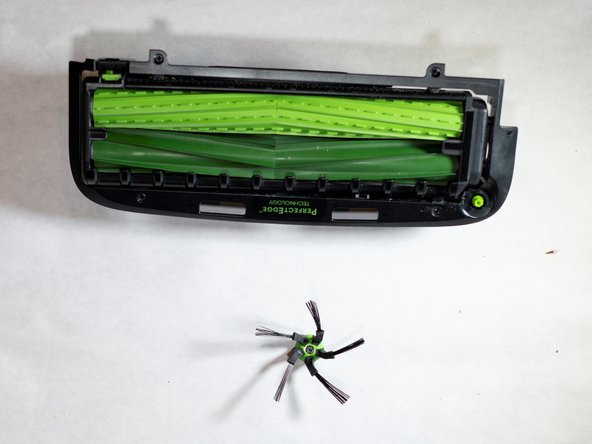
    • Place your Roomba upside down with the brush module facing you.

    • Push the grey tab by the top left corner of the brushes to release the retaining arm.

  2. iRobot Roomba S9 Plus Corner Brush Replacement: Schritt 2, Bild 1 von 1
    • Lift the retaining arm away from the brushes.

  3. iRobot Roomba S9 Plus Corner Brush Replacement: Schritt 3, Bild 1 von 1
    • Unscrew the four 11mm Phillips #2 screws holding the vacuum brushes in place.

  4. iRobot Roomba S9 Plus Corner Brush Replacement: Schritt 4, Bild 1 von 2 iRobot Roomba S9 Plus Corner Brush Replacement: Schritt 4, Bild 2 von 2
    • Remove the brush module by pulling up from the sides.

  5. iRobot Roomba S9 Plus Corner Brush Replacement: Schritt 5, Bild 1 von 3 iRobot Roomba S9 Plus Corner Brush Replacement: Schritt 5, Bild 2 von 3 iRobot Roomba S9 Plus Corner Brush Replacement: Schritt 5, Bild 3 von 3
    • Unscrew the 7mm Phillips #2 screw holding the corner brush head in place.

  6. iRobot Roomba S9 Plus Corner Brush Replacement: Schritt 6, Bild 1 von 1
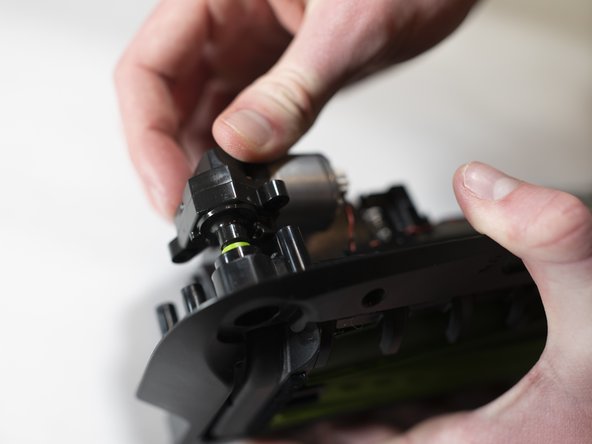
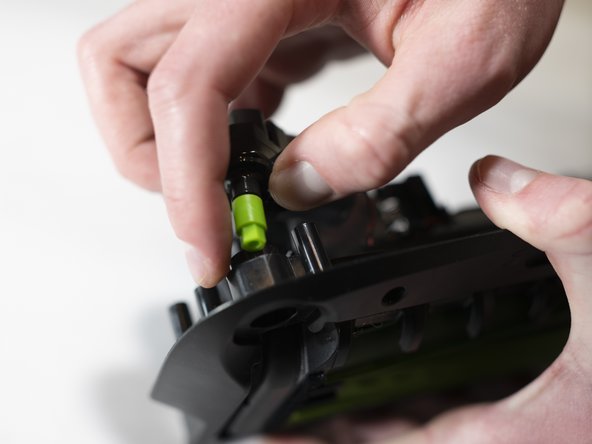
    • Flip over the brush module to access the corner brush motor.

    • Unscrew the 15mm Phillips #0 screws holding the motor in place.

  7. iRobot Roomba S9 Plus Corner Brush Replacement: Schritt 7, Bild 1 von 3 iRobot Roomba S9 Plus Corner Brush Replacement: Schritt 7, Bild 2 von 3 iRobot Roomba S9 Plus Corner Brush Replacement: Schritt 7, Bild 3 von 3
    • Carefully take the motor axle from its housing.

  8. iRobot Roomba S9 Plus Corner Brush Replacement: Schritt 8, Bild 1 von 2 iRobot Roomba S9 Plus Corner Brush Replacement: Schritt 8, Bild 2 von 2
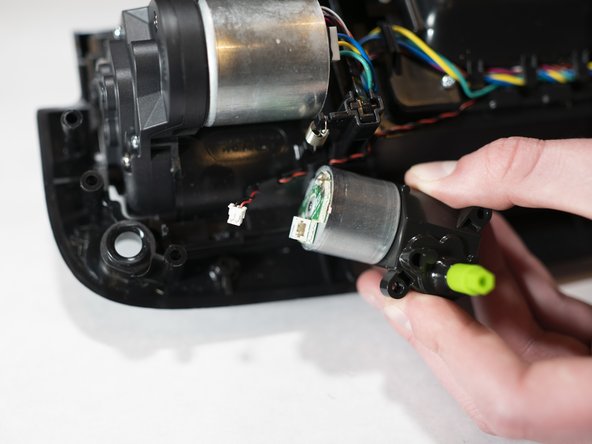
    • Disconnect the wire connecting the motor using tweezers to pull out the connector.

Abschluss

To reassemble your device, follow these instructions in reverse order.

2 weitere Nutzer:innen haben diese Anleitung absolviert.

Lance Brown

Mitglied seit: 01/23/20

348 Reputation

2 Anleitungen geschrieben

Team

Cal Poly, Team S18-G3, White Winter 2020 Mitglied von Cal Poly, Team S18-G3, White Winter 2020

CPSU-WHITE-W20S18G3

4 Mitglieder

9 Anleitungen geschrieben

2 Kommentare

Wish there was a way to replace that plastic. Stripped on mine.

Steve Yeung - Antwort

Hi!

Is it possible to change just the plastic part where the brush screws in?

They did a really dumb thing and made a metal screw go in a plastic thread so of course, the plastic thread finally gave in.

Piotr - Antwort

Kommentar hinzufügen

Seitenaufrufe:

Letzte 24 Stunden: 1

Letzte 7 Tage: 3

Letzte 30 Tage: 30

Insgesamt: 2,351