Zum Hauptinhalt wechseln

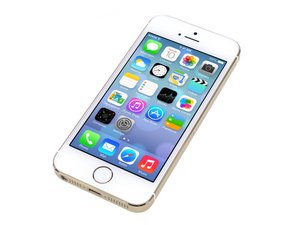
Das Apple iPhone 5s wurde am 10. September 2013 angekündigt. Die Reparatur dieses Geräts ist ähnlich wie bei den Vorgängermodellen und erfordert Schraubendreher und Hebelwerkzeuge. Verfügbar mit GSM oder CDMA mit 16, 32 oder 64 GB in silber, gold und space grau.

3530 Fragen Alle anzeigen

battery replacement - volume buttons ribbon cable damage

you guys at ifixit really dropped the ball on this one. Why you did not underscore a caution when removing the old battery; to use extreme caution at the volume button end of the battery??

When I used my tool to pry the battery up, I nicked the volume buttons ribbon cable. Then trying to repair this thing which was already brittle, it broke clean in two! Now buttons are inop and I will have to pull all the innards to replace it, a very daunting task!

Can you guys send me a replacement? I'm overseas and need this done ASAP! Also I advice updating the ifixit procedure for this caution to save others from this terrible fate!

Beantwortet! Antwort anzeigen Ich habe das gleiche Problem

Ist dies eine gute Frage?

Bewertung 1
1 Kommentar

I have to agree with RobertS on this one, there should be some warning about the potential for this to happen when trying to get the battery out (which is hard to do as battery is almost permanently adhered. Same thing happened to me and now my phone will be inoperable until I can get the replacement cable shipped.

von

Einen Kommentar hinzufügen

1 Antwort

Gewählte Lösung

Hello Robert,

I looked at the guide, and from the steps and tools used, it should be hard to rip the ribbon cable if the battery is pried in the correct locations. However, anything can happen when performing a repair, and in this case, the part you broke is very inexpensive. At this point, if you are feeling confident, then I would just get a new cable and install it, job done. However, if you don't want to go through that process and risk damaging anything else, I am sure a local repair shop could help you with solving the problem. If I was close to you, I'd even help you fix it, but I don't believe I am in the same country. If you do want to get the part, you can find it here.

iPhone 5s Audio Control and Power Button Cable

The easiest thing to break when installing it is actually the cable itself, so again, I would be careful. If you want any more advice, or have more questions about installing the part, feel free to reply. Hopefully you can get your phone sorted out soon.

Hope this answer helps!

iPhone 5s Audio Control and Power Button Cable Bild

Produkt

iPhone 5s Audio Control and Power Button Cable

$14.99

War diese Antwort hilfreich?

Bewertung 1

4 Kommentare:

hey thanks a lot for the feedback. i was able to get a new cable for 10 bucks. now the daunting task of installing. is there a repair guide for this exact repair on ifixit? i cant seem to find it! :))

von

Hey Robert,

Here is the guide that you will need to replace that cable.

iPhone 5s Oberes Komponentenkabel ersetzen

A few things I would recommend before you start...

-Something to keep all the screws contained!!! Screw lenghts are VERY important, use iFixit's color codes!!

-Patience. Things are fragile, if you get frustrated, take a deep breath, step away, and take a few minutes. It is always easier when you come back.

During the repair, I have found it is best to look out for the following:

-The cables that can get stuck under the logic board. Check and make sure they are all above it BEFORE you screw it back in.

-The hinge bracket for the lock button can be tricky. For this, I actually stand the phone vertically and upside down. This lets gravity do the work of putting the button in. Let the button fall in, then use tweezers to push it down.

Hopefully your repair goes well! If you run into trouble, post back here, and I can offer more guidance.

von

owen thanks very much. well this guide is not complete, tho. it was a harrowing task to say the least! took me darn near the whole day. plus the guide does not detail how the brackets have to be transferred over from the old cable to the new one. this i had to use my own common sense. the trickiest one was the hinge bracket for the POWER button as you said. but it was somehow welded or soldered to the old cable. i tried a cig lighter and paper clip to free it. no go. eventually all i could do was pull it loose, thus destroying the old cable, which was getting trashed anyway. then getting it on the new cable was a bear! lighter / actual soldering was a no go. i was deadly afraid of melting that end of the cable with power button header.

von

cont: in the end, a dab of super glue at each inside side of the hinge where the metal plate on the power button header end mates with the inside hinge and it did the trick to bond it to the cable header then i could mount it and re-assemble. (if there is a better method i am all EYES!) all buttons work now and God forbid i ever have to change that cable again! i advise much caution to anyone when changing the battery! do not go thru what i just did! :P

von

Einen Kommentar hinzufügen

Antwort hinzufügen

Robert S wird auf ewig dankbar sein.
Seitenaufrufe:

Letzte 24 Stunden: 0

Letzte 7 Tage: 0

Letzte 30 Tage: 4

Insgesamt: 1,282