Zum Hauptinhalt wechseln

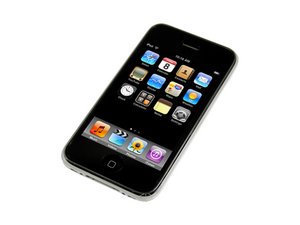
Zweite iPhone Generation. Modell A1241 mit 8 oder 16 GB Kapazität und schwarzer oder weißer Kunststoff-Rückseite. Die Reparatur ist leichter zu bewerkstelligen als beim iPhone 1. Es werden Schraubendreher, Hebelwerkzeuge und Saugnäpfe benötigt.

1158 Fragen Alle anzeigen

Cable 3 connector reassembly into logic board proper placement?

There is a white line across the cable 3 connector. When you are putting the cable back in to the connector, does it go in far enough so that the white line is no longer visible? My friend dropped his 3G black 16 gb and the rear casing cracked. I had a white rear casing and swapped everything over to it to help him out. I thought I put everything in correctly but the proximity sensor isn't working and you cannot hear callers taking to you. Works great on speakerphone etc... Just not through the iPhone earpiece. Please help, and with a picture if you can. Thanks

Beantwortet! Antwort anzeigen Ich habe das gleiche Problem

Ist dies eine gute Frage?

Bewertung -1
3 Kommentare

anyone know how to replace the cable for cable 3? Ive seen the part go for $4.00 so if I somehow broke the cable - Id love to know how to replace it - seems like I don't need to solder anything - I looked through the step by step guides and didn't find one that covered this particularly - please help

von

lots of people have been asking this recently-just scroll through answers index for recent posts. good luck.

von

Thanks pollytintop. I'll check around

von

Einen Kommentar hinzufügen

3 Antworten

Gewählte Lösung

in all the phones i have worked on the ribbon NEVER goes to the line. as rage says just insert gently until you feel resistance. there is usually about 1mm between end of connection and line. if proximity sensor isn't working maybe it's been damaged in transit-easy enough to replace

War diese Antwort hilfreich?

Bewertung 2
Einen Kommentar hinzufügen

Great help guys, worked for me!!

War diese Antwort hilfreich?

Bewertung 1
Einen Kommentar hinzufügen

Generally you should only need to push it in so that you can't see any of the ribbon past the line. Sometimes the line will be marked a little off and so wont even go in that far. I would just push it in as far as it will go without putting any real force to it. That ribbon is very easy to tear. Sorry no pics, I don't have a camera atm that I can connect to my computer :P

War diese Antwort hilfreich?

Bewertung 0

1 Kommentar:

thank you guys for your help - im new to ifixit - but I love it - so im not use to how to help improve your ratings by thanking you for answers etc.. but thank you both ( rage & pollytintop ) - I went back in to the unit and tried again - as soon as I felt resistance i stopped and clamped down the black tab - connected everything up and still no luck - i was switching out the casing for a friend so his phone was working 100% when I took it - so I don't think anything ha been damaged - the connector looks great on the logic board - and the cable looks fine - I didn't see that I needed to lift the tab on original disassembly - as I thought my model didn't have it - but the cable pulled out fine on that first try - so I didn't think anything of it - do you think i might have damaged it somehow? it shows no visible evidence - what else can I check? or is #3 just that picky that I have to get it just right ? - any help is appreciated - so I can make my friend not kill me :-)

von

Einen Kommentar hinzufügen

Antwort hinzufügen

boss302beav wird auf ewig dankbar sein.
Seitenaufrufe:

Letzte 24 Stunden: 0

Letzte 7 Tage: 0

Letzte 30 Tage: 0

Insgesamt: 4,623