Zum Hauptinhalt wechseln

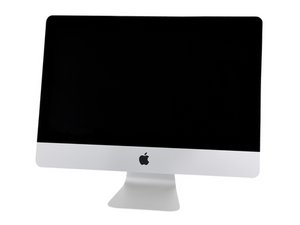
A1418 / EMC 3069 / 2017 / 3,0 GHz Quad-Core i5, 3,4 GHz Quad-Core i5 oder 3,6 GHz Quad-Core i7 Prozessor. Erscheinungsdatum: 8. Juni 2017.

175 Fragen Alle anzeigen

How do I reattach the microphone correctly?

The 21.5” 2017 iMac page on ifixit is missing the tutorial for the mic, which is located near the bottom of the display.

Block Image

The only thing available is a Muffled Microphone - iMac 21.5" (mid 2017) - Following Adhesive Strips not letting the adhesive strips for the display block the mic.

I'm not sure of a few things:

  • The orientation of the mic (is it supposed to fold and wrap around the lower support chin strap bracket?
  • Is the gold part supposed to touch the aluminum of the inside of the iMac chassis?
  • How to adhere it to the aluminum?
  • How does the sound even get through this thing if there's a piece of glass in front of it, and adhesive on either side of the glass? (I know to make sure that the adhesive strip doesn’t obstruct the mic, but I still don’t understand how the sound gets out clearly)

Update (07/26/2020)

I pulled off the old mic, and it seemed that the part with the three "dots" was adhered to the inside of the iMac frame where the corresponding holes are.

But I pulled it off and wasn’t able to see exactly how it was set under there. The image below is what both sides of the replacement microphone I have look like:

Block Image

There are no adhesive strips, so I guess I’ll use some really small cuts of double-sided tape to stick it, such that it doesn’t block any of the 3 dots.

What I meant about the placement (see poorly annotated image below) is that I guess the metal pin needs to be fastened to the logic board facing up, so the mic cable needs to do a loop so it’s adhered to the frame and can then fit the bottom bracket in (it would go under the bracket, not in between, and then flip and touch the aluminum body where the holes are).

Block Image

Does this approach seem correct to you? (Thanks for the super quick reply by the way!)

Beantwortet! Antwort anzeigen Ich habe das gleiche Problem

Ist dies eine gute Frage?

Bewertung 0
Einen Kommentar hinzufügen

1 Antwort

Gewählte Lösung

Did you not note its placement when you took it off to replace?

The ribbon cable does not thread between the bracket and the case. As you can see here:

Block Image

The hole (pin on other side) is used to align the cables placement

As for which way the microphone fits, the flat side of the flex cable fits against the case. As an example here’s the 13” MacBook microphone cable:

Block Image

Back Side

Block Image

Face Side

Block Image

Zoom in on one mike hole

Block Image

The Blue tape pulls expose the adhesive strips to adhere the part (same as the iMac) to the case.

As far as how the mic can even pick up sound: There is a small slot created along the bottom edge of the display frame where the glass meets up with the case. Thats that black marked area. You need to make sure the tape doesn’t cover the slot area.

Update

You got the right idea on how the cable is mounted aiming down and then looping up. But the hole is not the small hole in the middle its the black dash under it

Block Image

As I don’t take the microphone cable off I don’t remember exactly the placement but logic tells me the microphone hole in the ribbon cable needs to match up with the slot hole in the case otherwise it has no pathway for the sound to enter to it.

So basically you’ve got it lined up too high.

War diese Antwort hilfreich?

Bewertung 1

1 Kommentar:

Thanks so much, that makes complete sense. Appreciate you taking the time to mark that up.

von

Einen Kommentar hinzufügen

Antwort hinzufügen

orun bhuiyan wird auf ewig dankbar sein.
Seitenaufrufe:

Letzte 24 Stunden: 0

Letzte 7 Tage: 7

Letzte 30 Tage: 31

Insgesamt: 985