Zum Hauptinhalt wechseln

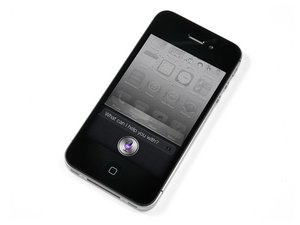
Fünfte Generation des iPhones. Die Reparatur dieses Geräts ist unkompliziert und mithilfe von Schraubendrehern, Hebelwerkzeugen und Geduld zu machen. GSM und CDMA mit 16, 32 oder 64 GB in schwarz oder weiß.

2193 Fragen Alle anzeigen
Frage geschlossen

small piece broke off while cleaning from water damage...

Block Image

So I opened up my friend's 4s to try and help them get it running. I removed all the screws, ribbons, etc, and got down to the main logic board.

While cleaning (with a qtip, VERY gently) the area right below the display ribbon connection. A small rectangular metal block came off the board. It is very very tiny, the only reason I even noticed was because I heard it hit the paper I was working over.

This 'block' is the one furthest right out of the 5 in that area. My question is..have I ruined the phone and it's chances of working?

I used a jeweler's loupe and took a 10x look at the piece. It almost looks to me like a 'jumper'. On the board where it was attached, I can see a copper piece that it was attached to...I'm assuming it was soldered in place.

What should I do, I'm still waiting for a replacement battery to come in so I can test the phone. But should I even try to turn it on with that piece missing? I wish I could solder it back into place but I don't have the equipment nor the know-how to make such a small solder.

Thanks in advance to anyone who may know...

**If you look at the logic board with the battery connector on the bottom, at the top of the board the is only one ribbon connector that goes vertical, the rest are horizontal. That vertical connector is the display connector. Below that connector are 5 very small 'blocks' (soldered?) to the board. The one I 'pulled off' is the one furthest to the right. **

Diese Frage beantworten Ich habe das gleiche Problem

Ist dies eine gute Frage?

Bewertung 0
2 Kommentare

could you take a look at this teardown iPhone 4S Teardown step 13 and verify that it is one (and which one ) of those?

von

have to tried with jumper ?

von

Einen Kommentar hinzufügen

3 Antworten

Hilfreichste Antwort

this is for the lcd . if you remove all from this line you will get the black light on the screen nothing more than . just make a jumper . you will get the icons on the lcd.

War diese Antwort hilfreich?

Bewertung 1

3 Kommentare:

how do i 'just make a jumper'? what do you mean if i remove from this line? can you be more descriptive? will it work without this piece? thanks

von

how can i try with jumper if it was soldered into place??? i told you it is not ATTACHED anymore.

von

try to use that or just try with small pin. wby which both the pads connect together then check

von

Einen Kommentar hinzufügen

I believe those are capacitors, but I am not sure on the functionality of each. Someone who knows more about EE could probably give a better than I, but I would try and turn it on and hope it works.

War diese Antwort hilfreich?

Bewertung 0

3 Kommentare:

In Reply to oldturkey03:

I'm not sure I understand your question. I looked at step 13....yes it is one of those?? From the step 13 picture it's the furthest one on the left above the ribbon connector. The picture I posted (enlarged) should be clear enough to distinguish what I'm talking about....sorry

von

Just easier for me to see it in another perspective :). Trying to get more information on this.....Thanks.

von

thanks. appreciate the effort.

von

Einen Kommentar hinzufügen

great solution

War diese Antwort hilfreich?

Bewertung 0

1 Kommentar:

great solution? what is?

von

Einen Kommentar hinzufügen
Seitenaufrufe:

Letzte 24 Stunden: 0

Letzte 7 Tage: 0

Letzte 30 Tage: 0

Insgesamt: 646