Einleitung
If your joystick has broken over time, this guide will help you replace these parts. This repair can take anywhere from 4 to 5 minutes and only requires a Phillips #1 screwdriver and the iFixit opening tool. A good replacement for this device is the Dual Shock 4 joystick.
Was du brauchst
-
-
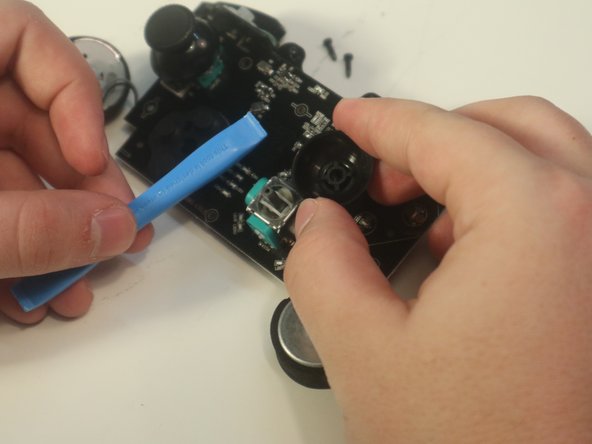
Using the Phillips 1 screwdriver, gently turn the screw to the left (repeat this step until all four screws are taken out).
-
-
-
-
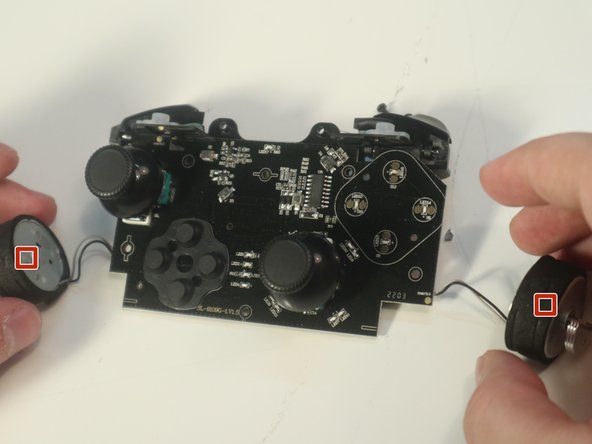
Apply a slow, but consistent pull to the old 600 maH battery.
-
Attach new battery onto the pad.
-
-
-
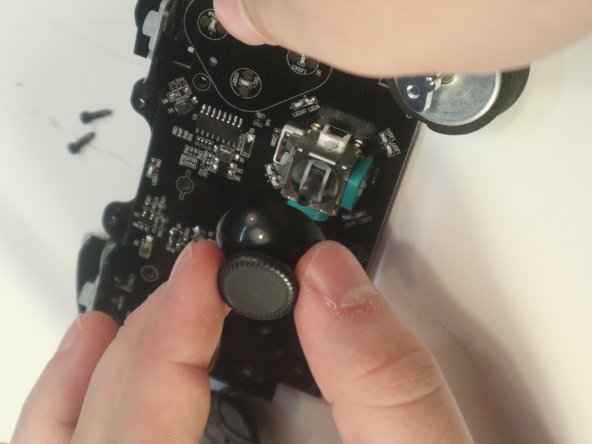
Make sure the square of the joystick matches the square of the pad and pop it in place.
-


To reassemble your device, follow these instructions in reverse order.
To reassemble your device, follow these instructions in reverse order.
Rückgängig: Ich habe diese Anleitung nicht absolviert.
Ein:e weitere:r Nutzer:in hat diese Anleitung absolviert.
Team

Western Carolina University, Team 1-4, Virtue Fall 2022 Mitglied von Western Carolina University, Team 1-4, Virtue Fall 2022
WCU-VIRTUE-F22S1G4
4 Mitglieder
10 Anleitungen geschrieben
3 Kommentare
I bought ps4 joysticks for the repair, but ps4 joysticks seems larger so it's stuck
PlayStation4 stick is not compatible with GameSir T4 Pro. The stick for the Nintendo Switch PRO controller does not interfere, but this also requires processing for installation.
It appears that you will need to remove the light diffuser(white tubular plastic sleeve) from the case to make the parts fit.
NAKIRI -