Einleitung
Use this guide to replace the left and right joystick modules on your IINE Retro Pocket game controller.
Was du brauchst
-
-
Set the controller down on your working surface.
-
Flip the controller over so the back of the controller is facing up, with the shoulder buttons facing away from you.
-
Use a Phillips #1 screwdriver to remove the four black 7.5mm screws from the corners of the back plate.
 Frag FixBot
-
-
-
Use the tip of an opening pick to separate the back plate. Start at the bottom corner, and pry downwards.
-
As you make your way toward the center, you will eventually disengage the retaining clips located on either side of the status LED array.
-
Lift the back plate up and away from you, and set it aside.
-
-
-
Once the back plate is removed, you now have access to the internals of the controller.
-
-
-
Locate the battery connector.
-
Use a pair of tweezers to carefully push on the notches of the battery connector and disconnect it from the socket.
-
-
-
-
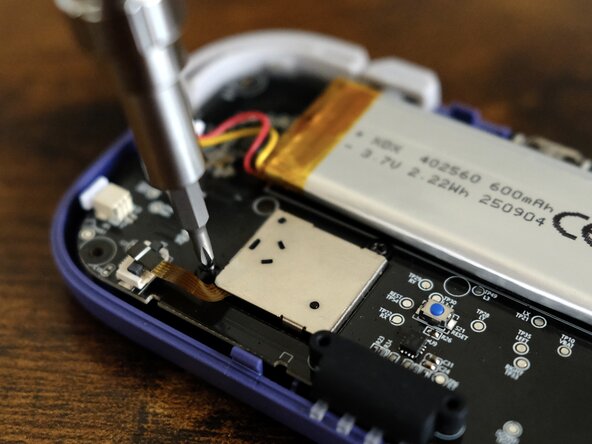
Locate the ZIF connector of the right joystick.
-
Use a pair of tweezers to flip up the black flap of the ZIF connector and unlock it.
-
Disconnect the joystick cable by carefully pulling it straight out of the connector.
-
-
-
Use a Phillips #00 screwdriver to remove the two black 3.5mm screws that secure the right joystick.
-
-
-
Lift up the joystick module and set it aside.
-
-
-
Locate the ZIF connector of the left joystick.
-
Use a pair of tweezers to flip up the black flap of the ZIF connector and unlock it.
-
Disconnect the joystick cable by carefully pulling it straight out of the connector.
-
-
-
Use a Phillips #00 screwdriver to remove the two black 3.5mm screws that secure the left joystick.
-
-
-
Lift up the joystick module and set it aside.
-


To reassemble your device, follow these instructions in reverse order.
Once the controller is fully reassembled, connect it to your Nintendo Switch and calibrate the new joystick.
Rückgängig: Ich habe diese Anleitung nicht absolviert.
2 weitere Personen haben diese Anleitung absolviert.
