Zum Hauptinhalt wechseln

Samsung Galaxy S5 Sport Motherboard Replacement

Was du brauchst

  1. Samsung Galaxy S5 Sport Motherboard Replacement, Battery: Schritt 1, Bild 1 von 3 Samsung Galaxy S5 Sport Motherboard Replacement, Battery: Schritt 1, Bild 2 von 3 Samsung Galaxy S5 Sport Motherboard Replacement, Battery: Schritt 1, Bild 3 von 3
    • Remove the back casing of the phone using the notch located at the top.

  2. Samsung Galaxy S5 Sport Motherboard Replacement: Schritt 2, Bild 1 von 3 Samsung Galaxy S5 Sport Motherboard Replacement: Schritt 2, Bild 2 von 3 Samsung Galaxy S5 Sport Motherboard Replacement: Schritt 2, Bild 3 von 3
    • Lift up the battery using a plastic spudger or fingernail.

    • Damaging the battery may result in physical injury and/or damage to the phone.

  3. Samsung Galaxy S5 Sport Motherboard Replacement, Screen: Schritt 3, Bild 1 von 3 Samsung Galaxy S5 Sport Motherboard Replacement, Screen: Schritt 3, Bild 2 von 3 Samsung Galaxy S5 Sport Motherboard Replacement, Screen: Schritt 3, Bild 3 von 3
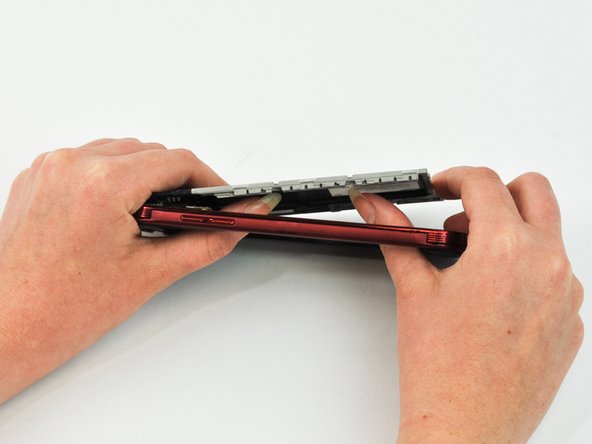
    • Using a plastic opening tool or spudger, pry up the screen after the adhesive has melted.

    • When working with electronics, it's important to choose a tool that's ESD-safe to avoid accidental damage to the device. The metal spudger is great when you need serious prying power, but the regular black nylon spudger or a plastic opening tool should be used whenever possible.

    • Because it is a water-resistant phone, the screen cannot be taken apart without breaking.

  4. Samsung Galaxy S5 Sport Motherboard Replacement: Schritt 4, Bild 1 von 2 Samsung Galaxy S5 Sport Motherboard Replacement: Schritt 4, Bild 2 von 2
    • The plastic cover of the phone may separate from the LCD screen. If so, also remove the LCD screen with the regular nylon spudger.

    • In the upper right area of the LCD screen, there is a connecting ribbon. Be careful not to rip its connection to the motherboard.

    • Do not hold the phone too close to your face or eyes. Small glass shards may dislodge or the metal spudger may slip.

  5. Samsung Galaxy S5 Sport Motherboard Replacement, Front-Facing Camera: Schritt 5, Bild 1 von 3 Samsung Galaxy S5 Sport Motherboard Replacement, Front-Facing Camera: Schritt 5, Bild 2 von 3 Samsung Galaxy S5 Sport Motherboard Replacement, Front-Facing Camera: Schritt 5, Bild 3 von 3
    • Remove the screws around the plate

  6. Samsung Galaxy S5 Sport Motherboard Replacement: Schritt 6, Bild 1 von 3 Samsung Galaxy S5 Sport Motherboard Replacement: Schritt 6, Bild 2 von 3 Samsung Galaxy S5 Sport Motherboard Replacement: Schritt 6, Bild 3 von 3
    • Push the plate out by applying pressure to the battery cavity.

  7. Samsung Galaxy S5 Sport Motherboard Replacement: Schritt 7, Bild 1 von 3 Samsung Galaxy S5 Sport Motherboard Replacement: Schritt 7, Bild 2 von 3 Samsung Galaxy S5 Sport Motherboard Replacement: Schritt 7, Bild 3 von 3
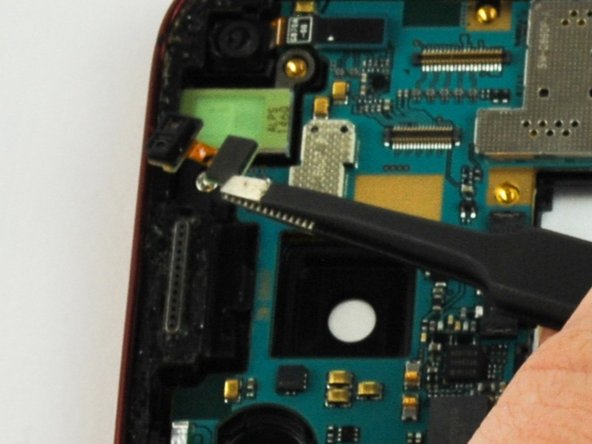
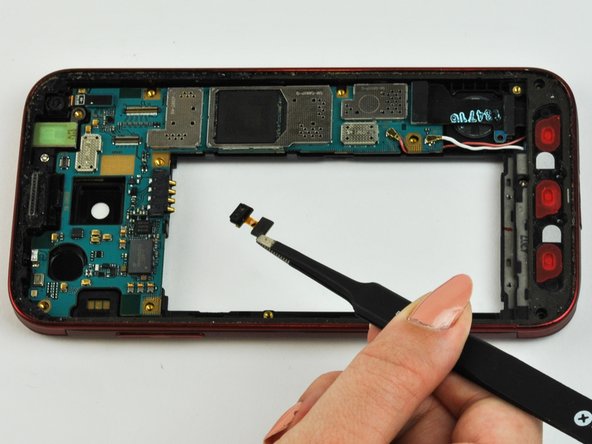
    • Remove the camera from the plug at the top of the phone with tweezers. It should pop out fairly easily.

  8. Samsung Galaxy S5 Sport Motherboard Replacement, Motherboard: Schritt 8, Bild 1 von 3 Samsung Galaxy S5 Sport Motherboard Replacement, Motherboard: Schritt 8, Bild 2 von 3 Samsung Galaxy S5 Sport Motherboard Replacement, Motherboard: Schritt 8, Bild 3 von 3
    • Push the plate out by applying pressure to the battery cavity.

  9. Samsung Galaxy S5 Sport Motherboard Replacement: Schritt 9, Bild 1 von 2 Samsung Galaxy S5 Sport Motherboard Replacement: Schritt 9, Bild 2 von 2
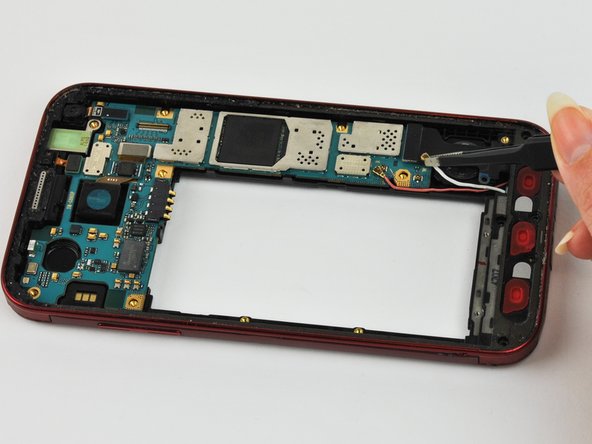
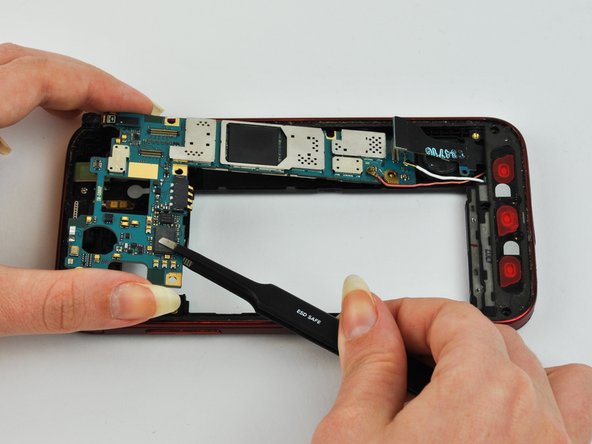
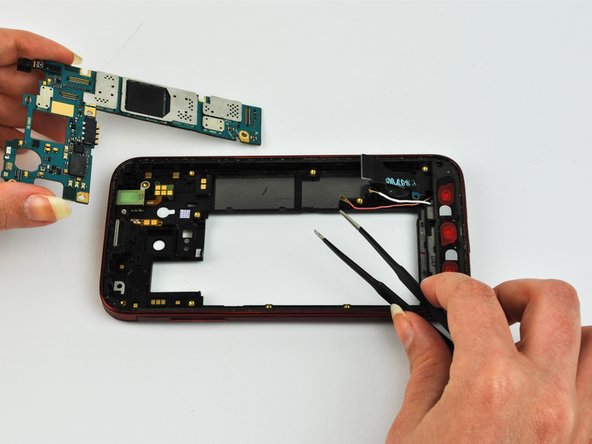
    • Detach the pink and white wires by pulling gently on the metallic caps that connect them to the motherboard.

  10. Samsung Galaxy S5 Sport Motherboard Replacement: Schritt 10, Bild 1 von 2 Samsung Galaxy S5 Sport Motherboard Replacement: Schritt 10, Bild 2 von 2
    • Remove the black connector above the wires by pulling straight up with tweezers.

  11. Samsung Galaxy S5 Sport Motherboard Replacement: Schritt 11, Bild 1 von 3 Samsung Galaxy S5 Sport Motherboard Replacement: Schritt 11, Bild 2 von 3 Samsung Galaxy S5 Sport Motherboard Replacement: Schritt 11, Bild 3 von 3
    • Pull the motherboard out. It should lift easily out of the phone.

Abschluss

To reassemble your device, follow these instructions in reverse order.

Ein:e weitere:r Nutzer:in hat diese Anleitung absolviert.

Team

USF Tampa, Team 1-6, Leahy Spring 2016 Mitglied von USF Tampa, Team 1-6, Leahy Spring 2016

USFT-LEAHY-S16S1G6

3 Mitglieder

10 Anleitungen geschrieben

0 Kommentare

Kommentar hinzufügen

Seitenaufrufe:

Letzte 24 Stunden: 3

Letzte 7 Tage: 11

Letzte 30 Tage: 14

Insgesamt: 1,548