LCD Screen Replacement by a Mac Rookie
Jeff -

Mein Problem
A couple of years ago just before Christmas a friend of mine was in the hospital, she had taken her G4 Powerbook with her. One afternoon while doing some activities on her computer in the hospital bed she dozed off with it still on her lap, at some point during her nap she rolled to one side and the laptop slid off the bed falling onto the cement floor, resulting in a fractured lcd screen. I bought her a another laptop, a Macbook Pro for Christmas and told her if she gave me the broken powerbook I would get another screen for it and have it repaired. I did eventually get a screen for the computer but rather than taking it to a technician to have it installed I thought I would try to do the task myself as I'm generally a pretty fair DIYer with pretty much anything.
Meine Reparatur
First off let me be perfectly clear, I am and always have been a PC man and my knowledge of Mac's is/was extremely limited and I found out in pretty short order that doing anything on a Mac is far more involved than performing the same or similar tasks on a PC.
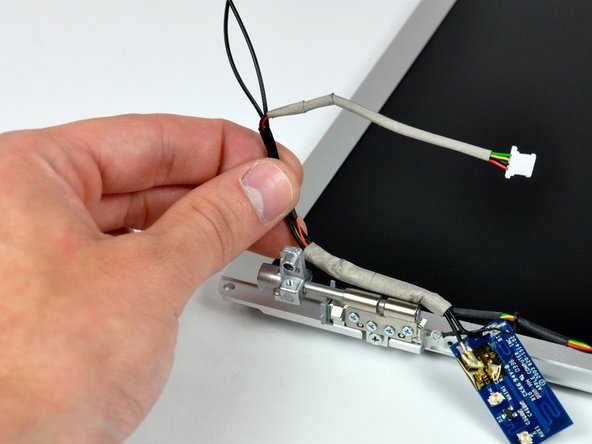
Ok on to the lcd screen replacement. My first order of business was to find an online tutorial for the repair I was about to perform, which led me to two excellent resources, ifixit and PowerbookMedic's "Apple Powerbook G4 Aluminum 15” Repair Manual". So armed with both of these guides on my PC laptop I set out to do the repair. At first, after having reviewed both guides, my preference was to use the ifixit method as it involved a lot less work to perform the repair by not having to remove the the trackpad/palmrest but I soon discovered that getting the the torx head screw driver onto the two screws at the bottom front corners of the display was going to be too challenging in regards to the possibility of stripping (rounding) the screw slots so I decided to use the more involved "Apple Powerbook G4 Aluminum 15” Repair Manual" instructions. Although I was quite astounded at the amount of teeny tiny screws that had to be removed, all was going along smoothly, I got the trackpad/palmrest off without incident, began unplugging the cables that had to be unplugged prior to removing the display, which was also going along smoothly until I got to the airport antenna connector....I pulled on the both ends of the connector where you're supposed to pull on it, but to my chagrin it just wouldn't come apart, while trying to separate the connector one of the rubber cable covers slipped off the connector itself and slid down the wire, I then noticed a small scored barrel on the connector which rotated so I thought maybe I had to unscrew this barrel to separate the connector....WRONG!!!....I began rotating the barrel counter clockwise and before you could say "Bob's your uncle" the cable broke off the connector....Oh Oh!! In any event I carried on with the rest of the lcd replacement.
After researching the possible fixes for the broken antenna cable I found that my only option was to order another airport antenna inverter which I got from ifixit (the part arrived in a very timely manner btw) but I soon discovered that I not only had to replace the antenna inverter with it's attached cables and connector but I also had to replace the connected cable that ran to the airport card which involved removing the airport card cage, which in turn involved removing the entire logic board....Holy Moley & Gadzooks!!
In conclusion and to make what is already a long story short/er, "what should have been a moderately difficult lcd screen replacement repair turned into an extremely difficult, time consuming project". But such is the life of the consumate DYIer sometimes....;)
Although the process turned out to be more difficult and took longer than it should have, I was successful in completing the repair/s. After I was finished I fired up the Powerbook and "voila" a fully operational computer....:)
Mein Rat
As I mentioned in my repair story, I was astounded at the amount of tiny screws involved in repairing or replacing components in these Macs (of course after I broke and had to replace the antenna cable/inverter that amount doubled for me...lol), to make life easier on yourself use a compartmentalized holder of some kind to keep these screws separated, I used an empty fishing lure tray for this purpose, the one mistake I made though was that I didn't put the screws in the separate compartments in any particular order....A definite faux pas!!....In hindsight (which is always 20/20) I should have put the screws in the compartments either clockwise or counter clockwise in the order they were removed so that I could simply reverse that order during the reassembly of the machine. Even though I did manage (apparently) to replace the screws in their proper places, it was a somewhat painful process.
Also, if you do decide to tackle your own repairs and you're a rookie such as myself, there are four rules that must be abided by....1) Don't be afraid of it....2) Use the proper tools....3) Follow any/and all instructions implicitly.....And last but definitely not least....4)....Be Patient!!
I discovered, after I'd removed the old airport antenna cable connector that it would indeed pull apart as it should but I had to use a small pair of pliers and a little bit of wiggling to initially free it up. If I had of done this to begin with I would have saved myself some anxiety, dineros and something even more valuable....TIME!!
0 Kommentare