Mein Problem
This laptop owned by my nephew was dropped several times––more than once with the top open. The front display bezel was broken in two places and the top cover was damaged. The nut plates matching the screws holding the top plate were broken off, and one of nut plates was lost. The display was dark, but the desktop images were visible when illuminated with a flashlight.
Meine Reparatur
The repair as it stands is satisfactory, and the laptop is now completely functional. There are still some cosmetic issues with the keyboard, which I will discuss after I have completed my description of the work I did and the difficulties I encountered on the way to completing the project.
My first effort involved studying the "Installing MacBook Pro 15" Core 2 Duo Models A1226 and A1260 Display Assembly" instructions carefully. I then followed in order the disassembly steps in the guide. When I got to step 14 I noticed that the inverter cable was already disconnected, which explained the dark screen. I then proceeded on to Step 18 and removed the display assembly from the rest of the computer.
I should note that at the beginning of doing this work I realized that I was going to have to keep track of lots of very small screws and parts, so as I moved from step to step I put each set of screws into a separate small envelope which I labeled with the screw size/description and step number. This precaution save me lots of time and hassle because I took the laptop apart and put it back together several times in the course of my work.
I then went to the guide I should have used in the first place, "Installing MacBook Pro 15" Core 2 Duo Models A1226 and A1260 Front Display Bezel" and proceeded from Step 19 onward. When I got to step 25 I noticed that the nut plates connecting the top cover to the front display bezel had broken off and that the one on the right side was lost. I stopped at this point and carefully examined the broken bezel. After thinking about the situation for a couple of days I decided that there was nothing to lose by trying to repair the bezel, so I cut a couple of pieces of wire from a coat hanger and epoxied these wires across the breaks in the bezel on both sides. One of these repairs is shown in Pict0001. As it turned out, this repair was a bit flimsy, but did hold together in one piece well enough for me to attempt to put the top cover back on. I was able to epoxy the nut plate on the left side back in place and screw the top plate to the bezel on the left side after carefully pressing it on to the top cover. I had to cut away the plastic part holding the top to the bezel in the areas where the wire patch interfered, but I was otherwise successful in achieving a serviceable repair up to this point. There was just a 1/8" gap between the bezel and the top cover on the lower right corner that needed to be dealt with.
I decided that I could close this gap by gluing a 2-56 nut to the corner of the top cover and then running a 2-56 screw trimmed to the proper length through the hole in the bezel to hold the bezel to the cover in the corner, so I carefully took the cover off and used super glue to hold the nut in place. When I tested the idea before I put the cover back on, I found that super glue was not strong enough to hold the nut in place when any reasonable force was applied. After a couple of failed attempts I did manage to use epoxy to glue the nut to the case in approximately the right location. See Pict0002.
Unfortunately, when I attempted to snap the cover back in place for the third or fourth time, the epoxy repair on the bezel came loose and the part broke again.
I then decided that before I went any further I needed to determine how much of the computer was fully operational. Before I even started take the laptop apart I had determined that all of the computer parts in the lower case were working by connecting an external display and testing the hard drive, RAM, CPU, etc. I also backed up the hard drive to an external drive. However, I wanted to know whether the display electronics were working or not, and I did not know what the condition of the display screen was.
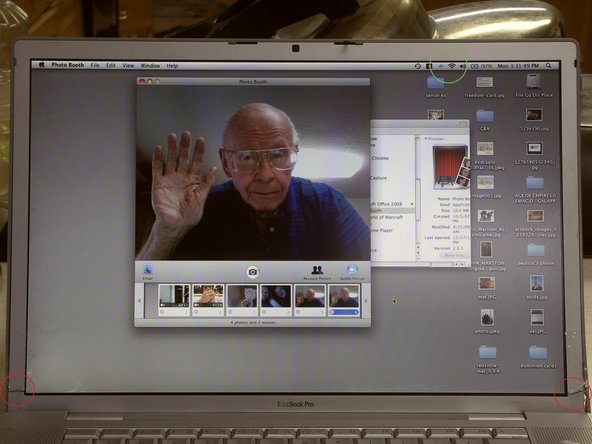
I used some transparent shipping tape on the front of the bezel to hold things together temporarily and then carefully snapped and screwed the top cover back on. I then reinstalled the whole top assembly following the guide step-by-step in reverse order. When that was complete I fired up the computer and was somewhat amazed that everything worked. All of the electronics in the display operated as designed: the bluetooth radio connected to my external Mighty Mouse, the WiFi connected to the internet, and the iSight camera worked. See Pict0003. Only on the display screen itself could other problems be observed. There a several noticeable artifacts such as dust and white spots on the edges of the which detract from the appearance of the display without affecting function except in the case of critical graphics applications. If it were not for the broken bezel, I would have called it Good Enough and given up.
I carefully considered buying a front display bezel from iFixit, but the time and effort involved in installing this part deterred me, although I am certain that I could accomplish this task. I also thought a little bit about buying a complete display assembly from you people, but for the iFixit asking price I could almost purchase a refurbished certified computer with a warranty, so that idea was discarded. I also seriously considered taking the cover off again, re-gluing the broken-loose epoxy-and-wire fix and drilling a hole through the top cover in order to run a screw and nut from the front of the display bezel through the top cover--not pretty, but probably sturdy enough because the whole assembly would be fairly rigid with the two screws in the corners and the plastic clips holding everything in alignment.
I then decided that before I did anything I would shop around and see if I could find a broken laptop available online that could be salvaged. As luck would have it, after quite a bit of looking in various places, I found a complete A1260 display assembly in "LCD Complete Assembly ONLY Webcam not working" condition on eBay for a low price, so I bought it. When the part arrived, there was a minor scratch on the left side of the screen along with lots of smudges and fingerprints, but the cosmetic condition of the metal parts is near mint. I cleaned the screen, removed the old display assembly, installed its replacement, and fired the computer up. Everything except the iSight camera works beautifully, and I am satisfied except for the fact that the keyboard has a couple of cosmetic issues. I don't need the camera because I already have a webcam that plugs into a USB port and works in those very few instances where I might want to use it.
As you can imagine I wouldn't make any money doing this for a living. I estimate that I probably spent 18-20 hours working and thinking before I turned the computer on to check everything for the first time. After that it took me about two hours to remove the original display assembly and install its replacement. A skilled tech could do this in less than half the time, but I am a very slow, deliberate, and careful person who hates doing things over.
Mein Rat
First, follow the advice given by other folks doing this type of work and keep your screws and small parts separated and well organized. The envelope scheme that I used worked very well, particularly because I had to repeatedly take things apart and reassemble them. Be very careful and follow the instructions given in the guides exactly until you are confident about deviating from them.
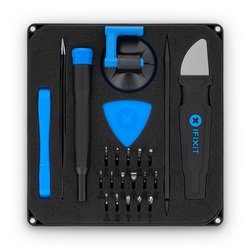
The tools in the Home Tech Toolkit worked perfectly.
As things now stand, I have the old A1226 display assembly that I removed from the laptop. All of the electronics such as antennas, circuit boards, cables, camera, etc., in this assembly work perfectly, and the mechanical parts, hinges, clutch, etc. have not been removed from the assembly.
I would like to trade this display assembly to you for a store credit against a replacement keyboard for my A1226 computer if you are interested. I noticed that your site currently shows that the camera assembly and the display data cable for this computer are out of stock.
/Users/D. Kent/Desktop/PICT0001.jpg
/Users/D. Kent/Desktop/PICT0002.jpg
/Users/D. Kent/Desktop/PICT0003.jpg


0 Kommentare