Zum Hauptinhalt wechseln

Was du brauchst

Dieser Teardown ist keine Reparaturanleitung. Um dein 3M SCP176 zu reparieren, verwende unsere Fehlerbehebungsseite.

  1. 3M SCP176 DLP Projector Teardown, Remove the lamp: Schritt 1, Bild 1 von 3 3M SCP176 DLP Projector Teardown, Remove the lamp: Schritt 1, Bild 2 von 3 3M SCP176 DLP Projector Teardown, Remove the lamp: Schritt 1, Bild 3 von 3
    • Start the teardown process by removing the lamp.

    • Remove the 2 black #1 Phillips screws holding down the lamp cover, then remove the 2 screws with arrows on the lamp.

    • After this the lamp should lift out.

  2. 3M SCP176 DLP Projector Teardown, Lamp Teardown: Schritt 2, Bild 1 von 3 3M SCP176 DLP Projector Teardown, Lamp Teardown: Schritt 2, Bild 2 von 3 3M SCP176 DLP Projector Teardown, Lamp Teardown: Schritt 2, Bild 3 von 3
    • Let me preface this step by saying how dangerous it could be if the bulb breaks. There is a hazard of broken glass and mercury in the florescent bulb. Skip this step if you choose.

    • Just in case anyone needs to know, the lamp's model is an Osram P-VIP 180-230W/10 E20.6

    • Remove the t-10 torx screw on the top of the lamp, and then the phillips screw holding the power connector down.

  3. 3M SCP176 DLP Projector Teardown, Lamp Teardown Part 2: Schritt 3, Bild 1 von 3 3M SCP176 DLP Projector Teardown, Lamp Teardown Part 2: Schritt 3, Bild 2 von 3 3M SCP176 DLP Projector Teardown, Lamp Teardown Part 2: Schritt 3, Bild 3 von 3
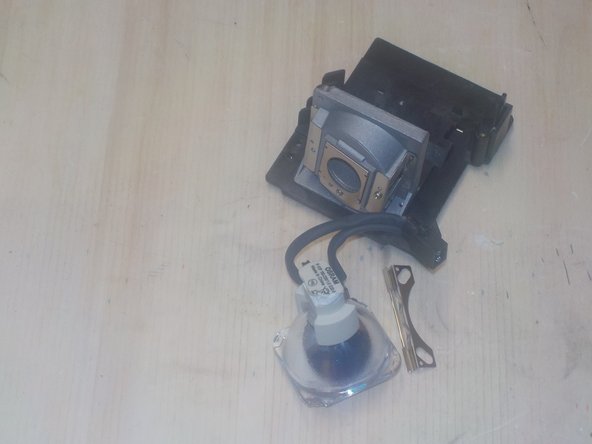
    • Remove the screws holding down the bracket for the lamp bulb, then remove both the bracket and the bulb.

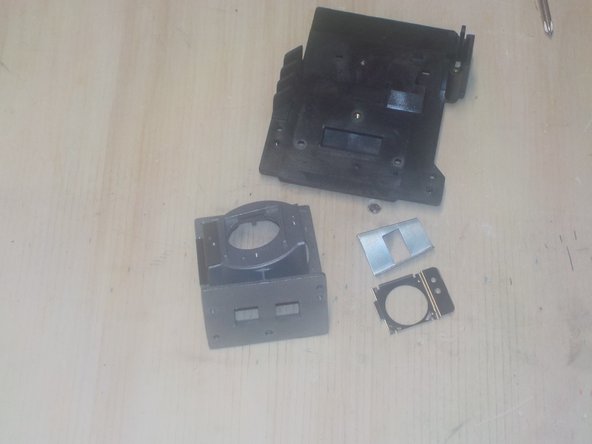
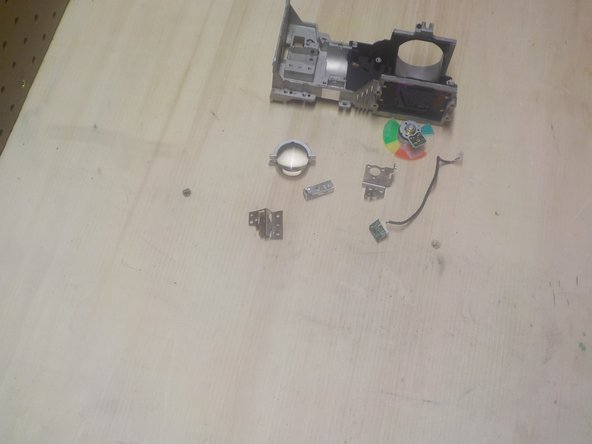
    • Remove the screws holding both the large metal piece to the base and the smaller metal pieces onto the larger one. You can then remove everything.

  4. 3M SCP176 DLP Projector Teardown, Remove the I/O cover: Schritt 4, Bild 1 von 2 3M SCP176 DLP Projector Teardown, Remove the I/O cover: Schritt 4, Bild 2 von 2
    • Remove all the Phillips screws holding down the metal shield around the ports.

    • Also use a 5mm nut driver to remove the standoffs on the VGA and I/O control ports. You can then use pliers or a small flat head screwdriver to remove the shield.

  5. 3M SCP176 DLP Projector Teardown, Remove the top cover Part 1: Schritt 5, Bild 1 von 3 3M SCP176 DLP Projector Teardown, Remove the top cover Part 1: Schritt 5, Bild 2 von 3 3M SCP176 DLP Projector Teardown, Remove the top cover Part 1: Schritt 5, Bild 3 von 3
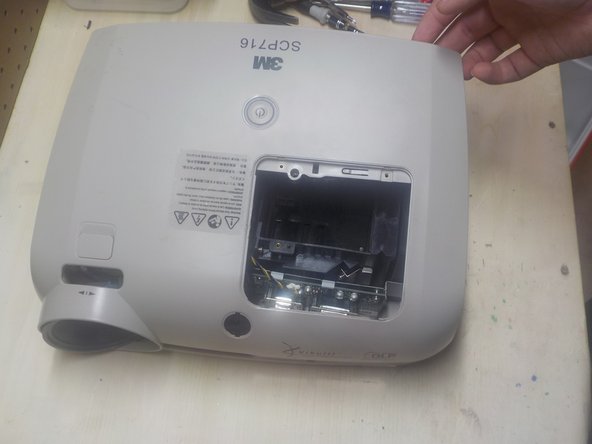
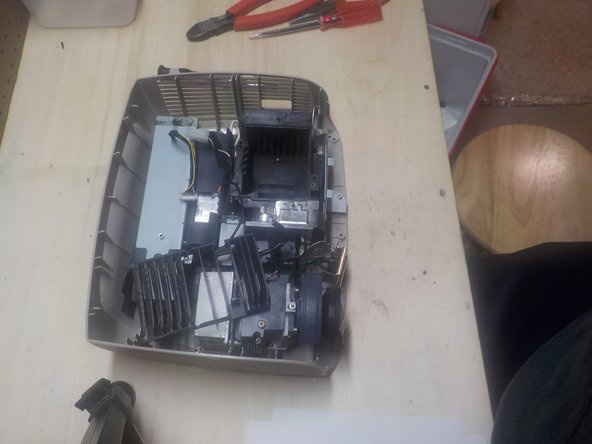
    • Remove all phillips screws from the back and bottom of the projector. Fortunately, none are hidden.

    • See Step 6 for more details.

  6. 3M SCP176 DLP Projector Teardown, Remove the top cover Part 2: Schritt 6, Bild 1 von 3 3M SCP176 DLP Projector Teardown, Remove the top cover Part 2: Schritt 6, Bild 2 von 3 3M SCP176 DLP Projector Teardown, Remove the top cover Part 2: Schritt 6, Bild 3 von 3
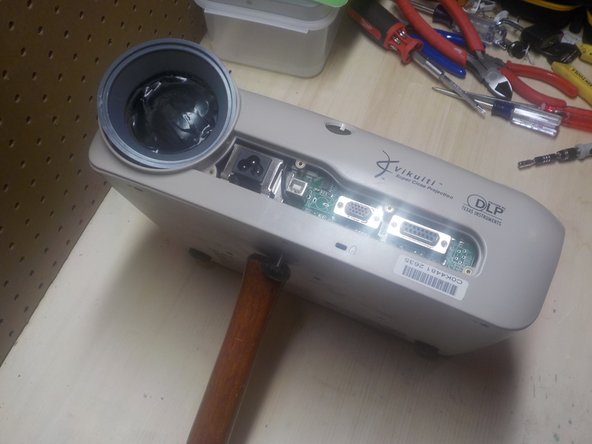
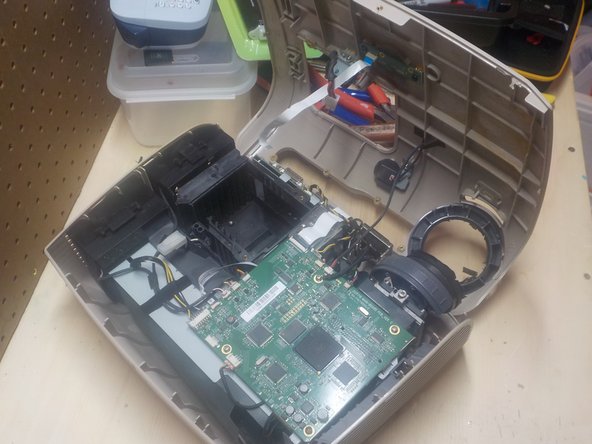
    • Carefully lift the cover off of the projector as pictured. Unplug all the connectors you can reach whichever way you desire.

    • Set the projector cover towards the front and unplug any remaining connectors until the cover is free.

  7. 3M SCP176 DLP Projector Teardown, Remove the fans: Schritt 7, Bild 1 von 2 3M SCP176 DLP Projector Teardown, Remove the fans: Schritt 7, Bild 2 von 2
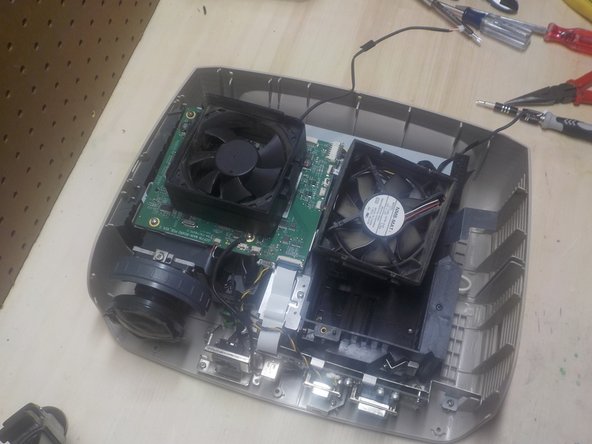
    • Simply pull the fans out from the side of the projector and unplug them. They are contained in rubber bumpers.

  8. 3M SCP176 DLP Projector Teardown, Remove the I/O board: Schritt 8, Bild 1 von 2 3M SCP176 DLP Projector Teardown, Remove the I/O board: Schritt 8, Bild 2 von 2
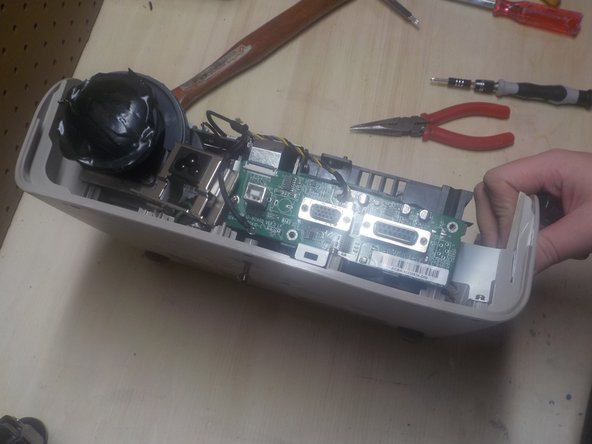
    • Remove all phillips screws holding the I/O board and power connector on. Push the power plug to the side and remove the I/O board.

  9. 3M SCP176 DLP Projector Teardown, Remove the mainboard: Schritt 9, Bild 1 von 3 3M SCP176 DLP Projector Teardown, Remove the mainboard: Schritt 9, Bild 2 von 3 3M SCP176 DLP Projector Teardown, Remove the mainboard: Schritt 9, Bild 3 von 3
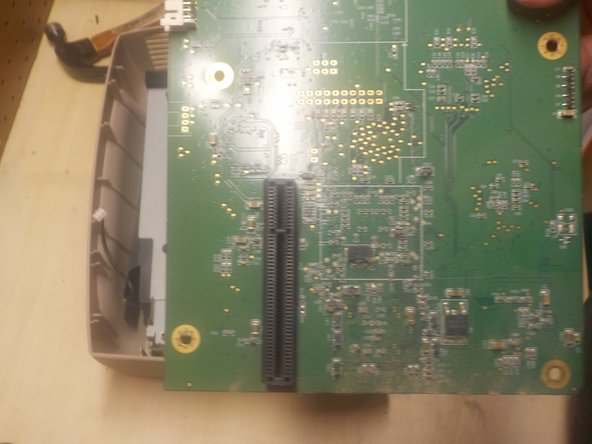
    • Remove the screws holding down the mainboard and lift it off the metal frame.

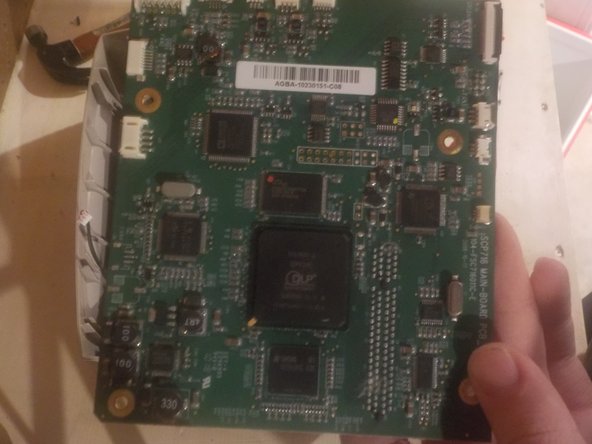
    • The top and bottom of the boards are here for reference.

  10. 3M SCP176 DLP Projector Teardown, Remove the frame: Schritt 10, Bild 1 von 3 3M SCP176 DLP Projector Teardown, Remove the frame: Schritt 10, Bild 2 von 3 3M SCP176 DLP Projector Teardown, Remove the frame: Schritt 10, Bild 3 von 3
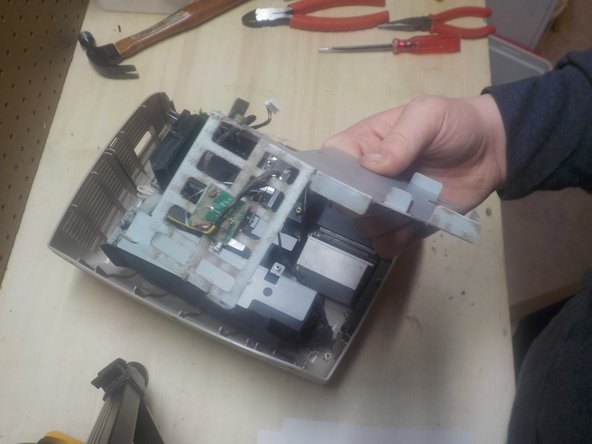
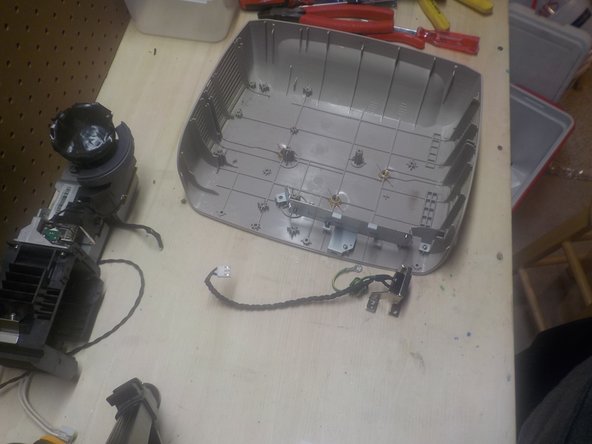
    • Remove the screws holding down the metal frame and remove it from the case.

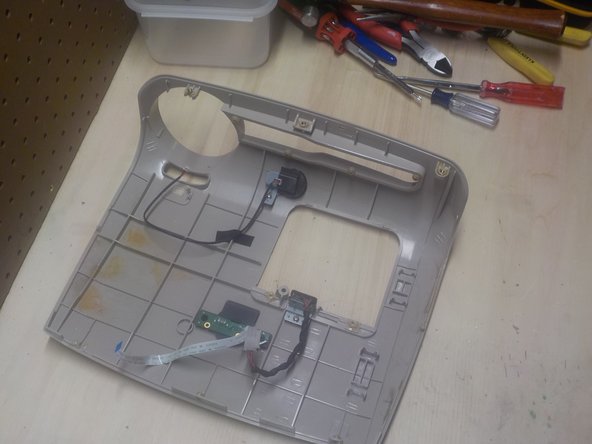
    • Pull the gray trim piece out from next to the frame and set it aside.

  11. 3M SCP176 DLP Projector Teardown, Remove the power supply: Schritt 11, Bild 1 von 3 3M SCP176 DLP Projector Teardown, Remove the power supply: Schritt 11, Bild 2 von 3 3M SCP176 DLP Projector Teardown, Remove the power supply: Schritt 11, Bild 3 von 3
    • This is an exposed power supply. Make sure it is discharged before continuing.

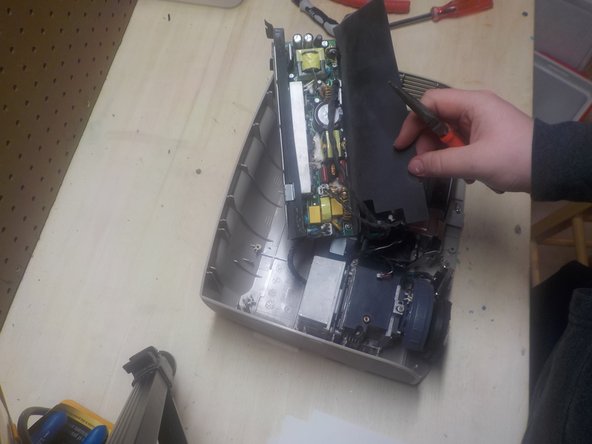
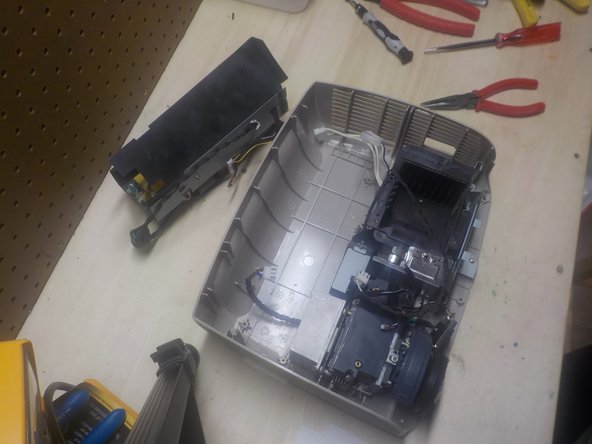
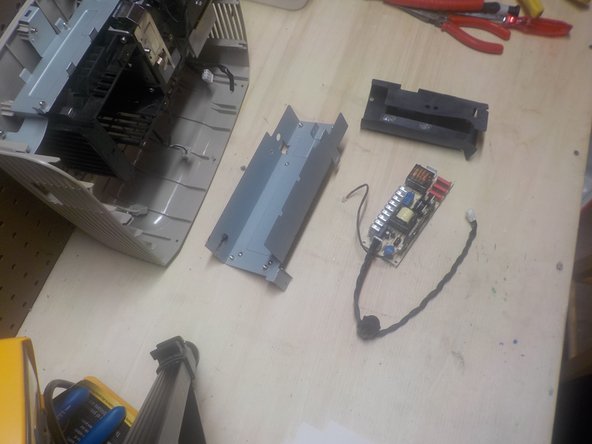
    • Remove the phillips screws from the sides of the box containing the power supply. You can now lift out the power supply.

  12. 3M SCP176 DLP Projector Teardown, Disassemble the power supply: Schritt 12, Bild 1 von 3 3M SCP176 DLP Projector Teardown, Disassemble the power supply: Schritt 12, Bild 2 von 3 3M SCP176 DLP Projector Teardown, Disassemble the power supply: Schritt 12, Bild 3 von 3
    • As I stated in step 11, this is an exposed power supply. Please make sure you have fully discharged any capacitors or other components in the power supply before continuing.

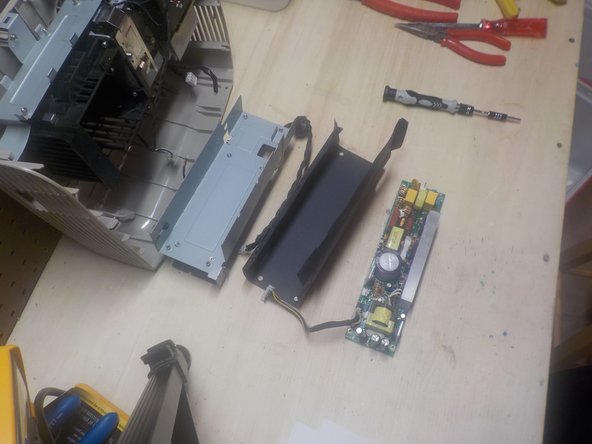
    • Push up the insulating sheet, then remove the screws holding the board to the metal case. The board is now free.

    • Repeat on the other side of the power supply.

  13. 3M SCP176 DLP Projector Teardown, Emptying the bottom case: Schritt 13, Bild 1 von 3 3M SCP176 DLP Projector Teardown, Emptying the bottom case: Schritt 13, Bild 2 von 3 3M SCP176 DLP Projector Teardown, Emptying the bottom case: Schritt 13, Bild 3 von 3
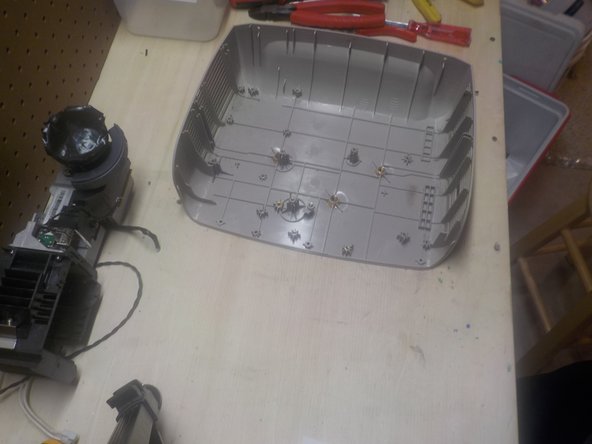
    • Remove any remaining screws holding down any metal pieces, including the main projector lens, and remove it.

  14. 3M SCP176 DLP Projector Teardown, Final Disassembly: Schritt 14, Bild 1 von 3 3M SCP176 DLP Projector Teardown, Final Disassembly: Schritt 14, Bild 2 von 3 3M SCP176 DLP Projector Teardown, Final Disassembly: Schritt 14, Bild 3 von 3
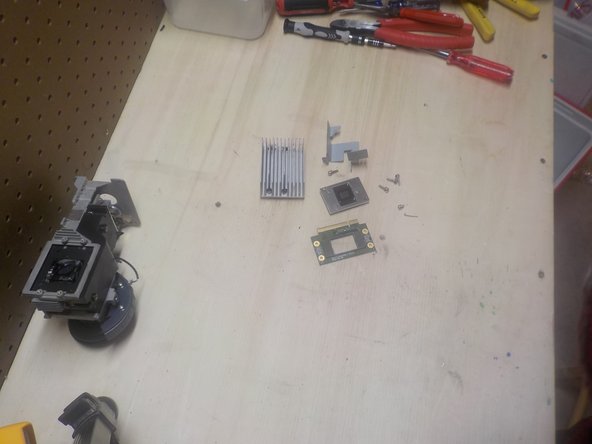
    • I won't go into too much detail here, but to disassemble the main unit, unscrew the screws, remove the parts or brackets that they're holding in, and repeat.

    • Be aware of glass and be careful not to break it. It's a mess to clean up and painful if it gets in your finger.

  15. 3M SCP176 DLP Projector Teardown, Conclusion: Schritt 15, Bild 1 von 1
    • To re-assemble, follow this guide in reverse order.

nerdbug96

Mitglied seit: 06/17/21

1.462 Reputation

8 Anleitungen geschrieben

0 Kommentare

Kommentar hinzufügen

Seitenaufrufe:

Letzte 24 Stunden: 0

Letzte 7 Tage: 3

Letzte 30 Tage: 9

Insgesamt: 661