Zum Hauptinhalt wechseln

Was du brauchst

Dieser Teardown ist keine Reparaturanleitung. Um dein Brother MFC-240C zu reparieren, verwende unsere Fehlerbehebungsseite.

  1. Brother MFC-240C Teardown, Brother MFC-240C Teardown: Schritt 1, Bild 1 von 3 Brother MFC-240C Teardown, Brother MFC-240C Teardown: Schritt 1, Bild 2 von 3 Brother MFC-240C Teardown, Brother MFC-240C Teardown: Schritt 1, Bild 3 von 3
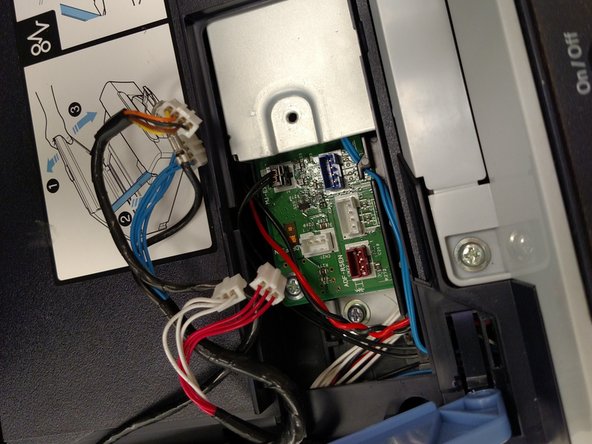
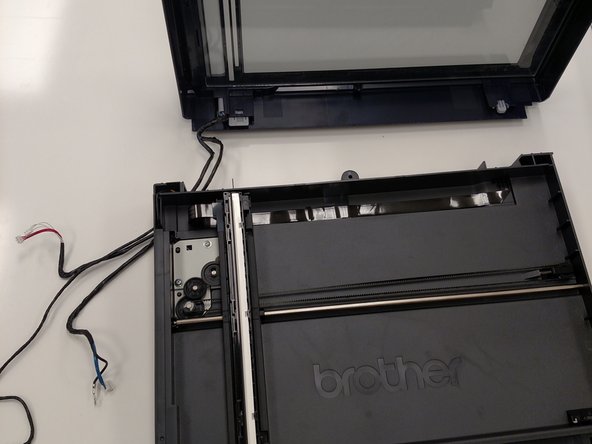
    • Completely lift up scanner portion of printer and detach visible USB chord.

  2. Brother MFC-240C Teardown: Schritt 2, Bild 1 von 3 Brother MFC-240C Teardown: Schritt 2, Bild 2 von 3 Brother MFC-240C Teardown: Schritt 2, Bild 3 von 3
    • Use flat head screwdriver to pry tabbed panel off.

  3. Brother MFC-240C Teardown: Schritt 3, Bild 1 von 3 Brother MFC-240C Teardown: Schritt 3, Bild 2 von 3 Brother MFC-240C Teardown: Schritt 3, Bild 3 von 3
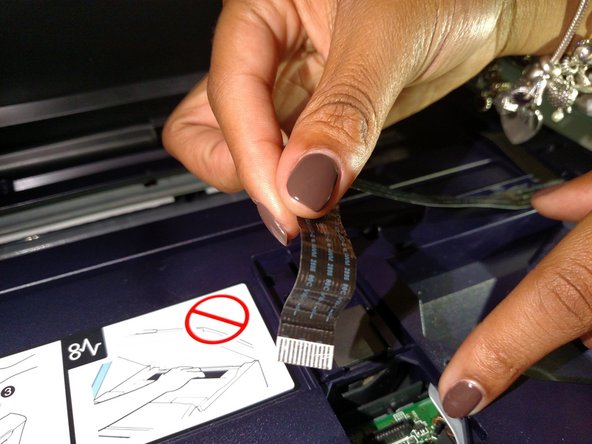
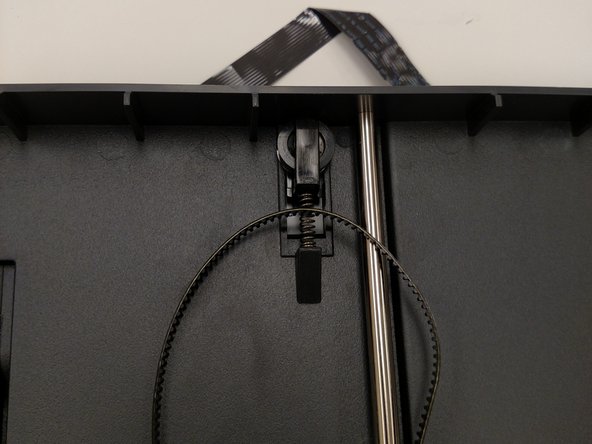
    • Gently lift up ribbon cable and pull it through holder then remove ribbon cable from its track.

  4. Brother MFC-240C Teardown: Schritt 4, Bild 1 von 3 Brother MFC-240C Teardown: Schritt 4, Bild 2 von 3 Brother MFC-240C Teardown: Schritt 4, Bild 3 von 3
    • Using a flat head screwdriver, remove the 2nd tabbed panel.

  5. Brother MFC-240C Teardown: Schritt 5, Bild 1 von 3 Brother MFC-240C Teardown: Schritt 5, Bild 2 von 3 Brother MFC-240C Teardown: Schritt 5, Bild 3 von 3
    • Remove the 4 plugs and unscrew ground-wire then place the plugs to the side.

  6. Brother MFC-240C Teardown: Schritt 6, Bild 1 von 2 Brother MFC-240C Teardown: Schritt 6, Bild 2 von 2
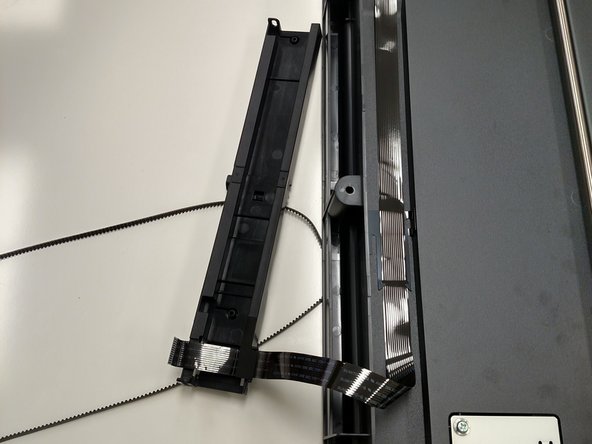
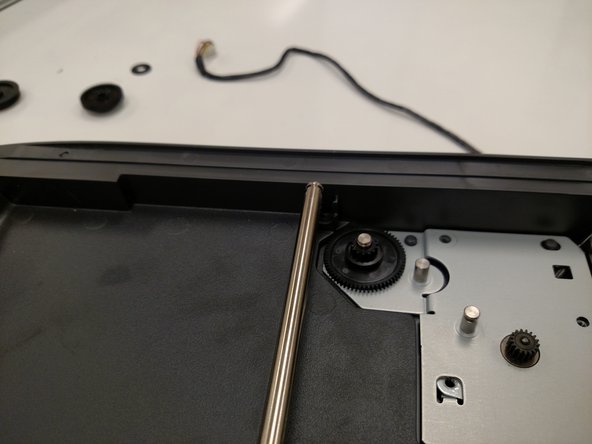
    • Using your screwdriver press down on the tab as shown. This allows the hinge to be removed from the printing body as seen in photo.

  7. Brother MFC-240C Teardown: Schritt 7, Bild 1 von 3 Brother MFC-240C Teardown: Schritt 7, Bild 2 von 3 Brother MFC-240C Teardown: Schritt 7, Bild 3 von 3
    • Extend scanner assembly completely to remove scanner portion.

  8. Brother MFC-240C Teardown: Schritt 8, Bild 1 von 2 Brother MFC-240C Teardown: Schritt 8, Bild 2 von 2
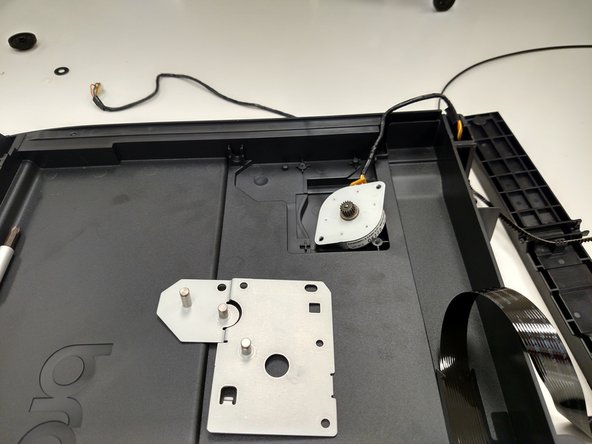
    • After removing the scanner assembly, place it on its head. Remove the hinge and 4 screws from the lower scanner portion using Philips-head screwdriver.

  9. Brother MFC-240C Teardown: Schritt 9, Bild 1 von 3 Brother MFC-240C Teardown: Schritt 9, Bild 2 von 3 Brother MFC-240C Teardown: Schritt 9, Bild 3 von 3
    • Place on opposite face, and gently pry upper and lower scanner portions apart. Remove the 4 plugs from the lower scanner portion.

  10. Brother MFC-240C Teardown: Schritt 10, Bild 1 von 3 Brother MFC-240C Teardown: Schritt 10, Bild 2 von 3 Brother MFC-240C Teardown: Schritt 10, Bild 3 von 3
    • To remove image sensor, detach the wire strip and pull it out. Remove the two springs that are under the image sensor after its removal.

  11. Brother MFC-240C Teardown: Schritt 11, Bild 1 von 3 Brother MFC-240C Teardown: Schritt 11, Bild 2 von 3 Brother MFC-240C Teardown: Schritt 11, Bild 3 von 3
    • To remove the belt, first place the image sensor to the side then press down on the gear base to loosen belt and remove from the gear.

  12. Brother MFC-240C Teardown: Schritt 12, Bild 1 von 3 Brother MFC-240C Teardown: Schritt 12, Bild 2 von 3 Brother MFC-240C Teardown: Schritt 12, Bild 3 von 3
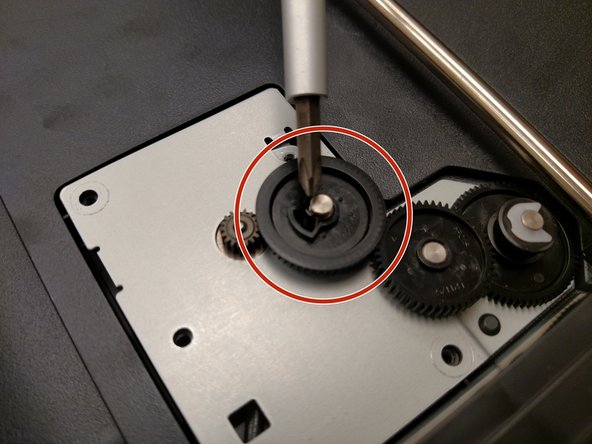
    • Remove the 3 highlighted screws. For the gear driven by the motor, press the tab in highlighted gear to remove set gear. For the gear that was attached to belt, remove C-clip to remove gear then pull the last gear off.

  13. Brother MFC-240C Teardown: Schritt 13, Bild 1 von 2 Brother MFC-240C Teardown: Schritt 13, Bild 2 von 2
    • After the removing gears, lift up on the retained end of metal rod and pull out the other side.

  14. Brother MFC-240C Teardown: Schritt 14, Bild 1 von 2 Brother MFC-240C Teardown: Schritt 14, Bild 2 von 2
    • Once the rod has been removed, remove the metal plate in which the gears were sitting then take out the motor.

Andrew Adcock

Mitglied seit: 11/10/16

131 Reputation

1 Anleitung geschrieben

2 Kommentare

This is only the scanner part? where is the printer part for teardown?

rene moret - Antwort

excellent guide, i like to know how to clean the head assembly and the the little hose that guides the ink to the head

alex jaimes - Antwort

Kommentar hinzufügen

Seitenaufrufe:

Letzte 24 Stunden: 0

Letzte 7 Tage: 14

Letzte 30 Tage: 37

Insgesamt: 4,771