Was du brauchst
-
Dieser Schritt ist noch nicht übersetzt. Hilf mit, ihn zu übersetzen!
-
The DNS-323 is a powerful NAS with Gigabit Ethernet, print server and extension via software. It can have a FTP server, DHCP, and even Bittorrent!
-
-
Dieser Schritt ist noch nicht übersetzt. Hilf mit, ihn zu übersetzen!
-
First thing first remove the frontal part by sliding it up and pulling out.
-
You will be able to see the hard disks.
-
By the way, the DNS-323 can support up to 3TB of disk space with the new firmware update. That's 1.5TB per disk! Could you imagine such capacity twenty years ago?
-
-
Dieser Schritt ist noch nicht übersetzt. Hilf mit, ihn zu übersetzen!
-
Now it's time to remove the Hard Disks.
-
At the back of the DNS, pull out the two little levers to make the hard drives come out.
-
Gently put them in a safe place until the whole unit is reassembled.
-
-
Dieser Schritt ist noch nicht übersetzt. Hilf mit, ihn zu übersetzen!
-
Remove the frontal part.
-
There are two screws; remove them with a cross screwdriver.
-
Pull off the little sheet of metal that's covering the front.
-
-
-
Dieser Schritt ist noch nicht übersetzt. Hilf mit, ihn zu übersetzen!
-
Now it's time to open the rear.
-
Locate the four rubber caps which cover the screws, then remove them with a flat screwdriver.
-
Remove the screws with a Phillips screwdriver.
-
-
Dieser Schritt ist noch nicht übersetzt. Hilf mit, ihn zu übersetzen!
-
Take off the rear and unscrew the next four screw showed in the picture.
-
-
Dieser Schritt ist noch nicht übersetzt. Hilf mit, ihn zu übersetzen!
-
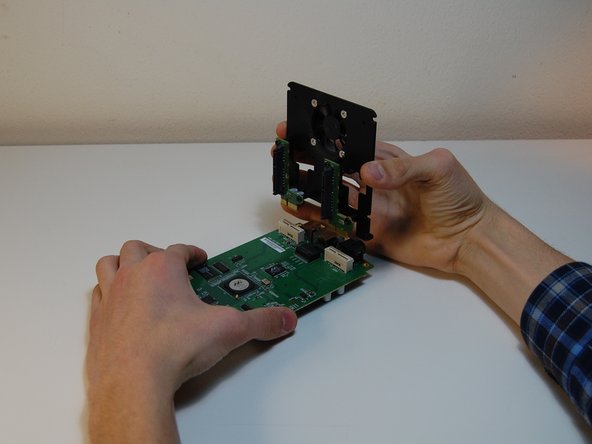
Pull the board to make it slide out of the case.
-
The board is quite simple, a little ARM-based computer mounting Linux. (is it?). The condensers are mostly for power supply, doubled because of the two HDDs.
-
Remove two more screws under the circuit.
-
-
Dieser Schritt ist noch nicht übersetzt. Hilf mit, ihn zu übersetzen!
-
Time to remove the iron part.
-
Pull out the fan wire. If you need you can use a flat screwdriver, paying attention not to break it.
-
It's time to detach the SATA adapters with the fan, so you can contemplate the main circuit.
-
-
Dieser Schritt ist noch nicht übersetzt. Hilf mit, ihn zu übersetzen!
-
Now all about the chips
-
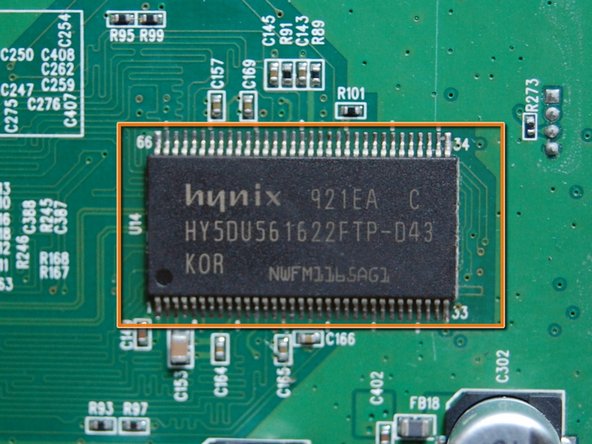
The first chip looks like a flash memory for the ROM, or the random memory for the OS, there are two of them; Labelled 921EA C HY5DU56 1622FTP-043 Made in Korea NWFM136SAG3
-
Marvell 88F8152-A2 "Feroceon(r)" Storage Networking SoC (System-on-Chip)
-
A 12 to 24 bit multiplexed D-type latch marked 94CJNQK ALVCH162260 , see more there -->
-
Eon SiliconSolution Inc EN29LV640B-90TIP 64Mbit Flash memory
-
-
Dieser Schritt ist noch nicht übersetzt. Hilf mit, ihn zu übersetzen!
-
Last chip... Marvell Alaska 88E1111 single-port GbE transceiver. Markings: 88E1111-BAB1 6MAE490301.4 0914 B2P Taiwan
-
Remove the last screws.
-
That's not useful unless you want to replace the fan; six screws keep the two SATA connectors and...
-
...four tapping screws hold the fan.
-
-
Dieser Schritt ist noch nicht übersetzt. Hilf mit, ihn zu übersetzen!
-
That'all folks! The DNS-323 is now disassembled. If you want to put things back just follow this guide backwards!
-
Guide made by Mc128k.
-


8 Kommentare
Awesome teardown G!
Very nice teardown. The pictures were very clear unlike my iPhone dock tear down. I'm making another teardown today. Keep up the good work Mc128k! :)