Zum Hauptinhalt wechseln

Dieser Teardown ist in Bearbeitung – Lade die Seite regelmäßig neu, um die neuesten Änderungen zu sehen!

Was du brauchst

  1. Dell Quietkey SK-8000 Keyboard Teardown, Remove Back Plastic Body: Schritt 1, Bild 1 von 2 Dell Quietkey SK-8000 Keyboard Teardown, Remove Back Plastic Body: Schritt 1, Bild 2 von 2
    • Flip the keyboard over to expose 8 screws.

    • Use a Phillips screwdriver to unscrew and remove each screw.

  2. Dell Quietkey SK-8000 Keyboard Teardown: Schritt 2, Bild 1 von 2 Dell Quietkey SK-8000 Keyboard Teardown: Schritt 2, Bild 2 von 2
    • Lift the keyboard upward from the bottom.

    • Do not pull too hard when lifting the base. Be careful not to destroy the wires connecting to the base of the keyboard.

    • Use a Phillips screwdriver to remove the remaining ten screws on the aluminum plate.

  3. Dell Quietkey SK-8000 Keyboard Teardown, Completion: Schritt 3, Bild 1 von 3 Dell Quietkey SK-8000 Keyboard Teardown, Completion: Schritt 3, Bild 2 von 3 Dell Quietkey SK-8000 Keyboard Teardown, Completion: Schritt 3, Bild 3 von 3
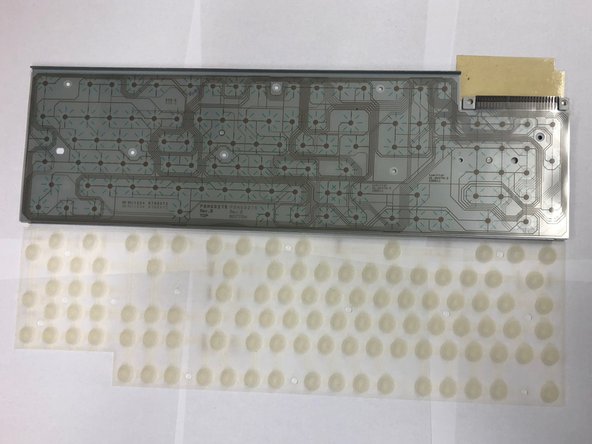
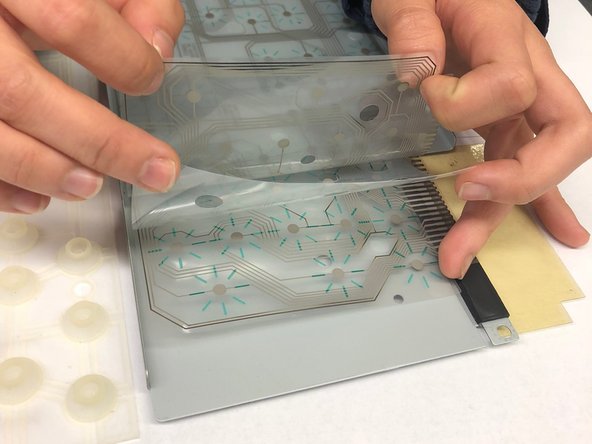
    • Carefully lift each part out. Each part should lift out very easily after the screws are removed.

  4. Dell Quietkey SK-8000 Keyboard Teardown, Siltek Chip Reveal: Schritt 4, Bild 1 von 1
    • The keyboard controller is seen to be a Siltek R4462.

Ion

Mitglied seit: 09/29/15

479 Reputation

3 Anleitungen geschrieben

Team

Cal Poly, Team 10-5, Green Fall 2015 Mitglied von Cal Poly, Team 10-5, Green Fall 2015

CPSU-GREEN-F15S10G5

3 Mitglieder

4 Anleitungen geschrieben

0 Kommentare

Kommentar hinzufügen

Seitenaufrufe:

Letzte 24 Stunden: 0

Letzte 7 Tage: 0

Letzte 30 Tage: 2

Insgesamt: 1,003