Einleitung
Dewalt 1/4" Impact driver and battery teardown.
-
-
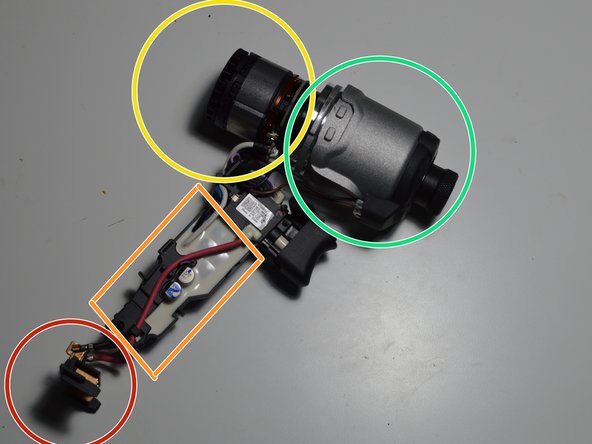
Battery Contacts
-
Potted Circuit
-
Brushless Motor
-
Impact Gearbox
-
-
-
With the Gearbox removed we are left with the motor on one side and the light ring on the other.
-
-
-
-
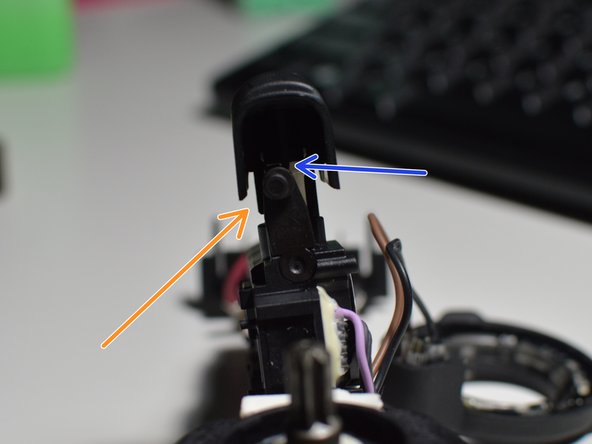
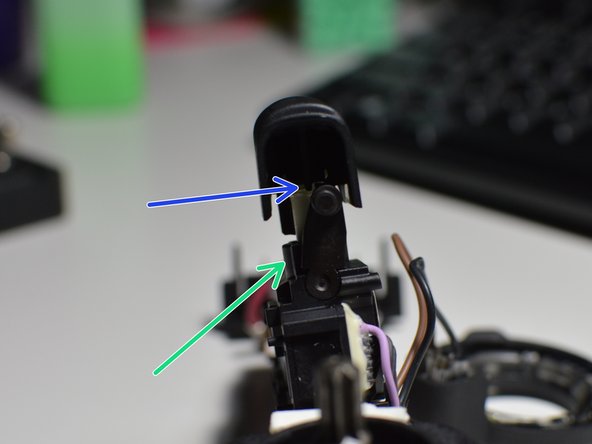
Neutral: Trigger Locked
-
Forward
-
Reverse
-
When selector is neutral this tab keeps the trigger from being depressed
-
-
-
Gear box fits into housing as a press fit with two clips. Releasing the two clips allows the gear box to be freed from its housing.
-
-
-
Planetary gear set: reduce motor speed and increase torque
-
Splines to gear box case
-
Internal teeth for planetary gear set
-
Spring (hard to see) for impact function: base spins and strikes output drive labeled with blue arrow in last picture
-
-
-
Remove four screws to open battery
-
Spring for latch to lock battery into tool
-
-
-
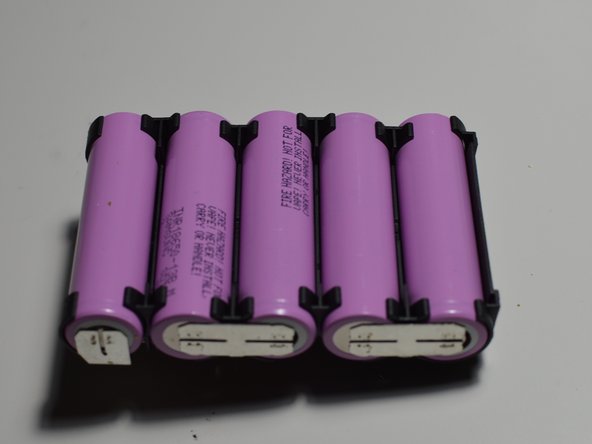
5 cells nominally 3.7V in series.
-
0V (GND)
-
12V (likely for LED light ring)
-
3.7V (not connected to tool)
-
18.5V
-
18.5V (main output)
-