Einleitung
Here at iFixit, we promote only the healthiest of lifestyles. We eat our vegetables at least once per week, and we never eat pizza two days in a row (unless it's leftovers, of course). One might go so far as to call us health freaks. We would not argue.
But we are iFixit, so of course we're sacrificing our fitness ambitions for science. We ripped into Fitbit's newest pedometer/heart rate monitor/sleep tracker wristband. What kind of a diet helped this thing fit into its tiny jacket? We're about to find out.
Check out Instagram if you're interested in getting a behind-the-scenes look at iFixit. Food, gnomes, and fancy filters not your thing? Get a healthy dose of fighting eWaste on Twitter and Facebook.
Was du brauchst
-
-
So many goodies in one package! The Fitbit Flex comes with the following:
-
Two adjustable wristbands: one large, one small
-
Wireless sync dongle
-
Charging cable
-
The Flex tracker sports some cool tech specs, too.
-
Bluetooth 4.0 syncing
-
Memory to store 30 days of data
-
5-day battery life
-
-
-
With less effort than peeling an orange, we peel the Fitbit Flex tracker out of the flexible wrist strap.
-
Although it seems like a small consideration, we appreciate how easy it is to separate the electronics from the wrist strap—the component most likely to wear out.
-
-
-
Normally we would compare the device to other similar devices. Unfortunately, we don't really have much to compare the Flex to. How about a half dollar?
-
The Flex may be slightly larger than a half dollar (though smaller than half a dollar bill), but it will cost you 200 of them.
-
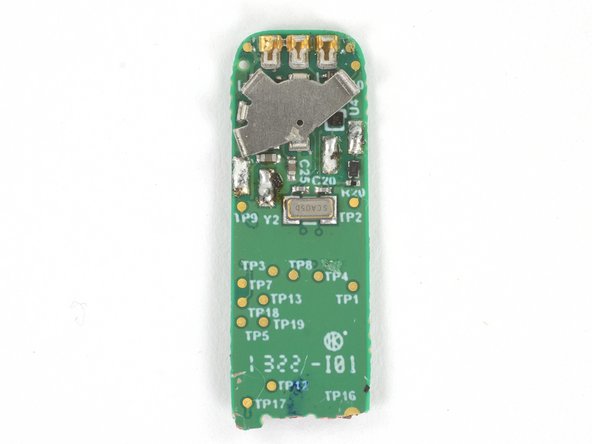
The back of the Flex reveals the model number, FB401, and provides a nice insertion arrow. It's not quite disassembly information, but it's something, right?
-
-
-
The first things we notice on the Flex are the waterproof contacts. This is good news for those who might be sweating while wearing, or tearing down, the Flex.
-
This tiny gizmo fits snugly in its USB charger when its lithium-polymer battery needs juice.
where is the small hole for a reset I can't find it. Any alternatives to the charging situation
The reset hole is on the charging adapter, not the device itself.
odaiwai -
To answer for charging purposes. The center pin is positive. And while looking at the led side of the flex and the pins towards you, the right pin is ground.
Thank you! It was very helpful to have such a precise description of the pins.
How many volts? 5v? what is the third pin for?
3 Volts worked for me, also it looks like a button battery which is typically a 3 V bat
-
-
-
With no visible point of entry, we figure the path to victory can be carved with judicious application of sharp tools.
-
-
-
-
Our first extraction: the light guides for the LEDs that pass for a display on this slim, dare we say emaciated, unit.
-
Next out is the Bluetooth antenna, used for communicating with devices and the accompanying dongle.
-
To those of you following along at home: you don't need to chop up your PCB.
-
P.S. Don't follow along at home.
-
-
-
Pulling components out through the top of the Flex worked for a little while, but it's time to get to the good stuff.
-
Using our handy rotary tool, we cut through the plastic casing of the Flex tracker.
-
Well hello there, Rico Suave! Peeling back the Flex's stylish plastic jacket reveals the components we've been looking for.
-
-
-
The main board slides right away from the contact pins. Now we can get to the juicy bits.
-
Small and encased in a thin sheet of metal tape, the battery is soldered to the motherboard. By this point, a replaceable battery is the least of our worries.
-
We're getting some good vibrations from the prominent vibrator that functions as an alarm.
-
-
-
Stuck right on to the front of the board we find a near field communications (NFC) antenna.
-
The NFC tag enables a tap launch of the Flex tracker's associated mobile app with "select NFC-enabled Android devices."
-
This little guy looks like a likely candidate for the NFC controller.
-
-
-
-
We just couldn't keep our scalpels to ourselves, so we ripped into the Flex's dongle as well.
-
Plastic aside, we get to the goodies.
-
We quickly free the dongle board from the metal casing of the USB plug.
-
-
-
Enough loligagging, let's cut to the chase. This diminutive USB board houses all of the hardware needed to communicate with the Flex — and your computer:
-
Texas Instruments CC2540F128 2.4 GHz Bluetooth Low Energy SoC
-
On the contact side:
-
BLE Antenna
-
USB connection contacts
Why a second TI BLE controller in the USB dongle when there is already a Nordic Semi BLE controller on the motherboard?
Never mind. After looking at the use cases on the Fitbit website of course one needs BLE in the *wireless* sync module. I was confusing with the USB dongle.
Nice teardown, wish you had ID'd other components on the motherboard.
What an awesome teardown, it's a shame though that they make this thing basically disposable.....at 99$ + tax....I guess I can't complain too bad though, it did last a little over 1 year ;) And yes, I showered, and went swimming/diving in an 8 foot deep pool with mine on many ocassions....
My "first" Flex only lasted about 4 months though.....would anyone be interested in tearing these now "broken" units down? LOL....it really shocked me, that Fitbit did NOT want the old defective"Flex" tracker back, when they sent me the replacement.....since this is really not repairable at all ;) They simply told me to drop it off at a local "electronics recycler" (luckily that would be my local dump!) but yea, just chiming in. I enjoyed this ;) Came here to see if there's a way of "fixing" it lol.....but no such luck haha
The batteries tend to not hold much charge around the time the warranty runs out. If there was somewhere you could get a replacement, a few minutes with a hot air gun to take it apart and solder a new battery in would get it working again.
-
-
-
Fitbit Flex Repairability Score: 2 out of 10 (10 is easiest to repair)
-
Solid waterproofing, no moving parts, and lightweight construction make the Flex a very durable device, with the potential to last a long time.
-
The wrist strap is similarly constructed and can be easily replaced.
-
It's impossible to open the device without destroying it or at least compromising the waterproofing, making internal repairs infeasible.
-
The Flex's inaccessible (and non-replaceable) battery limits the life of the device.
I domt know about lasting a lifetime......I had one replaced 8 months into warranty.....no problem. THe replacement died about 6 months later.......they wouldn't replace that one though, only offered me a discount code towards my next purchase.....but yea, I actually came here wondering if there was a way to replace the battery haha Cause yea mine just stopped charging
-


24 Kommentare
i also lost the cable charger, anybody know the 3 pin (positive negative) for fitbit. Any universal charger I can use?
look at the enlarged image... Left Pin is connected to the housing of the vibrator - this tells me its GND or Neg, center pin has a much thinner track on the PCB i would call it Data, right pin therefore looks like VCC+.
Sarah -
i also lost the cable charger, anybody know the 3 pin (positive negative) for fitbit. Any universal charger I can use and how?
Have you found out? Wish ifixit tore down the motherboard.
Peter -
The wifey lost her fitbit flex charger and there was no time to order a new one before ourtrip. For those of you wondering about the pinouts for the flex below are two pictures of how I managed to charge her using a couple of paperclips and a chopped USB cable.
Super useful pictures. Thank you !
Thank you! Very helpful pictures.
Does a fitbit work by radio frequency waves like a cell phone does? How does this sync with your cell phone?
it uses Bluetooth, which does in fact use radio frequency of 2.4 GHz,. However, unlike regular cell phones which also uses 2.4 GHz Bluetooth uses a radio technology called frequency-hopping spread spectrum.
dna -
Just so you all are away you can dissemble the flex without fully destroying its casing, make a small but deep incision with a sharp blade around the led display cover just enough to break the adhesive used to seal the component from there you can gently but firmly pull the board/speaker/antenna from the casing leaving behind an empty shell. Mine recently stopped charging so I decided to have a bit of fun before I seen this teardown. Needless to say a little superglue with a new battery and I've got a functional fitbit flex again. Hard part will be finding a replacement battery....
Hi, could you tell me what kind of battery is used? Due to the glue attaching the battery to the board the marking on the lipo battery was not readable anymore.
Jochen -
That battery looks like it could be useful for mini-planes etc, ie using a single pager motor.
I have actually tried using the one from Bluetooth headsets and this does work so perhaps old broken Fitbits could be a source of replacement parts?
Have you been able to source where that battery is available? I need many small batteries like that and cant find one anywhere.
Did anyone ever find a source for replacement battery?
Duc Dinh -
Im not sure why you guys sawed it apart, the cap by the led is held in place with something similar to hot glue, a few seconds in front of a hot air source and it comes out pretty easily, the circuit pack is also held in place with some sort of hot glue. My wife wore hers into the ocean and it quit, a soak in rubbing alcohol and drying it out restored it to working order.
I can totally confirm your statement. After forgetting to take the flex out when swimming it was dead.
Working with a hair dryer and some tweezers I was able to take the inside part of the flex out. Then I have rinsed the block with normal alcohol and then dried it with the hair dryer again. After that it came back to life!
Just a word of caution after taking the cover out keep working with the hair dryer to loose the circuit from the container otherwise it can happen like it happen to me and you may destroy the BT antenna.
Hope this helps!
The tiny part on my Fitbit flex that you push to see the time, steps,.etc. fell off, can it be replaced?
My plastic face is cracked can it be replaced
Terry M
The figures printed on the battery the dimensions as far as I can tell. The second line probably indicates capacity/ charging rates?…
031012
D420[can’t read it]
3mm x 10mm x 12mm
Possibly 4v, 20mA? I think it is 3.7v so I wonder why it has the ‘D4’ unless that is markings specifically for Fitbit.
There are similar looking batteries appearing on Ebay etc and a few data sheets around…
http://www.all-battery.com/datasheet/305... (the first page lists the 031012 number, also 4.2v is the charge voltage listed, so maybe that explains the ‘D42’).
https://www.ebay.com/itm/5-pcs-3-7V-30-m...
Other ‘headset’ batteries use a similar naming scheme, e.g. 041430 = 4 x 14 x 30mm
That seems like a viable solution to replace the battery. I’ll post back if I get around to doing it with any success.