Zum Hauptinhalt wechseln

Dieser Teardown ist in Bearbeitung – Lade die Seite regelmäßig neu, um die neuesten Änderungen zu sehen!

Was du brauchst

  1. GV30 Teardown, GV30 Teardown: Schritt 1, Bild 1 von 1
    • Unscrew the screws on the back side

  2. GV30 Teardown: Schritt 2, Bild 1 von 2 GV30 Teardown: Schritt 2, Bild 2 von 2
    • Move the microusb port to release the circuit

  3. GV30 Teardown: Schritt 3, Bild 1 von 3 GV30 Teardown: Schritt 3, Bild 2 von 3 GV30 Teardown: Schritt 3, Bild 3 von 3
    • The cables don't consent to separate the parts

  4. GV30 Teardown: Schritt 4, Bild 1 von 3 GV30 Teardown: Schritt 4, Bild 2 von 3 GV30 Teardown: Schritt 4, Bild 3 von 3
    • Neither the yellow flat cables from the screen.

  5. GV30 Teardown, Remove the speaker: Schritt 5, Bild 1 von 3 GV30 Teardown, Remove the speaker: Schritt 5, Bild 2 von 3 GV30 Teardown, Remove the speaker: Schritt 5, Bild 3 von 3
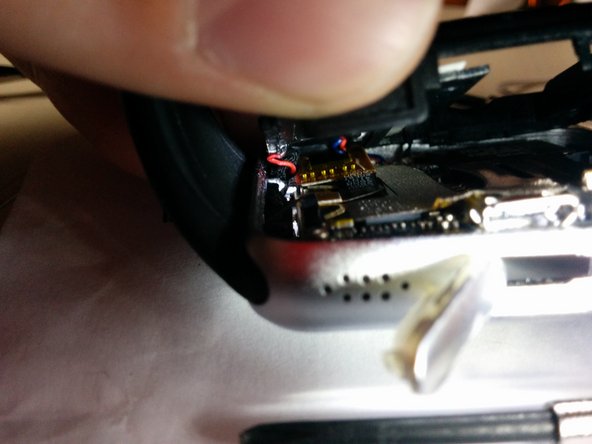
    • Levering the speaker with something sharp from its location, it's glued to the base and I damaged it

  6. GV30 Teardown, Remove the black tape: Schritt 6, Bild 1 von 3 GV30 Teardown, Remove the black tape: Schritt 6, Bild 2 von 3 GV30 Teardown, Remove the black tape: Schritt 6, Bild 3 von 3
    • Remove the black/yellow tape from the plastic frame with something

  7. GV30 Teardown, Now only the red&black cables are connected: Schritt 7, Bild 1 von 2 GV30 Teardown, Now only the red&black cables are connected: Schritt 7, Bild 2 von 2
    • Lift the plastic frame to view the circuit

    • The gray wire cloth used for cooling or shielding blocks the view of the chip below it.l, so remove it

  8. GV30 Teardown, Look at the elements of the circuit: Schritt 8, Bild 1 von 3 GV30 Teardown, Look at the elements of the circuit: Schritt 8, Bild 2 von 3 GV30 Teardown, Look at the elements of the circuit: Schritt 8, Bild 3 von 3
    • Mediatek mt6260a processor

    • ??

  9. GV30 Teardown, Have a look under the circuit at the flex or flat cables: Schritt 9, Bild 1 von 1
    • There are 2 cables :

    • 1

    • 2

  10. GV30 Teardown, Cable 1: Schritt 10, Bild 1 von 3 GV30 Teardown, Cable 1: Schritt 10, Bild 2 von 3 GV30 Teardown, Cable 1: Schritt 10, Bild 3 von 3
    • Seems to be soldered to the board, applying a slight pressure nothing happens. Maybe there's some glue

  11. GV30 Teardown, Cable 2: Schritt 11, Bild 1 von 3 GV30 Teardown, Cable 2: Schritt 11, Bild 2 von 3 GV30 Teardown, Cable 2: Schritt 11, Bild 3 von 3
    • This cable seems to have the locking bar, but trying to move it sliding or leveraging ir with a screwdriver it doesn't move. How can I remove it ?

  12. GV30 Teardown, Cable 3: Schritt 12, Bild 1 von 3 GV30 Teardown, Cable 3: Schritt 12, Bild 2 von 3 GV30 Teardown, Cable 3: Schritt 12, Bild 3 von 3
    • Another cable having a locking bar. I tried to move this cable too and having more space I forced it more than the previous one but nothing moved.

  13. GV30 Teardown, Another cable going into the strap: Schritt 13, Bild 1 von 3 GV30 Teardown, Another cable going into the strap: Schritt 13, Bild 2 von 3 GV30 Teardown, Another cable going into the strap: Schritt 13, Bild 3 von 3
    • I don't know what cable is it , the watch don't measures heartbeats but only steps and monitores sleep. However this cable is soldered and i don't want to desoldering it if not necessary

  14. GV30 Teardown, The last thing i notice is this chip: Schritt 14, Bild 1 von 3 GV30 Teardown, The last thing i notice is this chip: Schritt 14, Bild 2 von 3 GV30 Teardown, The last thing i notice is this chip: Schritt 14, Bild 3 von 3
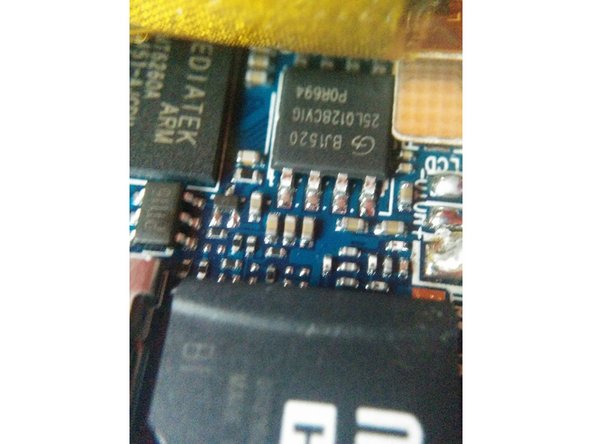
    • The chip is connected with the third cable

  15. GV30 Teardown, See the bt_ant near the on/off button: Schritt 15, Bild 1 von 2 GV30 Teardown, See the bt_ant near the on/off button: Schritt 15, Bild 2 von 2
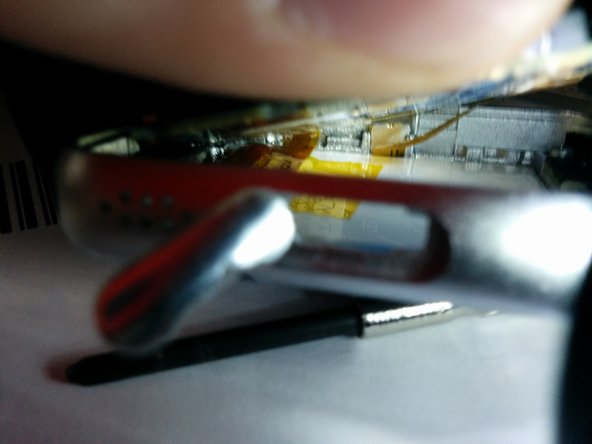
    • I had to remove the micro sd to see it, also if i described the same antenna in 6th step whitout realizing. It seems to have only 1 connection to the board and seems to be 1 thin copper plate all united. Unfortunately i ripped the antenna in the 2nd photo ! Now i need to replace the antenna with another.

  16. GV30 Teardown, The antenna i have is a simple wifi's one (i think: Schritt 16, Bild 1 von 3 GV30 Teardown, The antenna i have is a simple wifi's one (i think: Schritt 16, Bild 2 von 3 GV30 Teardown, The antenna i have is a simple wifi's one (i think: Schritt 16, Bild 3 von 3
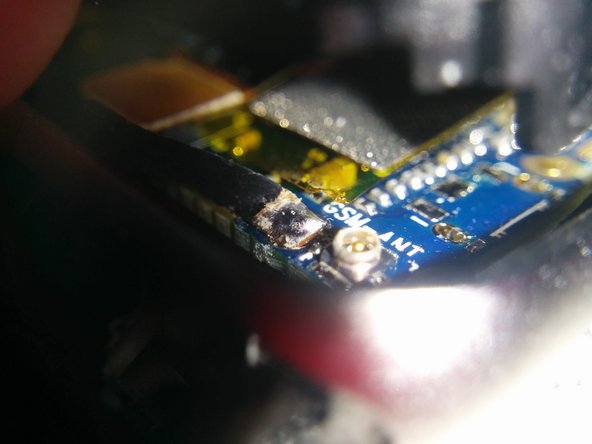
    • The problem is that this antenna have 2 connections while the previous had only 1 ! I don't know what are these connections. Maybe one connects simply to ground, but i don't know. I think it's a SMA connector. I expect if i peel the cable to get 2 cables.

  17. GV30 Teardown, Completed !: Schritt 17, Bild 1 von 3 GV30 Teardown, Completed !: Schritt 17, Bild 2 von 3 GV30 Teardown, Completed !: Schritt 17, Bild 3 von 3
    • The cable is about 2cm long and wide 2mm , i not measured it but works very well. I don'k know even if it touches the contact or is only near it.

    • If i connect another piece of wire on the antenna the range of the bluetooth remain practically the same. Maybe to increase further the range, i need a determinate-lenght wire , for example with a online calculator the lenght of the ideal antenna results a quarter of wave of 2,450 ghz but i don't know how much is important

Essenza Bocciolo

Mitglied seit: 03/17/16

43 Reputation

1 Anleitung geschrieben

Ein Kommentar

My strap got deattached by kids any remedy ??

nikita Gupta - Antwort

Kommentar hinzufügen

Seitenaufrufe:

Letzte 24 Stunden: 0

Letzte 7 Tage: 0

Letzte 30 Tage: 4

Insgesamt: 1,498