Einleitung
Das ist mein Teardown des Game Boy Color.
Was du brauchst
-
-
Nimm den Game Boy und schaue, wie die Bauteile im Spritzgussverfahren hergestellt worden sind. Das erste, das zu tun ist, ist, die beiden Bauteile voneinander zu separieren.
-
-
-
Entferne das Akkugehäuse des Game Boys und nimm alle Akkus heraus, die noch drin liegen. Jetzt gibt es nur noch die Gehäuserückseite.
-
-
-
Die zwei Schrauben auf der Oberseite der Gehäuserückseite können entfernt werden, indem du einen Y Dreikant-Schraubendreher benutzt.
-
-
-
Die anderen kleinen Schrauben in der Gehäuserückseite sind sehr schwer zu erreichen. Um sie herauszubekommen, musst du sie herausschrauben. Sei vorsichtig den Gameboy nicht zu beschädigen, weil dieser Vorgang die Gehäuserückseite zerstören kann.
-
Du kannst einen Dreikant-Bit anstattdessen verwenden.
I don't really get why you will drill out the screws! They are special screws, and ofcourse there's also a screwdriver for them, called Tri-wing - used in many parts, including Nintendo and Apple. Look it up at Wikipedia: http://en.wikipedia.org/wiki/Tri-Wing
I've bought one myself on eBay - that's better than screwing your Game Boy up ;)
Buuuh!!! Why are you using an electrical screwdriver!
That's cheating man!
Do not use a drill or phillips head screwdriver, use a tri-wing screwdriver. This step should be edited to reflect the proper procedure.
-
-
-
Die zwei Gehäuseteile sind ineinandergeklickt, also wirst du etwas zum Hebeln benutzen müssen, wenn du sie auseinanderklicken willst.
-
-
-
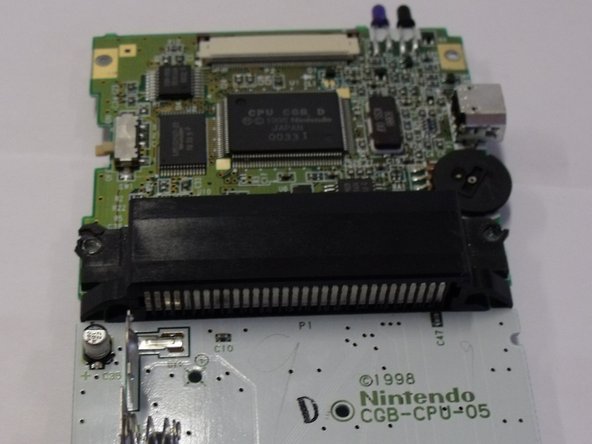
Um die Hauptplatine zu entfernen musst du nur die vier Schrauben auf der Rückseite entfernen. Wenn du das getan hast, kannst du die Platine aus der Kunststoffhülle herausnehmen.
-
-
-
-
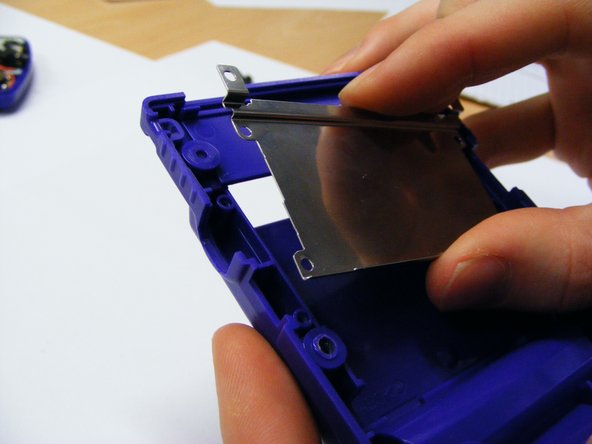
Die Metallkassette auf dem rückseitigen Kunststoffgehäuse kann einfach entfernt werden, indem du einen kleinen Schraubendreher in allen vier Ecken verwendest. Es sollte danach direkt herausspringen.
What does the metal cassette holder do? Does it have any specific purpose?
-
-
-
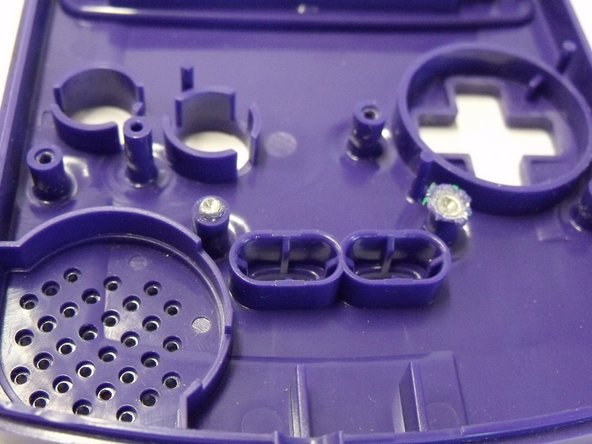
Der kleine Kunststoffschalter sollte aus dem Kunststoffgehäuse herausfallen. Stelle sicher, dass du ihn nicht verlierst, wenn du den Game Boy öffnest.
-
-
-
Du kannst den Schaum einfach von der Rückseite des Bildschirmes, indem du den Klebstoff abziehst, entfernen. Versuche, den Schaum nicht zu zerreißen, weil das Dinge hinterher erschweren würde.
-
-
-
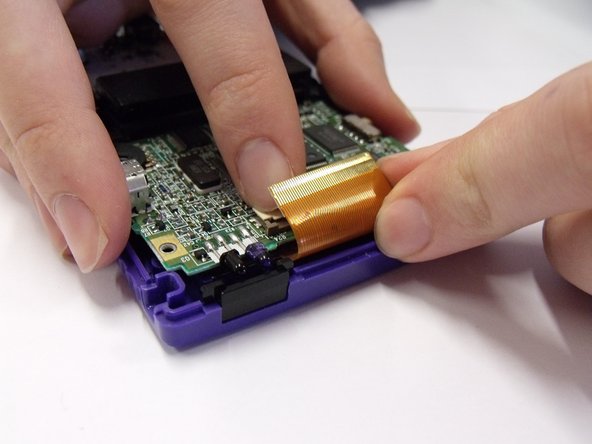
Wenn der Schaum weg ist, kannst du die Hauptverbindung des Bildschirmes abziehen. Das ist der braune Teil der Kunststofffolie. Sie rutscht einfach heraus.
-
-
-
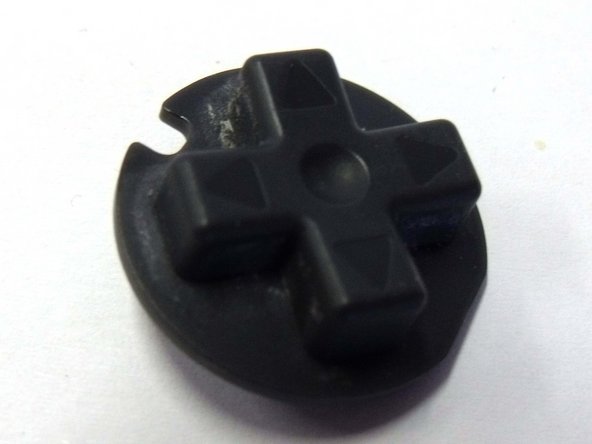
Die Gummiknöpfe können einfach abgezogen werden. Sie sind nicht befestigt, benötigen aber ein wenig Zug.
-
-
-
Die ganzen anderen Knöpfe sollten einfach herausfallen. Sei vorsichtig, dass du sie nicht fallen lässt oder verlierst, weil sie definitiv herauskommen werden.
-
-
-
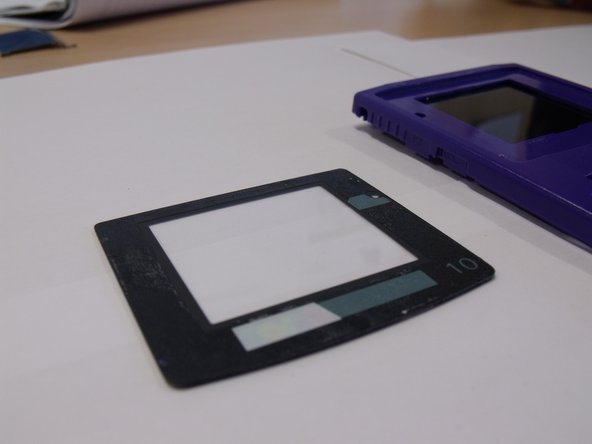
Ziehe den Bildschirm aus dem Game Boy heraus und nehme die vordere Kunststoffverkleidung ab und lege sie zur Seite.
-
-
-
Ziehe die Schutzfolie vom LCD Bildschirm ab und entferne den LCD Bildschirm aus dem Gehäuse.
-
-
-
Das Metall am Bildschirm kann abgezogen werden, indem man mit den Fingern unter das Metall (hier mit einem Klebeband markiert) fasst.
-
-
-
Manche Bauteile der Platine können zusätzlich entfernt und näher in Augenschein genommen werden, wie z.B. die Lautsprecher und die LED Lichter des Gerätes.
I wish I could take a picture of my situation I've succeeded in pulling out the back cover because I need to clean my corroded battery points. I see only 2 heads on the board what do I do?
-


Besonderer Dank geht an diese Übersetzer:innen:
100%
Steffen hilft uns, die Welt in Ordnung zu bringen! Wie kann ich mithelfen?
Hier starten ›
9 Kommentare
That feel when everything turns out perfectly. ^.^ Thanks a lot for the guide! I was able to switch out a few broken/worn out bits, and now it's working like new! Super hyped! Thank you so much!
(Also, the screws that are mentioned needing a drill are regular phillips screws and, are indeed incredibly tough to get out without a drill. Though, the ones in my Gameboy were somehow already stripped pretty badly.)
DEFINITELY do NOT need to use a drill to open a Gameboy Color!
Exactly! I've watched plenty of repair and restoration videos regarding Gameboy Color systems and NONE of them use a drill
The 6 screws to open the case ARE NOT PHILLIPS! They are Tri-Wing, a Y shaped driver, not + shaped. If you use a phillips head screwdriver, you will strip them quickly, and then you actually will have to drill them out. Use the right tool every time!
I had to open it up once because I forgot to connect the ribbon, but thanks for the guide! It was quite helpful.
Love how this model’s screen comes out relatively easy.
Will this fix my connection issues i was able to trade multiple times to get certain pokemon i stoped for like. Month i came back to do more trading keeps saying my friend is not ready and i have to try to connect atleast 50 times before we can go in the room so we go in and when we try to trade it says connection timed out ????