Zum Hauptinhalt wechseln

Jolla C or Intex Aqua Fish Teardown

Was du brauchst

  1. Jolla C or Intex Aqua Fish Teardown, Phone & Back Cover: Schritt 1, Bild 1 von 2 Jolla C or Intex Aqua Fish Teardown, Phone & Back Cover: Schritt 1, Bild 2 von 2
    • Remove the back cover, starting at the bottom right corner with your nail or a prying tool

  2. Jolla C or Intex Aqua Fish Teardown, Battery, Sims & SD: Schritt 2, Bild 1 von 2 Jolla C or Intex Aqua Fish Teardown, Battery, Sims & SD: Schritt 2, Bild 2 von 2
    • Remove the battery

    • Remove all sim-cards

    • Remove the microSD-card

  3. Jolla C or Intex Aqua Fish Teardown, Middle Cover: Schritt 3, Bild 1 von 3 Jolla C or Intex Aqua Fish Teardown, Middle Cover: Schritt 3, Bild 2 von 3 Jolla C or Intex Aqua Fish Teardown, Middle Cover: Schritt 3, Bild 3 von 3
    • Remove all 14 cross-head screws

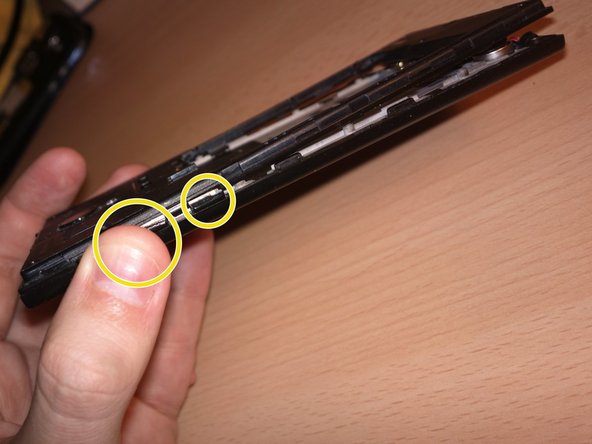
    • Use a prying tool to separate the middle cover from the phone, working from the bottom slowly up to the top

    • Watch out for the power and volume buttons, which probably fall out of the device.

  4. Jolla C or Intex Aqua Fish Teardown, Top Circuit Board: Schritt 4, Bild 1 von 3 Jolla C or Intex Aqua Fish Teardown, Top Circuit Board: Schritt 4, Bild 2 von 3 Jolla C or Intex Aqua Fish Teardown, Top Circuit Board: Schritt 4, Bild 3 von 3
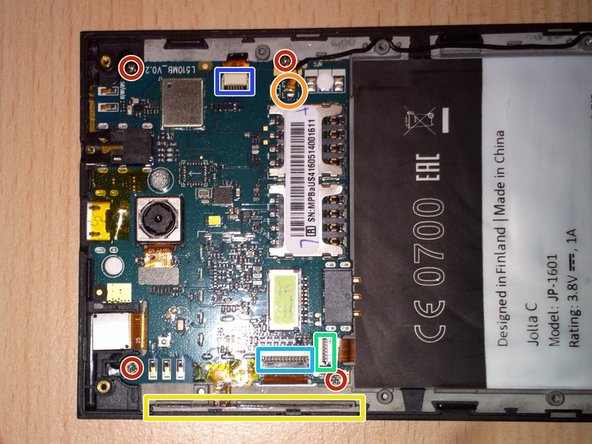
    • Remove all cross-head screws

    • Remove the antenna wire from the circuit board

    • Pry loose the power & volume button part at the side (it is stuck to the phone with sticky tape) and pull it out

    • Pull out the connector for the bottom cuircuit board

    • Pull out the screen connector

    • Pry loose the connector for the proximity sensor etc

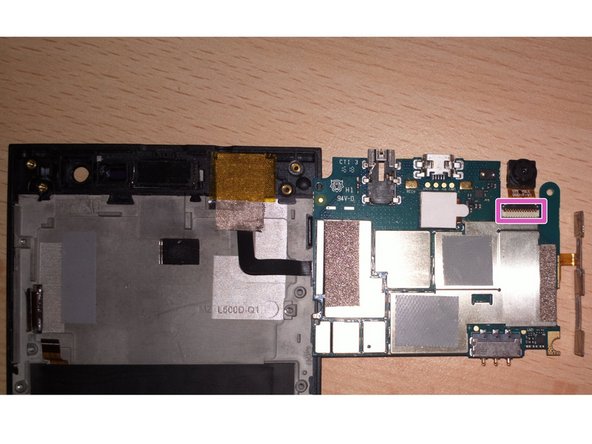
    • Now you can remove the top circuit board

    • Remove the main and front camera connectors

  5. Jolla C or Intex Aqua Fish Teardown, Bottom Cuircuit Board: Schritt 5, Bild 1 von 2 Jolla C or Intex Aqua Fish Teardown, Bottom Cuircuit Board: Schritt 5, Bild 2 von 2
    • Remove the antenna cable

    • Remove the speaker and vibration motor from the phone

    • Both items are stuck to the phone and the cables are very fragile. I broke one of the connections when removing the speaker for a second time, as seen in the second picture. It is possible to solder it back on

Abschluss

To reassemble your device, follow these instructions in reverse order.

Ein:e weitere:r Nutzer:in hat diese Anleitung absolviert.

Jos Wagenmakers

Mitglied seit: 03/20/17

131 Reputation

1 Anleitung geschrieben

0 Kommentare

Kommentar hinzufügen

Seitenaufrufe:

Letzte 24 Stunden: 0

Letzte 7 Tage: 0

Letzte 30 Tage: 2

Insgesamt: 1,299