Zum Hauptinhalt wechseln

Was du brauchst

Dieser Teardown ist keine Reparaturanleitung. Um dein LG GW300 zu reparieren, verwende unsere Fehlerbehebungsseite.

  1. LG GW300 Teardown, LG GW300 Teardown: Schritt 1, Bild 1 von 1
    • Found this phone lying around, so decided to make a teardown of it!

  2. LG GW300 Teardown: Schritt 2, Bild 1 von 1
    • First, remove the backplate by pushing the button at the top of the back of the phone.

  3. LG GW300 Teardown: Schritt 3, Bild 1 von 3 LG GW300 Teardown: Schritt 3, Bild 2 von 3 LG GW300 Teardown: Schritt 3, Bild 3 von 3
    • From here there are six screws we have to remove.

    • But first... lemme take a battery out!

  4. LG GW300 Teardown: Schritt 4, Bild 1 von 1
    • Get a thin opening tool and slide it around the bezel of the device.

    • Make sure you put it in the correct place, behind the silver bezel of the front of the phone!

  5. LG GW300 Teardown: Schritt 5, Bild 1 von 1
    • The front and back of the device should separate.

    • Two buttons should come off after you have removed the back.

    • This is the rear speaker.

  6. LG GW300 Teardown: Schritt 6, Bild 1 von 3 LG GW300 Teardown: Schritt 6, Bild 2 von 3 LG GW300 Teardown: Schritt 6, Bild 3 von 3
    • Both of these buttons need to be pried from the front casing to allow the mainboard to come away from the front housing.

    • These buttons are soldered to the mainboard so make sure you don't break them!

    • The front speaker also has to be pried from the front housing.

  7. LG GW300 Teardown: Schritt 7, Bild 1 von 2 LG GW300 Teardown: Schritt 7, Bild 2 von 2
    • The main board can then be lifted from the front housing.

  8. LG GW300 Teardown: Schritt 8, Bild 1 von 1
    • The buttons on the front housing can then be pushed out through the back of the housing.

  9. LG GW300 Teardown: Schritt 9, Bild 1 von 2 LG GW300 Teardown: Schritt 9, Bild 2 von 2
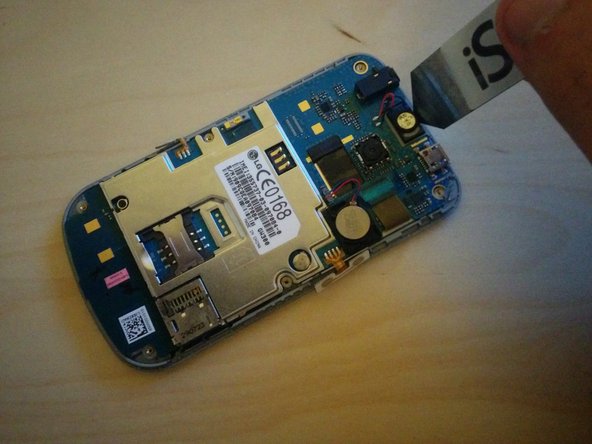
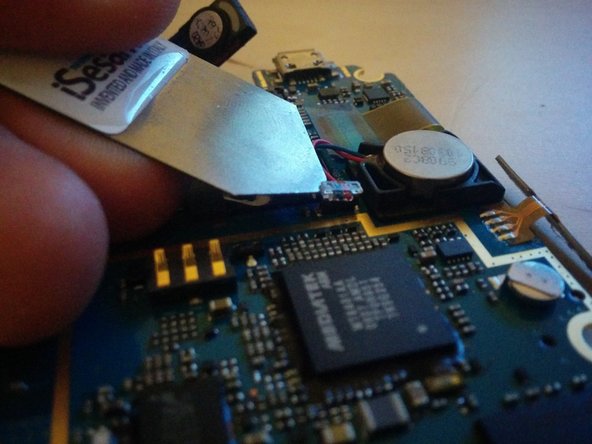
    • The EMI shield can be removed by unclipping the clips on the side of the device.

  10. LG GW300 Teardown: Schritt 10, Bild 1 von 2 LG GW300 Teardown: Schritt 10, Bild 2 von 2
    • In the centre of the picture is the vibration module. It can be unclipped to remove it.

  11. LG GW300 Teardown: Schritt 11, Bild 1 von 3 LG GW300 Teardown: Schritt 11, Bild 2 von 3 LG GW300 Teardown: Schritt 11, Bild 3 von 3
    • The LCD ribbon cable and connector are under a plastic sheet that has to be removed.

    • The ribbon cable can then be take out of the connector

    • The ribbon connector is very fragile, so be careful when lifting the lever.

  12. LG GW300 Teardown: Schritt 12, Bild 1 von 2 LG GW300 Teardown: Schritt 12, Bild 2 von 2
    • Use a thin opening tool to separate the LCD from the main board.

    • Do this slowly and carefully as the screen can easily crack or bleed.

  13. LG GW300 Teardown: Schritt 13, Bild 1 von 1
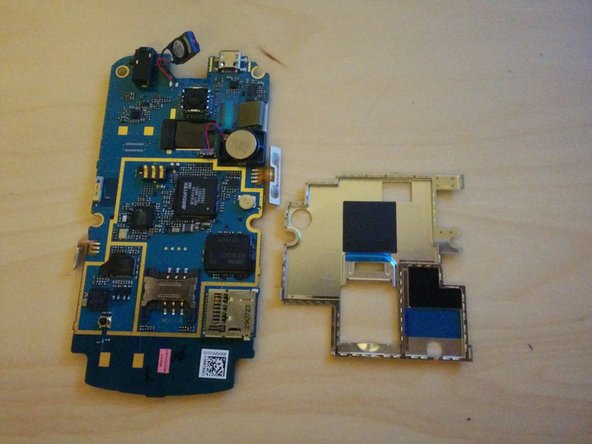
    • Chip inspection time!

    • Mediatek ARM MT6A01AA

    • Samsung K5D1H12ACC-A075 NAND flash memory

    • Skyworks Solutions SKY77524-15

    • CSR 51E130A14U

James

Mitglied seit: 09/30/12

185 Reputation

1 Anleitung geschrieben

Ein Kommentar

Now if only I could find the datasheet/pinout for the "Mediatek ARM MT6A01AA"...

River Saxton - Antwort

Kommentar hinzufügen

Seitenaufrufe:

Letzte 24 Stunden: 0

Letzte 7 Tage: 1

Letzte 30 Tage: 2

Insgesamt: 1,379