Was du brauchst
-
-
Die Circle-Kamera hat keine äußeren Schrauben. Der erste Schritt, um hineinzukommen, erfordert einen Plastikheber: Der dunkle Ring ist mit doppeltem Klebeband befestigt.
-
Hinweis: Der Ring besteht aus infrarot-transparentem Kunststoff und enthält Linsen zur Ausrichtung der Nachtsicht-LEDs.
-
-
-
Von nun an geht es nur noch um Schrauben, und zwar viele. Erwägen Sie die Verwendung von Beuteln, um Gruppen von Schrauben für den Wiederzusammenbau zusammenzuhalten.
-
Lösen Sie die vier eingekreisten Schrauben, um den ersten Ring zu entfernen.
-
-
-
Entfernen Sie den nächsten Ring, indem Sie die Schrauben an den eingekreisten Stellen herausdrehen.
-
-
-
-
Entfernen Sie schließlich die letzte Gruppe von Schrauben, um Zugang zu den inneren Teilen des Gehäuses zu erhalten.
-
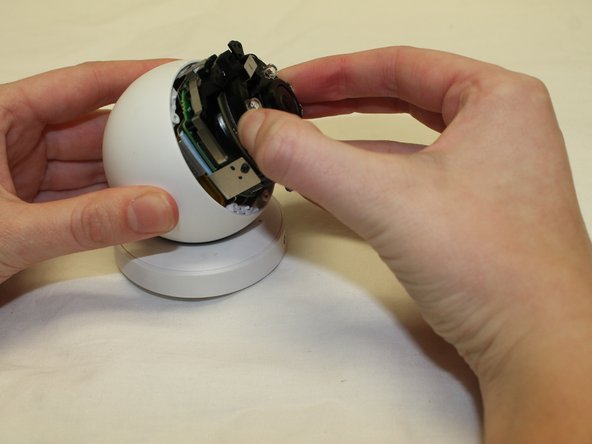
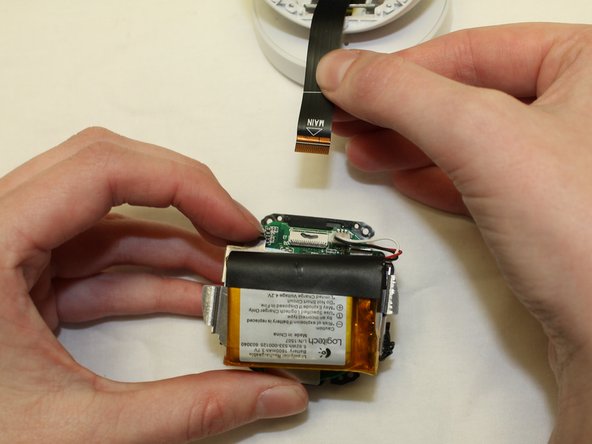
Ziehen Sie das Objektiv/die Batterie vorsichtig heraus - es ist an einem flexiblen Flachbandkabel befestigt, das reißen kann, seien Sie also besonders vorsichtig.
-
-
-
Achten Sie darauf, das flexible Kabel nicht zu beschädigen. Klappen Sie am Anschluss den schwarzen Kunststoffnocken hoch, um das Kabel zu lösen. Sie können dann die Kamera-/Batterieeinheit von der Kugel abnehmen.
-
Beachten Sie den umfangreichen Einsatz von Kühlkörpern und Wärmeleitmaterialien (TIM). Diese Kamera ist thermisch sehr gut ausbalanciert.
-
-
-
Was ist das? Unter einer weichen Stelle im Sockel befindet sich ein versteckter USB-Anschluss, der vermutlich zum Laden der Firmware in der Produktion verwendet wird.
-
Um den Sockel zu demontieren, suchen Sie die 3 Schrauben unter der weichen Stelle, stechen Sie sie mit einem Schraubenzieher durch und entfernen Sie die Schrauben. Danach können beide Teile leicht getrennt werden.
-
-
-
Der äußere Ring hat Linsen zur Fokussierung des IR-Lichts und eine Öffnung für das Kameraobjektiv.
-
Die sechs Infrarot-LEDs befinden sich auf einer dicken Platine mit einem Aluminium-Wärmespreizer und einer Verbindung zu zwei massiven Metallblöcken, die an der Sensorplatine befestigt sind.
-
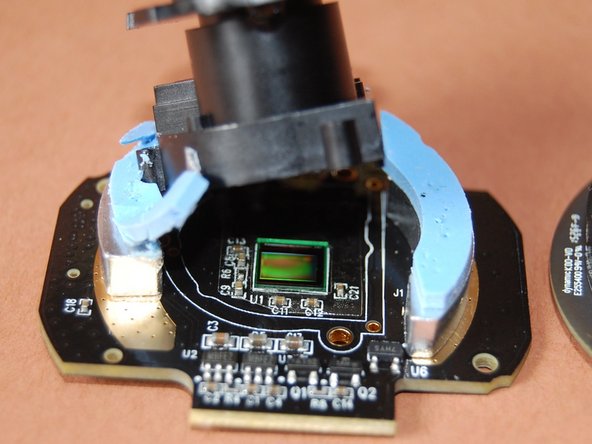
Das Objektiv wird manuell fokussiert und mit etwas gesichert, das wie Heißkleber aussieht (dies kann im Laufe der Zeit zu Fokusproblemen führen).
-
Es gibt nur ein einziges Filterglas, das für den Tagmodus umgedreht wird (höherwertige Kameras verwenden getrennte Gläser für Tag- und Nachtmodus).
-
Der optische Sensor befindet sich am unteren Ende des Stapels. Er ist von einem durchsichtigen Plastikaufkleber umgeben (wenn Sie wissen, warum, schreiben Sie in die Kommentare!).
-


Besonderer Dank geht an diese Übersetzer:innen:
50%
Martin Lenz hilft uns, die Welt in Ordnung zu bringen! Wie kann ich mithelfen?
Hier starten ›

25 Kommentare
any ideas where get a replacement ribbon cable? I dropped the camera when opening the box and the base and camera separated (ribbon cable tore). I was able to disassemble with this guide, but now I need a new cable and Logitech is no help (I asked).
Thanks
David
We just had it fall off the table it was on and it did exactly the same thing... the base and camera separated (ribbon cable tore).
I emailed the manufacturer of the cable to see if they can help, will let you know if they answer.
any word from them?
Nothing yet, I'll have to send another email.
That company sent me to Logitech, which was a dead end. So looks like we have some spare parts going forward. I may rummage through some old broken laptops I have to see if there might be something in those.
Im in need of a ribbon cable as well.
Unfortunately I dropped the camera too. The ball separated from the mount and the cable broke.
I would be very interested in a replacement ribbon too. But even if I had the replacement cable I wouldn't know how to assemble the cable, the ball and the mount again...
I'm in the same boat. I was able to get into the base of the camera and disassembled it enough to get the cable out. Its got a part number printed on it but I haven't been able to locate it yet. Maybe someone else has better luck finding it from this picture
Has anyone been lucky enough to get the flex cable yet?, It is a shame that there is nothing to do but throwing this thing away.
Just purchased this and it works for me. http://m.ebay.com/itm/31PIN-120mm-0-3mm-...
about a 4 hour job but mine works after some serious redesign work. I ordered mine about 4 weeks ago. When I installed it I had to make several modifications. I removed the old silver skinny metal piece that held the camera on to the base and replaced it with two screws with nuts (the same size as light and plug cover screws in the house), one screw on each side of the new ribbon cable. I also had to remove some of the plastic on the base side to allow the screws and new cable to fit. I added some regular 3M electrical tape to protect the new cable. I also had to bend the new cable 90 degrees because it’s a flat cable. Pretty tough job but it works.
What exact model number and specifications for the cable? Digikey is usually a good source for such things.
Or can I buy the battery? I have two dead?