Einleitung
The Droid RAZR is here, calling upon state-of-the-art space-saving technology, as well as a bit of nostalgia. Claiming once again to have made the thinnest phone in the universe, the Droid RAZR touts impressive features packed into one package. For safety reasons, we will not be throwing it around to see if it will cut bikes and lamp posts (as its trailer suggests), or shooting it to verify if it's bulletproof (we know it's not) -- but we will be opening it up to see what gives it its phone, video, audio and gaming powers.
Do these teardowns blow your mind and you can't get enough of them? Follow @ifixit on Twitter to stay up to date with the latest teardown shenanigans.
Was du brauchst
-
-
Is it Christmas already?? No, it's not even Thanksgiving, but we've already received a gift from Motorola—the Droid RAZR. The newest and thinnest addition to the dual-core Droid lineup, the Motorola Droid RAZR packs some impressive specs:
-
1.2 GHz dual-core processor
-
1 GB RAM
-
16 GB internal storage + 16 GB microSD (expandable up to 48 GB)
-
4.3" Super AMOLED display with Corning Gorilla Glass
-
8 MP with HD video recording (1080p) rear-facing camera
-
Verizon 4G LTE network capability
-
-
-
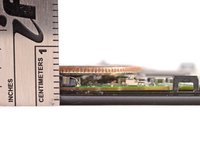
We have heard some mighty claims about the thinness of this phone, but how thin is it really?
-
Oh ... that thin. The claims are true; this phone is pretty darn thin.
-
The RAZR measures in at a mere 0.28 inches thin and increases to 0.42 inches at
its love-handlethe prevalent Motorola camera bulge. -
There is no doubt that the Droid RAZR is exceptionally thin, but Motorola had to fit the internals somewhere. To compensate, the RAZR is also rather large, measuring in at 5.15 inches long and 2.71 inches wide.
-
-
-
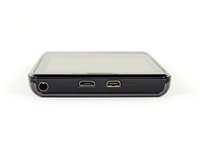
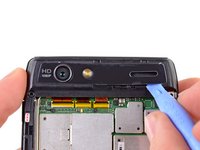
The micro-USB and micro-HDMI ports are located at the top of the phone, next to the 3.5 mm headphone jack.
-
Motorola likely chose this spot because the rest of the phone's slim profile would not be able to fit the ports.
-
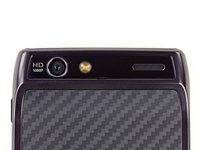
Looking at the rear of the phone gives us a glance at the 8 megapixel HD camera and Kevlar rear cover.
-
The Droid RAZR contains an LTE SIM Card slot and a microSD card slot, hidden inside a secret compartment.
-
The phone ships with a pre-installed 16 GB microSD card (for some carriers), for a total capacity of 32GB of storage. It supports microSD cards of up to 64 GB.
-
-
-
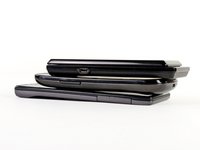
This is how the Droid RAZR stacks up to the Nexus S and the original Droid.
-
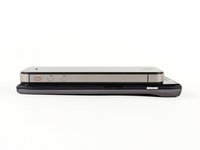
And when compared side-by-side, the Droid RAZR is clearly thinner than the iPhone 4S. However, the RAZR sports a much larger footprint that may make operating the phone difficult for folks with smaller hands. More on that later.
-
Here we show the Droid RAZR next to the original Motorola Droid. The extra half inch in either direction makes for a slightly awkward feel when holding the phone in one hand.
-
-
In diesem Schritt verwendetes Werkzeug:Spudger$3.99
-
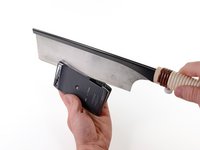
The back cover is fastened tightly to the rest of the phone; removing it will be no simple task. If only we had another Droid RAZR to help slice this one open...
-
Having only one RAZR, we were forced to improvise. This task called for nothing less than... a dozuki.
-
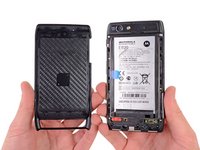
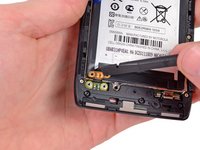
With a little finagling, the back cover separates from the rest of the phone, exposing the battery and the cool Kevlar weave.
-
-
-
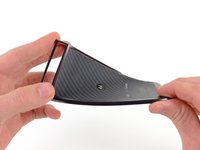
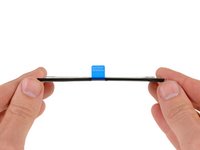
How can something that provides so much rigidity bend so much? The thin plastic, mated with the woven Kevlar, provides a tough yet flexible back cover. With the tensile yield strength of Kevlar being on par with some steels, the back case is the least of our worries as far as critical future repairs go.
-
After twisting and contorting the back case, we shift our focus to what its removal has exposed.
-
-
-
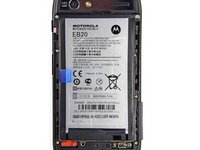
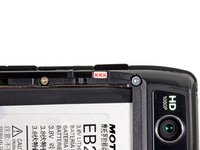
The Droid RAZR is equipped with two
whiskey bottlesliquid damage indicators: one on the bottom and one on the right side of the phone. -
We recommend not sweating while holding this phone, as that indicator is mighty close to the edge!
-
-
-
-
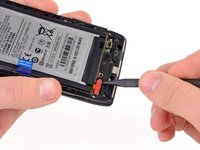
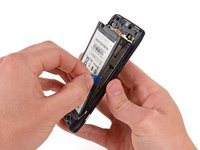
A flick of our spudger, a twist of our T5 torx screwdriver, a click of our heels, and badabing badaboom—the battery's disconnected.
-
It's quite the ordeal for removing the battery, but at least you don't have to rip the entire phone apart like a certain other phone we know.
-
Instead of the traditional battery connector socket or soldered wires found in other phones, the Droid RAZR utilizes contact points for its battery connector.
-
-
-
With the battery no longer firmly attached to the phone, all we have to do is pull the handy "remove battery" tab—ironic, since allegedly the battery's not supposed to be user-replaceable. Oh well.
-
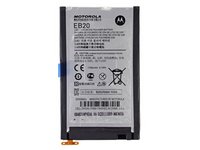
Measuring in at 3.79" long, 2.25" wide, and .110" thick with a capacity of 1750 mAh, this battery provides over 300 mAh more capacity than that of the iPhone 4S.
-
For those faithful repair enthusiasts who are still rocking the original 2004 Motorola RAZR V3, the Droid RAZR has a 1070 mAh greater capacity than its great-grandfather.
-
The battery is ultra-thin, taking up less than half of the phone's total thickness.
-
-
-
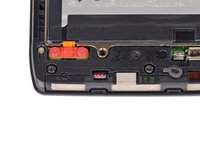
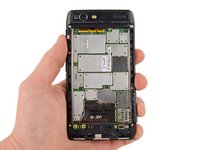
What we had once called a forest of EMI shields has now met its match. The Droid RAZR boasts an Amazon Basin's worth of EMI shields impeding our progress.
-
With the help of our T5 screwdriver, we twist out a few screws from the aluminum and plastic frames still covering the motherboard.
-
-
-
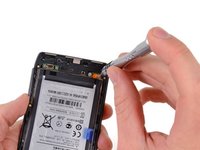
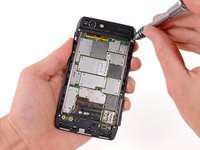
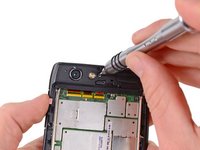
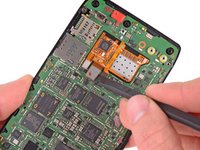
We were prepared to remove the rear inner framework when suddenly our super iFixit senses detected a hidden screw!
-
We peeled off the plastic cover from around the rear-facing camera to reveal a hidden screw near the flash LED. Sneaky, sneaky Motorola.
-
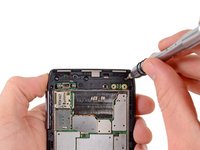
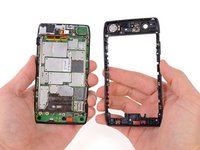
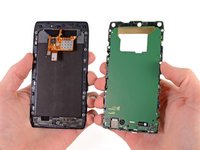
Dispatching that mischievous screw, and disconnecting several small clips around the perimeter of the rear inner framework enabled us to remove it from the motherboard and display assembly.
-
-
In diesem Schritt verwendetes Werkzeug:Coin$2.99
-
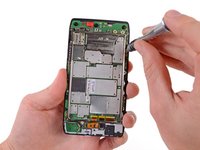
A few more Torx screws, and we're able to remove the diamond-cut aluminum chassis.
-
Why diamond-cut? Motorola needed ultimate precision when manufacturing this thin and light weight component.
-
How extreme are the space constraints inside a device this thin?
-
From the bottom to top, you can see the glass, display, motherboard, motherboard chips, and then quarter. (Quarter sold separately)
-
-
-
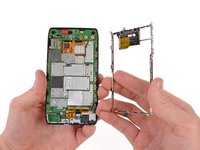
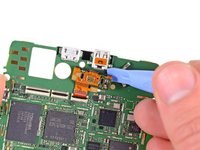
Disconnecting the touchscreen controller ribbon cables from their respective sockets allows the motherboard to be separated from the front display assembly.
-
-
-
Pulling back the 1.3 MP front-facing camera, apparently capable of 720p HD video, we are now able to undo all the connectors.
-
Zif-a-dee-doo-dah! Zif-a-dee-day! Yes, those are all ZIF type connectors, and yes, they all must bite the dust.
-
-
-
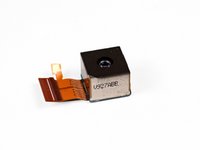
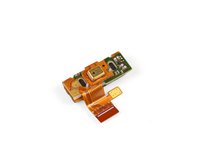
Ah, so that's the reason the RAZR is a bit
fatheadedtop-heavy. The larger rear-facing camera boasts 8 MP still picture capability and 1080p video at 30 fps. -
Trying to take video in a fast moving or high vibration environment? Sacrifice a little resolution, down to 720 x 480, and pick up your frame rate to a blistering 120 fps to keep the blur down.
-
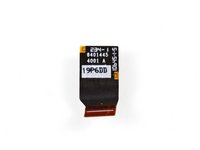
The rear-facing camera is marked as V927ABB.
-
-
-
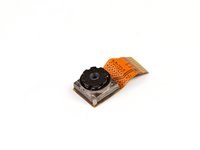
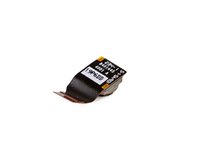
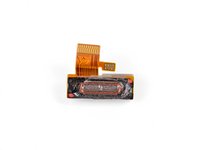
Is it ironic to take a picture of a camera? We don't think so... This dinky metal box is the 1.3 MP front-facing camera, which houses the lens and circuitry.
-
-
-
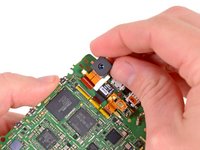
What's that? I can't hear you—speak up. Oh, you're the ear piece, I see. Well, I'm sorry, you're going to have to come out too.
-
For those itching to reveal their love of Britney Spears new album or Justin Beiber's new hit solo, fret not, this tiny litte speaker packs enough power to resonate [tinny, muddled] music throughout the room.
-
-
-
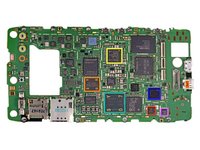
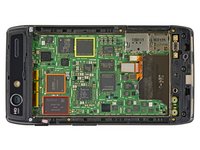
Holy cannoli! Look at all 'em chips! To keep the design svelte, Motorola packed pretty much everything on one side of the mobo. Let's see what we're dealing with:
-
Toshiba THGBM4G7D2GBAIE 16GB EMMC Flash Memory
-
Samsung K3PE7E700M-XGC1 4Gb LPDDR2 RAM
-
Qualcomm MDM6600 Dual-Mode Baseband/RF Transceiver
-
Qualcomm PM8028 Power Management IC
-
Avago ACPM-7868 Quad-Band Power Amplifier
-
Motorola T6VP0XBG-0001 (believed to be the LCM 2.0 LTE baseband processor)
-
Texas Instruments WL1285C Wilink 7 Bluetooth/Wi-Fi/GPS
-
-
-
So many chips…where's the dip?:
-
Skyworks 77449 Power Amplifier Module for LTE/EUTRAN Bands XIII/XIV
-
Toshiba Y9A0A111308LA Memory Stack
-
ST Ericsson CPCAP 6556002
-
Hynix H90H1GH51JMP (similar to other devices we've seen, this POP chip sits on top of the TI OMAP 4430 processor)
-
Infineon 5726 SLU A1 H1118 3A126586
-
Bosch 2133 C3H L1ABG accelerometer
-
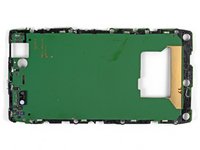
And the back of the board? Even the PCB is stepped with a cavity to recess the flex wrap from back to front. Nothing spared in the pursuit of ultimate thinness.
-
-
-
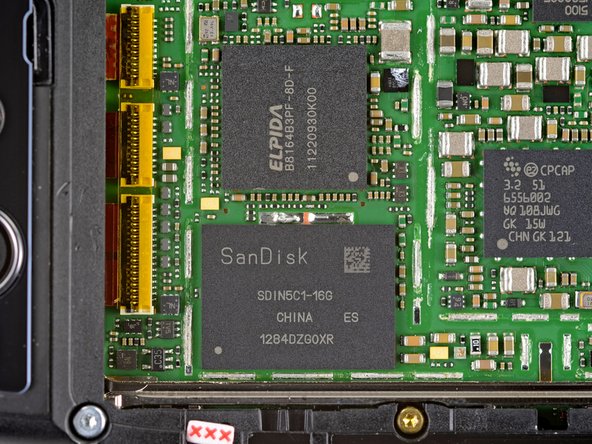
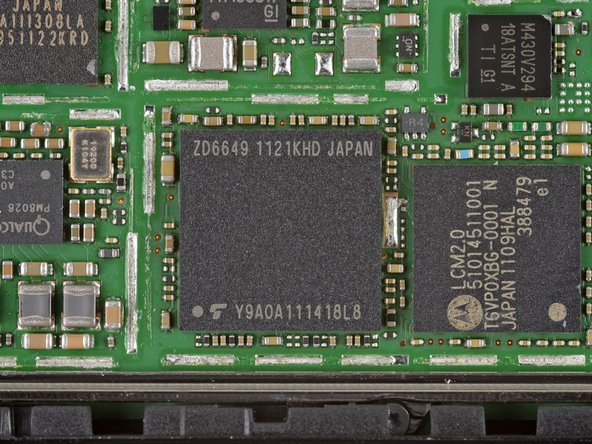
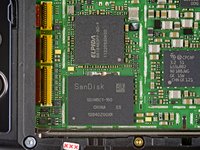
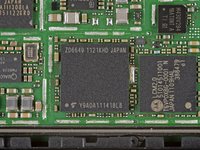
Teardown update: We discovered some interesting chip changes inside a newer Droid Razr. They include:
-
SanDisk SDIN5C1-16G NAND flash that replaces the Toshiba THGBM4G7D2GBAIE unit
-
ELPIDA B8164B3PF-8D-F RAM takes place in the Samsung K3PE7E700M-XGC1 RAM location
-
Toshiba Y9AOA111418L8 replaces the Hynix H90H1GH51JMP chip that sits atop the TI OMAP 4430 processor
-
-
-
Motorola Droid RAZR Repairability Score: 4 out of 10 (10 is easiest to repair).
-
Once the battery and motherboard are within reach, replacement is easy—no soldering required.
-
The "non-serviceable" back was a bit of a pain to remove.
-
The front panel is adhered to the AMOLED display, so they must be replaced as one expensive unit.
-
All plastic frames and casing proved to be incredibly tedious to remove, and felt like they would break at any moment.
-
There are copious amounts of adhesive holding the phone together.
-


17 Kommentare
"1 GB RAM"
"Samsung K3PE7E700M-XGC1 4Gb LPDDR2 RAM"
So does it have 1 or 4 Gb of RAM?
4Gb (4 gigabits) = 0.5 GigaBytes. I don't know where the other 0.5 GB is.
cityzen -
another 512MB is on the omap4