Zum Hauptinhalt wechseln

Motorola Moto G3 Teardown

Was du brauchst

Einführungsvideo

  1. Motorola Moto G3 Teardown, Motorola Moto G3 Teardown: Schritt 1, Bild 1 von 2 Motorola Moto G3 Teardown, Motorola Moto G3 Teardown: Schritt 1, Bild 2 von 2
    • Remove back cover.

    • Moto G3 plastic panel can be easily removed with the fingernails.

  2. Motorola Moto G3 Teardown: Schritt 2, Bild 1 von 2 Motorola Moto G3 Teardown: Schritt 2, Bild 2 von 2
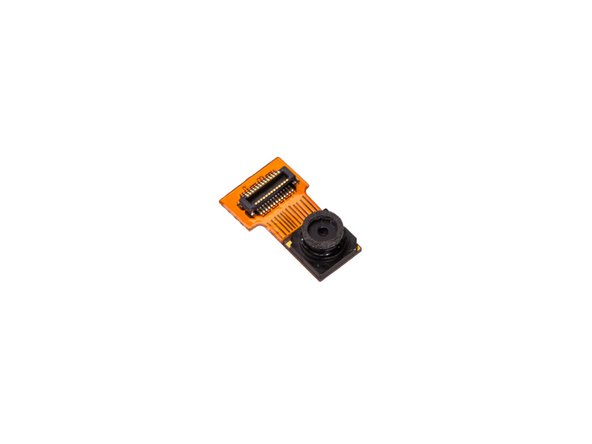
    • Remove camera&flashlight metal cover. Use tweezers to cut strong adhesives underneath.

  3. Motorola Moto G3 Teardown: Schritt 3, Bild 1 von 2 Motorola Moto G3 Teardown: Schritt 3, Bild 2 von 2
    • Undo 3 screws by T4 Torx screwdriver.

    • Take away plastic securing part.

  4. Motorola Moto G3 Teardown: Schritt 4, Bild 1 von 3 Motorola Moto G3 Teardown: Schritt 4, Bild 2 von 3 Motorola Moto G3 Teardown: Schritt 4, Bild 3 von 3
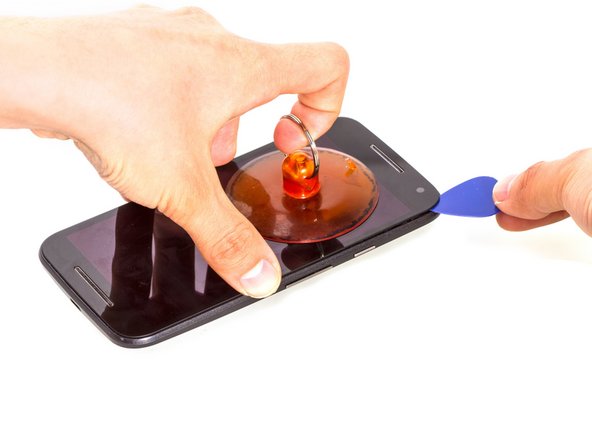
    • Heat up the LCD screen for a while.

    • Then with the help of suction cup, insert guitar picks to open a gap. Slide guitar picks or plastic opening tool to cut strong adhesives.

    • There is LCD screen connector on the left side, so be careful to slide guitar picks.

    start prying the screen off from the top corners very gently. I started from the bottom and shattered the glass

    Bob Mcroy - Antwort

    A que temperatura debe estar el aire caliente? Durante cuánto tiempo?

    Luis - Antwort

  5. Motorola Moto G3 Teardown: Schritt 5, Bild 1 von 3 Motorola Moto G3 Teardown: Schritt 5, Bild 2 von 3 Motorola Moto G3 Teardown: Schritt 5, Bild 3 von 3
    • Release LCD screen connector firstly.

    • Remove LCD screen.

  6. Motorola Moto G3 Teardown: Schritt 6, Bild 1 von 3 Motorola Moto G3 Teardown: Schritt 6, Bild 2 von 3 Motorola Moto G3 Teardown: Schritt 6, Bild 3 von 3
    • Undo 14 screws by T4 Torx screwdriver

    • Pry up motherboard assembly.

    • Battery flex connector is connected with motherboard, so be careful to pry the assembly up.

  7. Motorola Moto G3 Teardown: Schritt 7, Bild 1 von 2 Motorola Moto G3 Teardown: Schritt 7, Bild 2 von 2
    • Release battery flex connector.

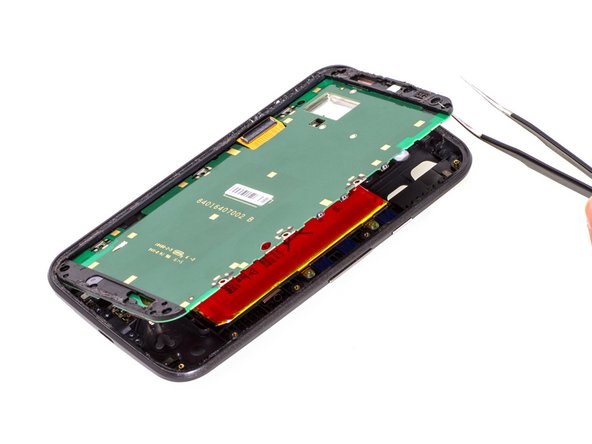
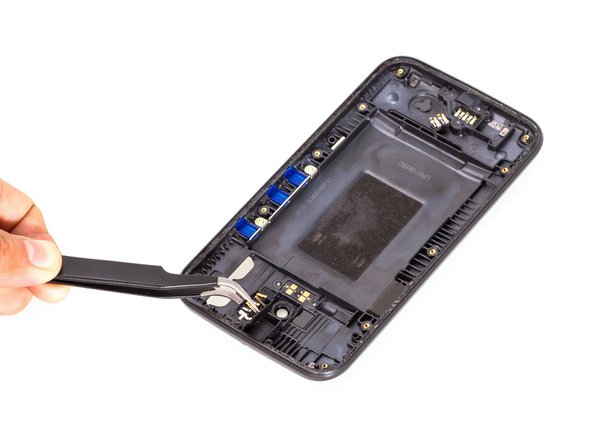
    • Separate motherboard assembly from back cover assembly.
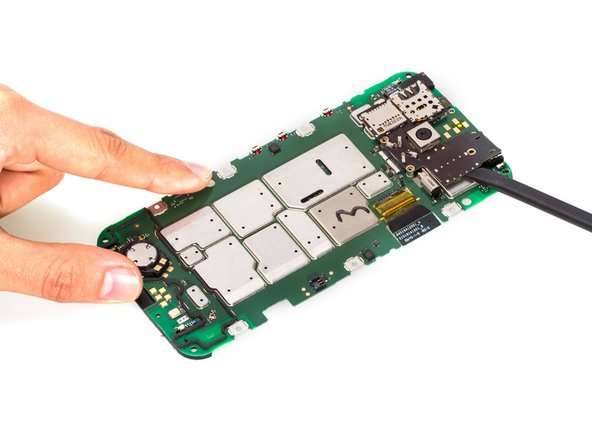
  8. Motorola Moto G3 Teardown: Schritt 8, Bild 1 von 3 Motorola Moto G3 Teardown: Schritt 8, Bild 2 von 3 Motorola Moto G3 Teardown: Schritt 8, Bild 3 von 3
    • Undo 3 screws here.

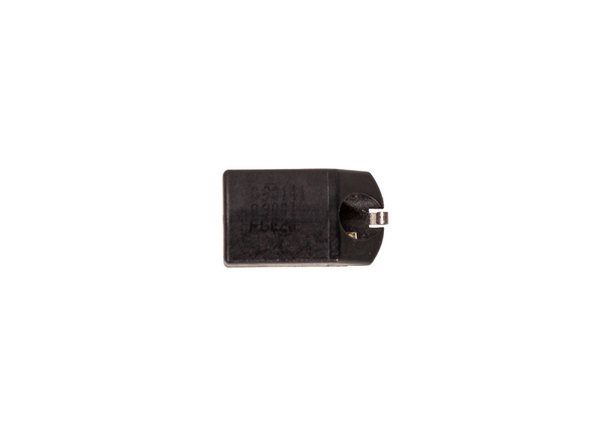
    • Use spudger to cut adhesives and pry the SIM&SD card reader board, then remove it.

  9. Motorola Moto G3 Teardown: Schritt 9, Bild 1 von 2 Motorola Moto G3 Teardown: Schritt 9, Bild 2 von 2
    • Remove front-facing camera.

  10. Motorola Moto G3 Teardown: Schritt 10, Bild 1 von 3 Motorola Moto G3 Teardown: Schritt 10, Bild 2 von 3 Motorola Moto G3 Teardown: Schritt 10, Bild 3 von 3
    • Remove rear camera.

  11. Motorola Moto G3 Teardown: Schritt 11, Bild 1 von 2 Motorola Moto G3 Teardown: Schritt 11, Bild 2 von 2
    • Remove earpiece.

  12. Motorola Moto G3 Teardown: Schritt 12, Bild 1 von 2 Motorola Moto G3 Teardown: Schritt 12, Bild 2 von 2
    • Remove loudspeaker.

  13. Motorola Moto G3 Teardown: Schritt 13, Bild 1 von 2 Motorola Moto G3 Teardown: Schritt 13, Bild 2 von 2
    • Here is the motherboard.

  14. Motorola Moto G3 Teardown: Schritt 14, Bild 1 von 2 Motorola Moto G3 Teardown: Schritt 14, Bild 2 von 2
    • Use spudger to cut adhesive and pry the battery up.

  15. Motorola Moto G3 Teardown: Schritt 15, Bild 1 von 3 Motorola Moto G3 Teardown: Schritt 15, Bild 2 von 3 Motorola Moto G3 Teardown: Schritt 15, Bild 3 von 3
    • Take away headphone jack.

  16. Motorola Moto G3 Teardown: Schritt 16, Bild 1 von 1
    • Done

Ziellinie

18 weitere Nutzer:innen haben diese Anleitung absolviert.

Witrigs

Mitglied seit: 11/24/15

69.454 Reputation

378 Anleitungen geschrieben

7 Kommentare

Muito bom, parabéns!

Manoel - Antwort

Could you guys tell me if the main speaker, at the bottom, has a special protection agains water spills, like a membrane or so, or is it pretty fine too spill water there?

setsuoleandro - Antwort

Wi fi not trun on ..moto g3

Seoni Seoni - Antwort

When you heat up the display, do you heat up the entire display or just around the edges? What heat gun/setting should i use? Can i use a blowdryer?

guest - Antwort

Thanks. ......................

Biswajit Saha - Antwort

Anyone know where the GPS antenna is? I'm having issues with intermittent loss of GPS signal and would like to try re-seating or replacing the antenna.

saml604 - Antwort

Excelente tutorial Gracias

Oscar Lopez - Antwort

Kommentar hinzufügen

Seitenaufrufe:

Letzte 24 Stunden: 1

Letzte 7 Tage: 7

Letzte 30 Tage: 27

Insgesamt: 23,957