Zum Hauptinhalt wechseln

Was du brauchst

Dieser Teardown ist keine Reparaturanleitung. Um dein Motorola Moto X Force zu reparieren, verwende unsere Fehlerbehebungsseite.

  1. Motorola Moto X Force Teardown, Remove SIM card tray.: Schritt 1, Bild 1 von 2 Motorola Moto X Force Teardown, Remove SIM card tray.: Schritt 1, Bild 2 von 2
    • Remove it or it will be a barrier to remove motherboard.

  2. Motorola Moto X Force Teardown, Remove back cover.: Schritt 2, Bild 1 von 3 Motorola Moto X Force Teardown, Remove back cover.: Schritt 2, Bild 2 von 3 Motorola Moto X Force Teardown, Remove back cover.: Schritt 2, Bild 3 von 3
    • Use heat gun to heat up back cover firstly.

    • Insert metal opening tool to open a gap and cut adhesives around.

    • Take care when sliding tool under the back cover, there are delicate antenna and other components that could be damaged by your glue slicing tool

  3. Motorola Moto X Force Teardown, Remove metal logo cover.: Schritt 3, Bild 1 von 2 Motorola Moto X Force Teardown, Remove metal logo cover.: Schritt 3, Bild 2 von 2
    • Use tweezers to cut adhesives underneath.

  4. Motorola Moto X Force Teardown, Remove middle frame.: Schritt 4, Bild 1 von 3 Motorola Moto X Force Teardown, Remove middle frame.: Schritt 4, Bild 2 von 3 Motorola Moto X Force Teardown, Remove middle frame.: Schritt 4, Bild 3 von 3
    • Twist off 17 screws by T3 Torx screwdriver.

    • Take away rubber bracket securing NFC antenna and release NFC antenna connector.

  5. Motorola Moto X Force Teardown: Schritt 5, Bild 1 von 3 Motorola Moto X Force Teardown: Schritt 5, Bild 2 von 3 Motorola Moto X Force Teardown: Schritt 5, Bild 3 von 3
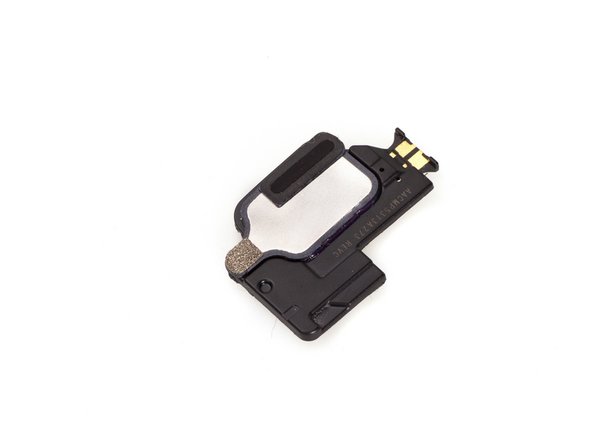
    • Take away rubber bracket securing MIC flex and release microphone flex cable connector.

  6. Motorola Moto X Force Teardown, Remove side button.: Schritt 6, Bild 1 von 1
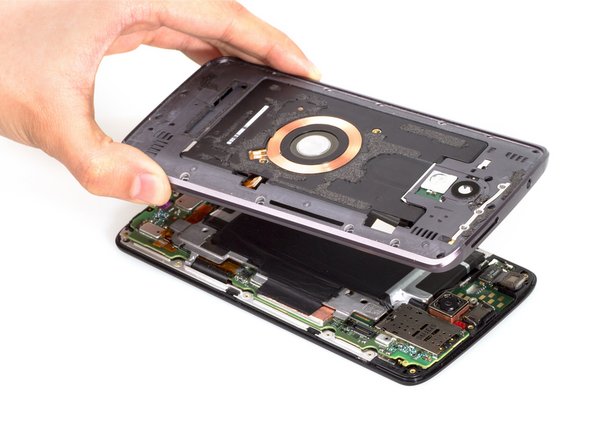
    • After middle frame's separating from the rest of parts, side buttons are loose and easy to remove.

  7. Motorola Moto X Force Teardown, Remove microphone flex cable ribbon.: Schritt 7, Bild 1 von 3 Motorola Moto X Force Teardown, Remove microphone flex cable ribbon.: Schritt 7, Bild 2 von 3 Motorola Moto X Force Teardown, Remove microphone flex cable ribbon.: Schritt 7, Bild 3 von 3
    • Release MIC connector.

    • There are adhesives existed underneath.

  8. Motorola Moto X Force Teardown, Remove headphone jack.: Schritt 8, Bild 1 von 2 Motorola Moto X Force Teardown, Remove headphone jack.: Schritt 8, Bild 2 von 2
    • Use tweezers to pry this part up.

  9. Motorola Moto X Force Teardown, Remove vibration motor.: Schritt 9, Bild 1 von 2 Motorola Moto X Force Teardown, Remove vibration motor.: Schritt 9, Bild 2 von 2
    • The vibrator is only fastened by the plastic bracket.

  10. Motorola Moto X Force Teardown, Remove NFC antenna along with  plastic board attached.: Schritt 10, Bild 1 von 2 Motorola Moto X Force Teardown, Remove NFC antenna along with  plastic board attached.: Schritt 10, Bild 2 von 2
    • There are a little bit adhesives around, but you can peel this part easily.

  11. Motorola Moto X Force Teardown, Remove loudspeaker.: Schritt 11, Bild 1 von 2 Motorola Moto X Force Teardown, Remove loudspeaker.: Schritt 11, Bild 2 von 2
    • Pry this part up.

  12. Motorola Moto X Force Teardown, Remove metal bracket securing on motherboard.: Schritt 12, Bild 1 von 3 Motorola Moto X Force Teardown, Remove metal bracket securing on motherboard.: Schritt 12, Bild 2 von 3 Motorola Moto X Force Teardown, Remove metal bracket securing on motherboard.: Schritt 12, Bild 3 von 3
    • Peel off the tape.

    • Twist off 2 screws.

    • Take care not to apply any lateral force to the motherboard to metal bracket electrical connector when removing the motherboard bracket. If abused, the tiny spring could break off at a later date and causing short circuits within the phone. The connector is to the right of the side button connector and above the copper film screened component.

  13. Motorola Moto X Force Teardown, Release battery connector and side button connector.: Schritt 13, Bild 1 von 1
    • Release this two connectors carefully.

  14. Motorola Moto X Force Teardown, Release touch digitizer connector.: Schritt 14, Bild 1 von 2 Motorola Moto X Force Teardown, Release touch digitizer connector.: Schritt 14, Bild 2 von 2
    • The LCD assembly has two connectors, here is touchscreen connector.

  15. Motorola Moto X Force Teardown, ReleaseLCD display connector.: Schritt 15, Bild 1 von 2 Motorola Moto X Force Teardown, ReleaseLCD display connector.: Schritt 15, Bild 2 von 2
    • This one is display connector.

  16. Motorola Moto X Force Teardown, Release motherboard assembly.: Schritt 16, Bild 1 von 3 Motorola Moto X Force Teardown, Release motherboard assembly.: Schritt 16, Bild 2 von 3 Motorola Moto X Force Teardown, Release motherboard assembly.: Schritt 16, Bild 3 von 3
    • Release signal cable connector.

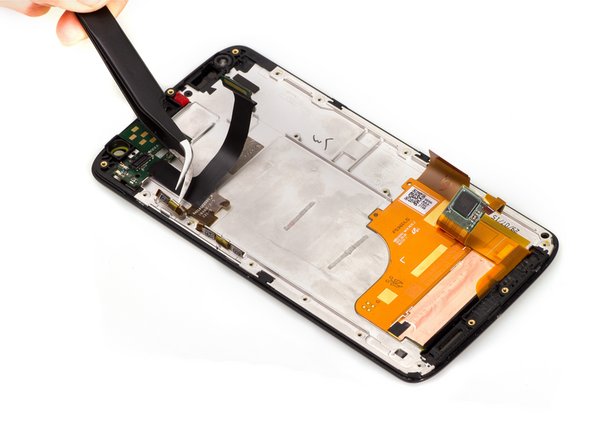
    • Pry the motherboard assembly up.

  17. Motorola Moto X Force Teardown, Remove rear camera.: Schritt 17, Bild 1 von 2 Motorola Moto X Force Teardown, Remove rear camera.: Schritt 17, Bild 2 von 2
    • Moto X Force packs a 21-megapixel primary camera on the rear.

  18. Motorola Moto X Force Teardown, Release signal cable connector and remove it.: Schritt 18, Bild 1 von 2 Motorola Moto X Force Teardown, Release signal cable connector and remove it.: Schritt 18, Bild 2 von 2
    • Use tweezers to release the connector.

  19. Motorola Moto X Force Teardown, Remove proximity sensor flex.: Schritt 19, Bild 1 von 2 Motorola Moto X Force Teardown, Remove proximity sensor flex.: Schritt 19, Bild 2 von 2
    • With this sensor flex, you can wave your hand on the top of the screen to wake up the screen.

  20. Motorola Moto X Force Teardown, Pry up and remove battery.: Schritt 20, Bild 1 von 2 Motorola Moto X Force Teardown, Pry up and remove battery.: Schritt 20, Bild 2 von 2
    • Non-removable Li-Ion 3760 mAh battery.

  21. Motorola Moto X Force Teardown, Remove front-facing camera.: Schritt 21, Bild 1 von 2 Motorola Moto X Force Teardown, Remove front-facing camera.: Schritt 21, Bild 2 von 2
    • A 5-megapixel front shooter for selfies.

  22. Motorola Moto X Force Teardown, Remove earpiece.: Schritt 22, Bild 1 von 2 Motorola Moto X Force Teardown, Remove earpiece.: Schritt 22, Bild 2 von 2
    • Be careful to pry this part up, because it tends to fall apart easily.

  23. Motorola Moto X Force Teardown, Remove side button flex.: Schritt 23, Bild 1 von 3 Motorola Moto X Force Teardown, Remove side button flex.: Schritt 23, Bild 2 von 3 Motorola Moto X Force Teardown, Remove side button flex.: Schritt 23, Bild 3 von 3
    • Use tweezers to cut adhesives underneath.

  24. Motorola Moto X Force Teardown: Schritt 24, Bild 1 von 2 Motorola Moto X Force Teardown: Schritt 24, Bild 2 von 2
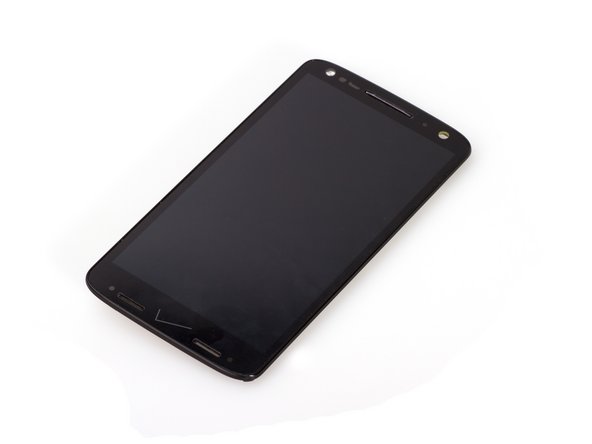
    • Here is LCD screen with LCD supporting frame. They are attached tightly, so we haven't separate them.

  25. Motorola Moto X Force Teardown: Schritt 25, Bild 1 von 1
    • Done.

Witrigs

Mitglied seit: 11/24/15

69.454 Reputation

378 Anleitungen geschrieben

9 Kommentare

>>Here is LCD screen with LCD supporting frame.

amoled

Danila Elchin - Antwort

Good afternoon,

Tell me what you can say on the problem faced by many users of the device.

When you connect the original or third-party charger with fast charging Functions or without fast charging function, and sometimes when using cordless phone charging on the charge indication is presented but charging rate is 1-3% per hour. This problem occurs on the Droid Turbo 2 and X force.

I would like to hear your opinion on this issue.

Vikulov Aleksander - Antwort

Several units are plagued by a vertical green line that appears on LCD (just search for Moto X Force or Droid Turbo 2 Green Line). Bad flex or bad LCD ?

NCQ - Antwort

There should be problem of lcd screen flex.

Witrigs -

I have a UK Moto X Force. I have noticed that the green line appears when You push harder between the screen and right loudspeaker hole. it disapears when I remove my finger. I hope this green line wont become permanent :/

Dxt D -

Kommentar hinzufügen

Seitenaufrufe:

Letzte 24 Stunden: 1

Letzte 7 Tage: 1

Letzte 30 Tage: 5

Insgesamt: 18,788