Was du brauchst
-
-
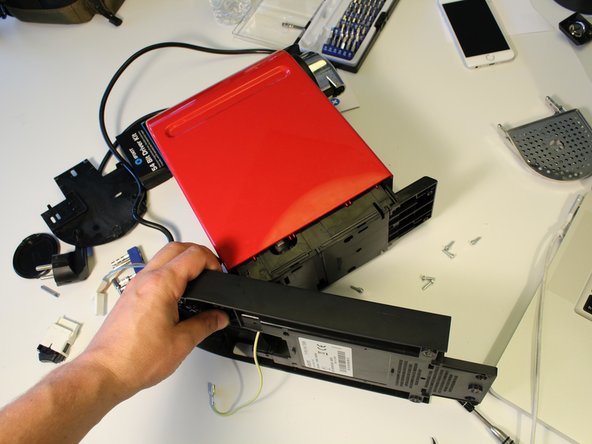
Die CitiZ ist ein kompaktes Kapselmaschinchen. Um sie zu öffnen, benötigst du ein spezielles Werkzeug für Ovalkopfschrauben. Du erhältst es als Oval Drive Bit in Bitsammlungen von iFixit, oder bei Jura Ersatzteilhändlern. (Ovalkopfschraubenbit)
-
Zur Not kannst du diese Schrauben auch mit einer Spitzzange ausdrehen. Es ist aber erschwert, da diese Schrauben - sie sehen aus wie Nieten - in Vertiefungen sitzen.
-
-
-
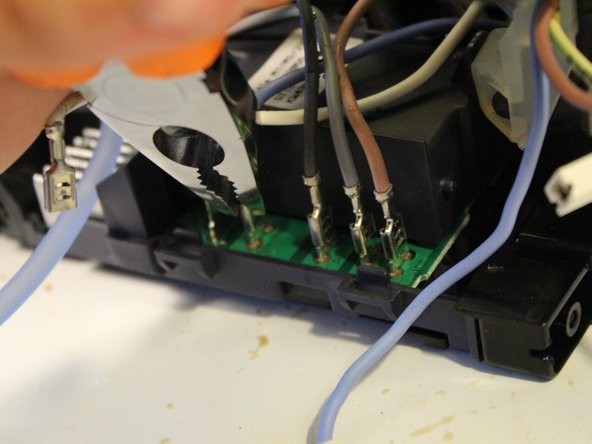
An der Unterseite befinden sich sechs dieser Ovalkopfschrauben. Sie sehen wie Nieten aus, haben aber einen leicht ovalen Kopf.
-
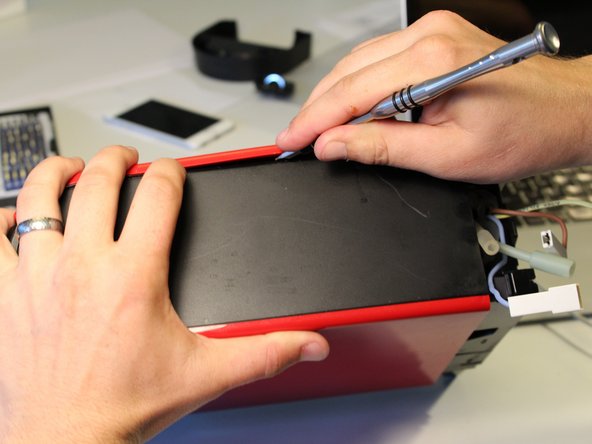
Lass dir Zeit beim Entfernen, im Bild mit einer Zange gezeigt.
-
Wenn es mit einer Zange nicht geht, kannst du es auch mit Superkleber, einem verschmolzenen BIC Kugelschreiber, oder einem selbst erstellten Werkzeug probieren. Am Besten ist ein Ovalkopfschlüssel vom Ersatzteilhändler für Jura. Nespresso will uns aus unseren eigenen Maschinen heraushalten!
8in crescent wrench used end on worked really well for the oval head screws
Seeing the recommendation, I heated the end of the BIC pen with a lighter and while hot pressed it against the oval screw, let cool then applied pressure and turned gently, the procedure for each screw worked.
-
-
-
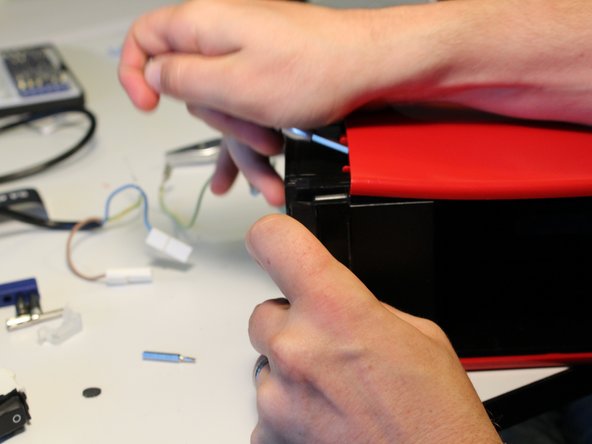
Wenn die Schrauben weg sind, kannst du mit einem Spudger die Rasten lösen, die die Bodenplatte festhalten.
-
Am einfachsten kannst du das Werkzeug an der Stelle einsetzen, wo das Netzkabel hineingeht. Achte darauf, dass du das Kabel nicht beschädigst. (Und sei dir sicher, dass der Netzstecker gezogen ist!)
-
-
-
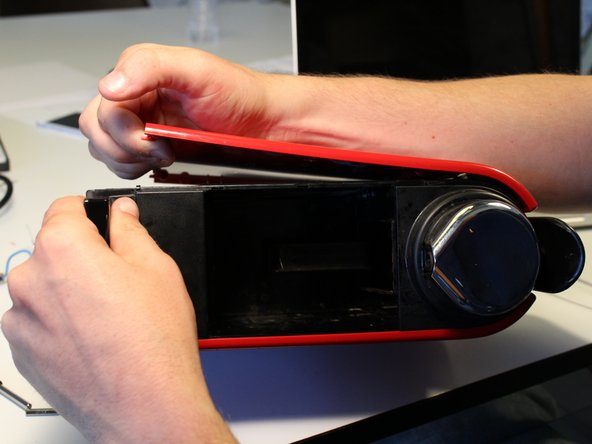
Öffne vorsichtig die Bodenplatte und lege die Maschine auf die Seite.
In the picture background there is a box of a Nespresso Inissia, however the machine actually being handled (KRUPS XN7006) is a CitiZ machine.
-
-
-
Die Kunstoffzugentlastung am Netzkabel ist schwer zu entfernen. Setze einen kleinen Flachschraubendreher in den kleinen Schlitz an der Seite ein, um die Raste zu lösen.
-
-
-
Im Innern der Maschine findest du eine Menge von Flachverbindern.
-
Halte eine Seite des Verbinders mit der Zange fest, drücke den kleinen Sperrknopf nach unten und ziehe die andere Seite mit der Hand ab. Ziehe nicht am Kabel, es könnte sonst abreißen.
-
-
-
Fasse die Anschlüsse des Netzkabels gut an und ziehe sie vom Einschaltknopf ab.
-
-
-
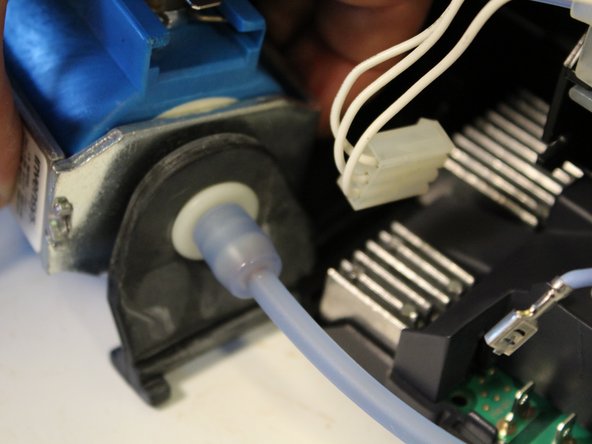
Setze die Spudgerspitze am Silikonschlauch an und schiebe ihn vom Anschluss herunter.
-
-
-
Fädle die restlichen Schläuche und Kabel durch die Bodenplatte, damit sie vom Hauptgerät frei kommen.
-
Entferne die Bodenplatte.
-
-
-
-
Um die Gehäuseseiten zu lösen brauchst du etwas Kraft.
-
Es gibt viele Rasten an allen vier Rändern der Seitenteile.
-
Benutze einen Spudger oder einen Flachschraubendreher, um die erste Raste aufspringen zu lassen.
-
Arbeite dich rings um den Rand des Seitenteils, um nach und nach alle Rasten zu lösen.
-
-
-
Weiter und weiter...
-
-
-
Der Hochdruckschlauch an der Pumpe ist mit einer pfiffigen Halteklammer versehen. Ziehe die Klammer mit einer Zange heraus, das erfordert nicht sehr viel Kraft.
-
Wiederhole das bei der Klammer, die das Ventil zum Wassererhitzer befestigt.
-
-
-
Löse die Ventileinheit vom Rahmen ab.
Is there a general name for this type of connector - the metal doohickey on the end of the tube, plus the retaining clip?
-
-
-
Entferne den Auslauf.
-
Entferne das Oberteil. Vorsicht, die Kabel zu den Tasten bleiben im Gehäuse hängen. Löse die Kabel ab und setze das Oberteil nahe am Rahmen ab.
-
-
-
Die Versorgungskabel, von links nach rechts: Heizung (weiß), Neutral (blau), Pumpe (dunkelgrau), Pumpe Erdung? (hellgrau) , Phase (braun).
-
Löse mit der Zange alle Kabel ab.
-
-
-
Schiebe die Wasserpumpe heraus. Das Gummiformstück hält gleichzeitig die Pumpe fest und schützt das Gerät vor den Vibrationen. Es gleitet schön aus dem Kunstoffrahmen heraus.
-
-
-
Entferne die etwas überdimensionierte Silikonhalterung des Hochdruckschlauchs .
-
-
-
Löse die Rasten und schiebe die Heizeinheit aus dem Rahmen heraus.
-
-
-
Löse die Raste auf der rechten Seite der Platine und heble sie dann vorsichtig heraus.
-
Übe nicht zuviel Kraft auf die Kunstoffhalterung oben an der Platine aus, es gibt nämlich zwei empfindliche Kondensatoren hinten links auf der Platine.
-
-
-
Der BTB12 AC 12 A Triac benötigt einen großen Kühlkörper, welcher auf der Hauptplatine vernietet ist.
-


Besonderer Dank geht an diese Übersetzer:innen:
100%

Diese Übersetzer:innen helfen uns, die Welt zu reparieren! Wie kann ich mithelfen?
Hier starten ›
32 Kommentare
or you can make your own tool! See http://www.maultech.com/chrislott/blog/2...
Where is the heating element then?
Hi Junaho.
Did you have a look to Step 26 ?
I see, my bad.
My Citiz is leaking took it apart and water leaking from a few areas. Any suggestions?
our machine quit crimping coffee cups so no coffee, only water. any ideas?
Tory April 7
FYI
Power cables, from left to right: heat (white), neutral (blue), pump (dark grey), **line also (grey) as directly connected to ->**, line (brown).
Hi please my one is leaking from underneath any digestion?
Hi there my one is a magimix and is leaking from underneath any suggestion.?
In the picture background there is a box of a Nespresso Inissia, however the machine actually being handled (KRUPS XN7006) is a CitiZ machine. This teardown is actually a Nespresso CitiZ teardown, not a Nespresso Inissia teardown.
I have taken a citiz apart to replace a brewing unit which was leaking water into the capsule tray. This seems to be a common problem. Ireplaced the brewing unit and fixed the problem. However i had a look at the old brewing unit and discovered to my annoyance that the real problem was the filter which the capsule pushes against under pressure and which pierces the top of the capsule.. It just pops out but nowhere can I find a replacement for this piece alone. You have to buy the full brewing unit. Anyway it would be useful if your stripdown could go this far as it would at least identify this piece
I am trying to diagnose my machine. Top part of capsule is not getting punctured. Lack of any good flow. Some water is found in the capsule tray. I have seen the same symptom elsewhere, when someone says “water is leaking in the tray”, how much water (all of some)? Where did you source your brewing unit (in the US)? I don’t wish to pay out $50 and find it is the wrong type for the machine (Nespresso Citiz with frother - Type D122, not a Krups as shown above). Thanks in advance.
Anyone know what the brass compression tube fitting is called that slots within the retaining clip is called (in steps 16 & 17)?
Has anybody thought of replacing the vibration pump with a rotary one?
No, why? A rotary ump and 15 bar? Puuh…
VauWeh -
Could be possible to remove the outer shell without dismounting the base? I’d like to give them a paint job dismounting the less possible
Our C110 machine (one of the original models) stopped heating above lukewarm and the pump seemed to run fine. I did a continuity test between the white wire that goes from the “heat” connection on the board to the heater, and the “Line” connection on the board and it appears to be OK whether I touch the light blue or red wires. Does that indicate my heater is OK?
!&&* this one is ok,
Nespresso type D122 power not on but power plug put in line pump motor continues working what reason . Thanks
Can you get a better pump and replace the one they use? I’d like to get a stronger one that is also quieter if anyone know where to get them.
The pump is a Invensys CL4, now ARS CL4. (Google for it). What do you mean with “stronger"? It IS strong, making a pressure of about 16 bar, and more pressure does not make sense. If you want to have a change, try a ULKA EX4, but there will not be a great difference. Look for the right voltage.
If the pump does not work well, maybe its worth to carefully open it and clean it.
VauWeh -
Why is there no instructions for tearing down the brewing unit? Lots of problems with water leak and other stuff involve parts or seals in the brewing unit.
Hi my machine coffee disperse no power light. But the milk frother side have power. May I know why no power going to the coffee side
Did you ever find a cure? I tried to descale my Citiz but think messed up and after a large hiss and puff of steam the machine now does nothing! although the milk froth unit still powers up!
Can it be repaired? if so how?
Thanks
I need parts! Brown o-ring at the watertank base.
Try a 3 mm socket - it worked on my machine.
howard.marsh37 - Antwort
The tool is a socket or box spanner with an oval hole opening; they are available from amazon. I have two types: one is a 1inch long tube with hexagon head for using in a removable bit screwdriver handle, the other is an L-shaped tubular tool with the opening at each end.
Robert Cooper - Antwort
Hi, I have a CitiZ and it’s not turning on. Which internal component is likely to be causing the problem? I have an old Magimix I could use some of those parts. Any help would be appreciated. Thank you.
Georgia - Antwort
Try replacing the condensators: Nespresso CitiZ Kondensatoren tauschen
VauWeh -