Zum Hauptinhalt wechseln

Was du brauchst

Dieser Teardown ist keine Reparaturanleitung. Um dein PlayStation 2 Slimline zu reparieren, verwende unsere Fehlerbehebungsseite.

  1. Dieser Schritt ist noch nicht übersetzt. Hilf mit, ihn zu übersetzen!

    : Schritt 1, Bild 1 von 3 : Schritt 1, Bild 2 von 3 : Schritt 1, Bild 3 von 3
    • On a flat working surface, flip the PlayStation 2 Slimline so that the bottom side is facing up.

    • Remove the covers over the screws, circled in red on the second image.

    • Take a Phillip's #1 screwdriver and remove the five screws circled in red on the second image.

    • You will have to remove the "Do Not Void" seal in order to remove the last screw.

  2. Dieser Schritt ist noch nicht übersetzt. Hilf mit, ihn zu übersetzen!

    : Schritt 2, Bild 1 von 2 : Schritt 2, Bild 2 von 2
    • Make sure you haven't forgotten the screw under the "Do Not Void" seal.

    • Take a metal spudger and separate the upper half of the chasis from the lower half.

    • For later models the DVD drive assembly is not screwed in and will fall off if you open it upside down.

  3. Dieser Schritt ist noch nicht übersetzt. Hilf mit, ihn zu übersetzen!

    : Schritt 3, Bild 1 von 3 : Schritt 3, Bild 2 von 3 : Schritt 3, Bild 3 von 3
    • With the chassis open you can see the motherboard and its attachments.

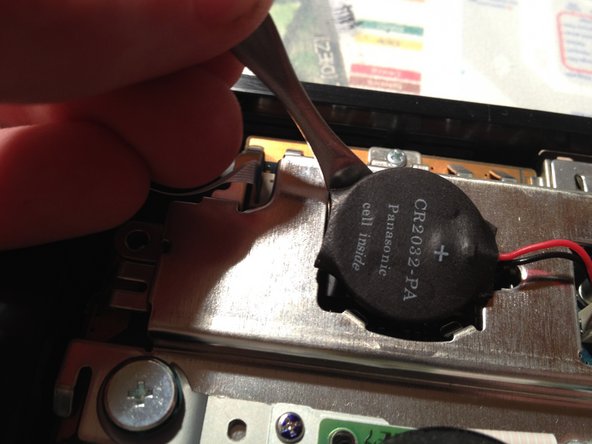
    • Identify the battery, then use a spudger to pry it out. Disconnect the battery from the motherboard with your hands.

  4. Dieser Schritt ist noch nicht übersetzt. Hilf mit, ihn zu übersetzen!

    : Schritt 4, Bild 1 von 3 : Schritt 4, Bild 2 von 3 : Schritt 4, Bild 3 von 3
    • Gently disconnect the three ribbon cables.

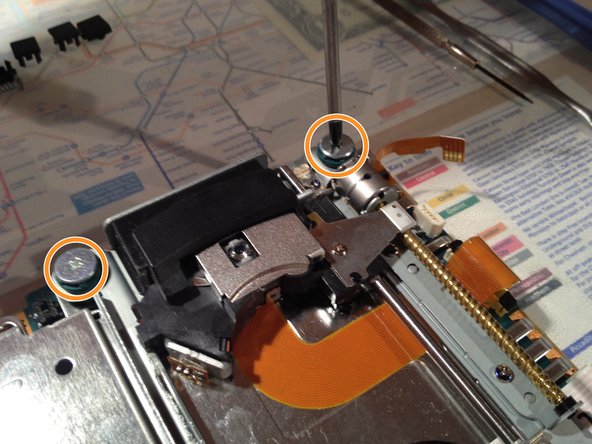
    • Take a Phillips #1 screwdriver and remove the four screws on the optical drive.

    • Two of the screws can't be seen on the picture, they are located on the opisite side from the visable ones.

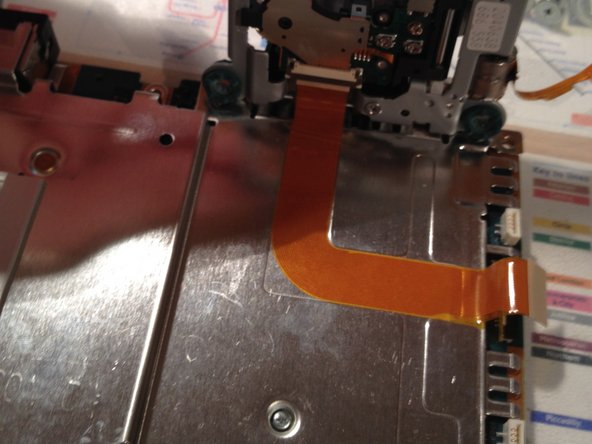
    • Pull up the optical drive and carefully peel the flex cable, attached underneath the drive, from the metal plate.

  5. Dieser Schritt ist noch nicht übersetzt. Hilf mit, ihn zu übersetzen!

    : Schritt 5, Bild 1 von 2 : Schritt 5, Bild 2 von 2
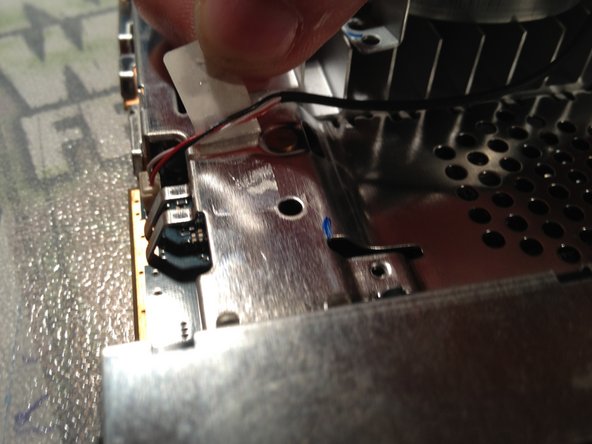
    • Remove the three PH00 screws from the fan's cover.

    • Then peel the duct tape back and remove the cable.

  6. Dieser Schritt ist noch nicht übersetzt. Hilf mit, ihn zu übersetzen!

    : Schritt 6, Bild 1 von 3 : Schritt 6, Bild 2 von 3 : Schritt 6, Bild 3 von 3
    • Remove the four screws marked on the picture. These are located on the bottom side of the motherboard.

    • Then flip the motherboard back over and remove the two rating screws on the upside.

    • Now both metal plates should be ready to remove.

  7. Dieser Schritt ist noch nicht übersetzt. Hilf mit, ihn zu übersetzen!

    : Schritt 7, Bild 1 von 2 : Schritt 7, Bild 2 von 2
    • Remove the metal plate from the bottom side of the motherboard.

    • Now everything should be disconnected and you successfully torn your PlayStation 2 Slimline down.

    • To reassemble, follow these steps in reverse.

tlroesner

Mitglied seit: 05/13/12

1.864 Reputation

4 Anleitungen geschrieben

2 Kommentare

not all slimlines are internally the same. as seen in the second picture, this teardown is for the 75004 model

Roman - Antwort

Komponen kotak hitam kaki 4 itu apa gan, di dalemnya kaya jumperan gitu. Itu fungsinya buat apa ya? Posisinya sudut kiri bawah iptikal drive.

camxmovie - Antwort

Kommentar hinzufügen

Seitenaufrufe:

Letzte 24 Stunden: 22

Letzte 7 Tage: 203

Letzte 30 Tage: 749

Insgesamt: 77,403