Zum Hauptinhalt wechseln

Dieser Teardown ist keine Reparaturanleitung. Um dein PlayStation 3 zu reparieren, verwende unsere Fehlerbehebungsseite.

  1. PlayStation 3 Fat 4 USB Teardown, The console case: Schritt 1, Bild 1 von 1
    • Inserir instruções aqui.

  2. PlayStation 3 Fat 4 USB Teardown, Remove the screws: Schritt 2, Bild 1 von 3 PlayStation 3 Fat 4 USB Teardown, Remove the screws: Schritt 2, Bild 2 von 3 PlayStation 3 Fat 4 USB Teardown, Remove the screws: Schritt 2, Bild 3 von 3
    • Inserir instruções aqui.

  3. PlayStation 3 Fat 4 USB Teardown, Open the console: Schritt 3, Bild 1 von 1
    • Inserir instruções aqui.

  4. PlayStation 3 Fat 4 USB Teardown, Remove the power supply: Schritt 4, Bild 1 von 2 PlayStation 3 Fat 4 USB Teardown, Remove the power supply: Schritt 4, Bild 2 von 2
    • Inserir instruções aqui.

  5. PlayStation 3 Fat 4 USB Teardown, The power supply board: Schritt 5, Bild 1 von 3 PlayStation 3 Fat 4 USB Teardown, The power supply board: Schritt 5, Bild 2 von 3 PlayStation 3 Fat 4 USB Teardown, The power supply board: Schritt 5, Bild 3 von 3
    • Inserir instruções aqui.

  6. PlayStation 3 Fat 4 USB Teardown, Remove the bluray driver: Schritt 6, Bild 1 von 3 PlayStation 3 Fat 4 USB Teardown, Remove the bluray driver: Schritt 6, Bild 2 von 3 PlayStation 3 Fat 4 USB Teardown, Remove the bluray driver: Schritt 6, Bild 3 von 3
    • Be very careful to do not break the data connector because it is very fragile.
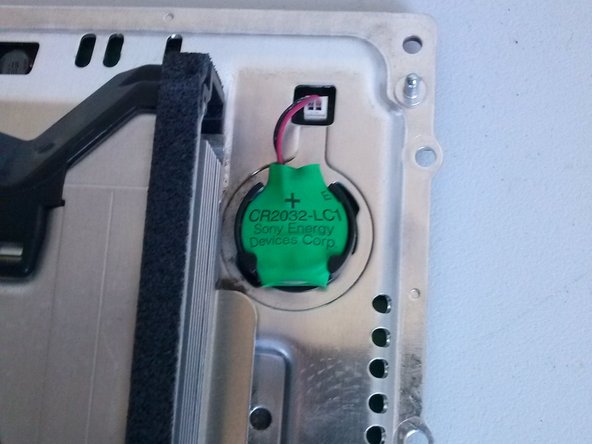
  7. PlayStation 3 Fat 4 USB Teardown, Remove the SD card slot: Schritt 7, Bild 1 von 3 PlayStation 3 Fat 4 USB Teardown, Remove the SD card slot: Schritt 7, Bild 2 von 3 PlayStation 3 Fat 4 USB Teardown, Remove the SD card slot: Schritt 7, Bild 3 von 3
    • Inserir instruções aqui.

  8. PlayStation 3 Fat 4 USB Teardown, Remove the bluethoot board: Schritt 8, Bild 1 von 2 PlayStation 3 Fat 4 USB Teardown, Remove the bluethoot board: Schritt 8, Bild 2 von 2
    • Inserir instruções aqui.

  9. PlayStation 3 Fat 4 USB Teardown, Remove the intire motherboard from the case: Schritt 9, Bild 1 von 3 PlayStation 3 Fat 4 USB Teardown, Remove the intire motherboard from the case: Schritt 9, Bild 2 von 3 PlayStation 3 Fat 4 USB Teardown, Remove the intire motherboard from the case: Schritt 9, Bild 3 von 3
    • Inserir instruções aqui.

  10. PlayStation 3 Fat 4 USB Teardown, Remove the coller and mother board shield: Schritt 10, Bild 1 von 3 PlayStation 3 Fat 4 USB Teardown, Remove the coller and mother board shield: Schritt 10, Bild 2 von 3 PlayStation 3 Fat 4 USB Teardown, Remove the coller and mother board shield: Schritt 10, Bild 3 von 3
    • Inserir instruções aqui.

  11. PlayStation 3 Fat 4 USB Teardown, The cooler specifications and ball bearing: Schritt 11, Bild 1 von 2 PlayStation 3 Fat 4 USB Teardown, The cooler specifications and ball bearing: Schritt 11, Bild 2 von 2
    • Inserir instruções aqui.

  12. PlayStation 3 Fat 4 USB Teardown, The gigantic and unefective cooler: Schritt 12, Bild 1 von 3 PlayStation 3 Fat 4 USB Teardown, The gigantic and unefective cooler: Schritt 12, Bild 2 von 3 PlayStation 3 Fat 4 USB Teardown, The gigantic and unefective cooler: Schritt 12, Bild 3 von 3
    • Inserir instruções aqui.

  13. PlayStation 3 Fat 4 USB Teardown, The mother board: Schritt 13, Bild 1 von 3 PlayStation 3 Fat 4 USB Teardown, The mother board: Schritt 13, Bild 2 von 3 PlayStation 3 Fat 4 USB Teardown, The mother board: Schritt 13, Bild 3 von 3
    • Inserir instruções aqui.

  14. PlayStation 3 Fat 4 USB Teardown, The processors: Schritt 14, Bild 1 von 3 PlayStation 3 Fat 4 USB Teardown, The processors: Schritt 14, Bild 2 von 3 PlayStation 3 Fat 4 USB Teardown, The processors: Schritt 14, Bild 3 von 3
    • Inserir instruções aqui.

  15. PlayStation 3 Fat 4 USB Teardown, Some details: Schritt 15, Bild 1 von 3 PlayStation 3 Fat 4 USB Teardown, Some details: Schritt 15, Bild 2 von 3 PlayStation 3 Fat 4 USB Teardown, Some details: Schritt 15, Bild 3 von 3
    • Bios battery

    • Power on and eject sensors

    • Main AC power conector and ground conector

  16. PlayStation 3 Fat 4 USB Teardown, Some details: Schritt 16, Bild 1 von 2 PlayStation 3 Fat 4 USB Teardown, Some details: Schritt 16, Bild 2 von 2
    • HD Slot

    • HD case screw

0 Kommentare

Kommentar hinzufügen

Seitenaufrufe:

Letzte 24 Stunden: 10

Letzte 7 Tage: 65

Letzte 30 Tage: 329

Insgesamt: 5,354