Diese Übersetzung enthält möglicherweise noch nicht die neuesten Änderungen der Original-Anleitung. Hilf mit, die Übersetzung zu aktualisieren oder sieh dir die Original-Anleitung an.
Einleitung
PlayStation 3 Super Slim - Wie man die Konsole komplett auseinanderbaut.
Das kannst du ebenfalls anschauen: PlayStation 3 Super Slim Teardown
Was du brauchst
Einführungsvideo
-
-
Entferne die drei Gummifüsschen, das Garantiesiegel und vier Schrauben.
-
Ziehe vorsichtig an der unteren Abdeckung, um sie zu entfernen.
-
-
-
Schiebe die Festplattenabdeckung in die Richtung der Rückseite des Gerätes, um sie zu entfernen.
-
Entferne die hier gezeigte blaue Schraube, um das Festplattengehäuse zu entfernen.
-
Entferne die 3 Chassis Schrauben mit einem TR8 Bit.
-
-
-
Verwende eine Metall-Pinzette, um den Riegel am hinteren oberen Endstück zu drücken und hebe es an, um es zu entfernen.
-
-
-
-
Entferne die zwei markierten Torx T3R8 Schrauben im CD-Laufwerk.
-
Entferne die fünf markierten Kreuzschlitzschrauben#1 entlang der Kante der oberen Abdeckung.
-
Hebe die obere Abdeckung an und entferne sie.
-
-
-
Bewege die optische Leseeinheit nach links, um eine der Schrauben freizulegen, die das Netzteil fixieren.
-
Entferne die zwei markierten Kreuzschlitzschrauben #1 und löse vorsichtig das Kabel rechts vom Netzteil.
-
Hebe das Netzteil an und entferne es.
-
-
-
Löse vorsichtig die markierten Flachbandkabel.
-
Hebe das optische Laufwerk an, um es zu entfernen.
-
Trenne und entferne das weiße Kabel und das Flachbandkabel wie im Bild markiert.
-
-
-
Entferne die sieben markierten Kreuzschlitzschrauben #1.
-
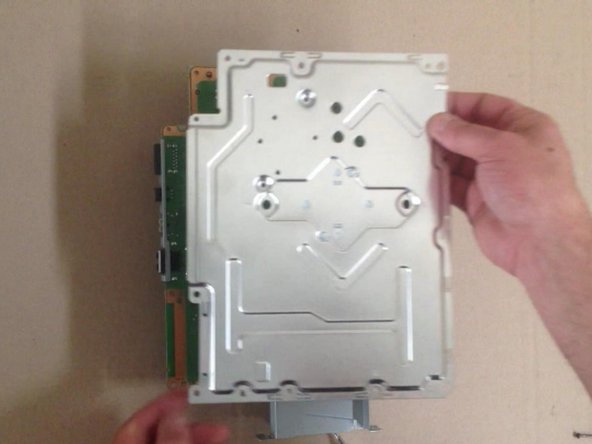
Hebe das Motherboard aus der unteren Hälfte des Gehäuses.
-
Löse vorsichtig die WLAN-Antennenkabel und den Lüfteranschluss (rote Pfeile im Bild).
-
-
-
Entferne die sechs markierten Kreuzschlitzschrauben #1, um den Kühlkörper und die Abdeckung vom Motherboard zu lösen.
-


Um dein Gerät wieder zusammenzubauen, folge der Anleitung in umgekehrter Reihenfolge.
Um dein Gerät wieder zusammenzubauen, folge der Anleitung in umgekehrter Reihenfolge.
Rückgängig: Ich habe diese Anleitung nicht absolviert.
41 weitere Nutzer:innen haben diese Anleitung absolviert.
Besonderer Dank geht an diese Übersetzer:innen:
91%


Diese Übersetzer:innen helfen uns, die Welt zu reparieren! Wie kann ich mithelfen?
Hier starten ›

Team

13 Kommentare
What's the name of the screwdriver that undo's the star shaped screws?
It is a T8 Torx screwdriver! I'll add the tools to this guide =)
i took apart my ps3 super slim and put it back together but there is no power what so ever no red light at all
Same here did you fix it?
Kriss -
One thing to pay attention to: The T8 Torx screws (at least on my 500GB model) are Tamper Proof TR8 screws, meaning you need a special screwdriver to undo them. A normal T8 wont work.
use a cross-shaped screwdriver (idk the correct name) to tear off the little metal thing, ez
Step 4: “simply remove the front finisher” - are you kidding me? I nearly broke mine!
Thank you, used 1.5mm straight screwdriver to undo the T8 security screws. PS3 completely clogged up with fluff. Used WD40 on a cotton bud to redistribute old heat sink compound on re assembly. Console is like new, video output works again! I keep a stack of those small plastic take away sauce pots, place the screws for the first step in the pot, then stack the second pot on for the second step screws etc.
Where does the Phillips #00 screwdriver come into play? You only used a #1.
I am replacing the optical drive in my console. But didn't note where the drive ribbon was positioned!? Every video I have found, they just pop right in...my original and replacement drives, have larger receptacles than the ribbon it self. There are at least 5 pins, that don't have (potentially) anything connecting them, to the ribbon. I don't want to randomly place the ribbon in one of the possible (7?) positions and fry something in the process...so where do I connect the smaller ribbon?!
Hey, dear community!
I did clean my PS3, because it was running hot and freezing after about 2 hours gameplay I'd say. However it did make the Problem worse, now my PS3 runs its fan like crazy when i boot it up and once i start a game, it sounds like a helicopter taking off.
Anybody know, where the temperature Sensor is located, or if i can just hardwire the fan to a potentiometer and adjust it by hand? (Learned mechatronics, so i could do something myself).
Thanks in advance,
Felix