Zum Hauptinhalt wechseln

Was du brauchst

Dieser Teardown ist keine Reparaturanleitung. Um dein Ratchet zu reparieren, verwende unsere Fehlerbehebungsseite.

  1. Ratchet Teardown, Duralast Ratchet Teardown: Schritt 1, Bild 1 von 1
    • Complete ratchet

  2. Ratchet Teardown, Removing the flexible head: Schritt 2, Bild 1 von 1
    • The head is attached with a machine screw and a split washer to make the head hold its position.

    • If the head slips sometimes the helical split washer can be bent out or replaced.

  3. Ratchet Teardown, Removing the ratcheting mechanism: Schritt 3, Bild 1 von 2 Ratchet Teardown, Removing the ratcheting mechanism: Schritt 3, Bild 2 von 2
    • Head opened and in pieces

  4. Ratchet Teardown, Ratcheting Mechanism: Schritt 4, Bild 1 von 3 Ratchet Teardown, Ratcheting Mechanism: Schritt 4, Bild 2 von 3 Ratchet Teardown, Ratcheting Mechanism: Schritt 4, Bild 3 von 3
    • Ratcheting mechanism in various views

  5. Ratchet Teardown, Ratchet Mechanism Parts: Schritt 5, Bild 1 von 1
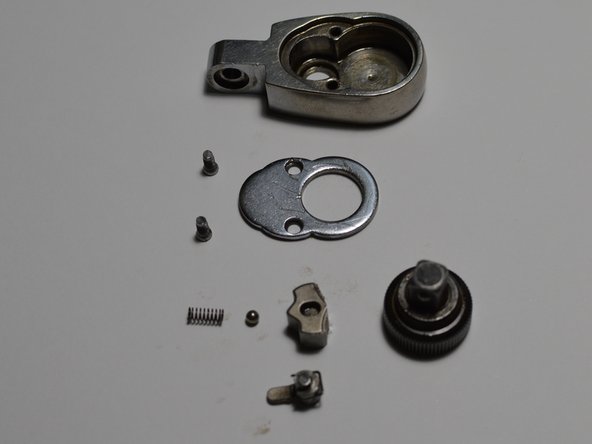
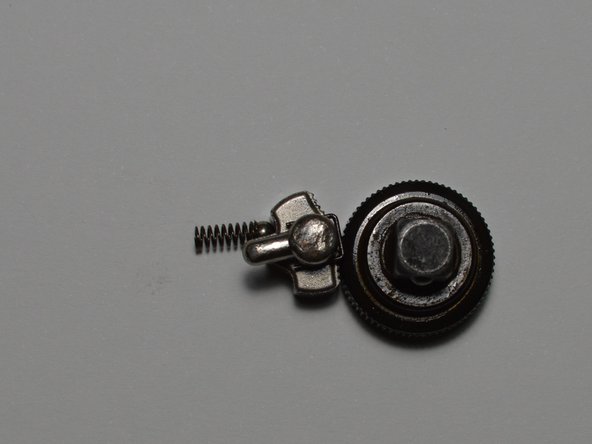
    • Spring: holds ball bearing against pawl

    • Ball bearing: holds pawl in its position

    • Pawl: allows gear/tang to rotate in only one direction

    • Gear/Tang: part that rotates

    • Lever: selects the pawls position and what direction the gear turns

  6. Ratchet Teardown, Complete Ratchet: Schritt 6, Bild 1 von 1
    • All parts laid out

Wieli

Mitglied seit: 01/08/23

1.707 Reputation

12 Anleitungen geschrieben

0 Kommentare

Kommentar hinzufügen

Seitenaufrufe:

Letzte 24 Stunden: 0

Letzte 7 Tage: 10

Letzte 30 Tage: 38

Insgesamt: 648