Zum Hauptinhalt wechseln

Dieser Teardown ist in Bearbeitung – Lade die Seite regelmäßig neu, um die neuesten Änderungen zu sehen!

Was du brauchst

  1. Samsung Galaxy Tab 3 7.0 Teardown, Samsung Galaxy Tab 3 7.0 Teardown: Schritt 1, Bild 1 von 1
    • Make sure u have the essential tools need(Bought this toolkit for 10 dollars at walmart)

  2. Samsung Galaxy Tab 3 7.0 Teardown: Schritt 2, Bild 1 von 1
    • Take off the micro sd card cover

  3. Samsung Galaxy Tab 3 7.0 Teardown: Schritt 3, Bild 1 von 2 Samsung Galaxy Tab 3 7.0 Teardown: Schritt 3, Bild 2 von 2
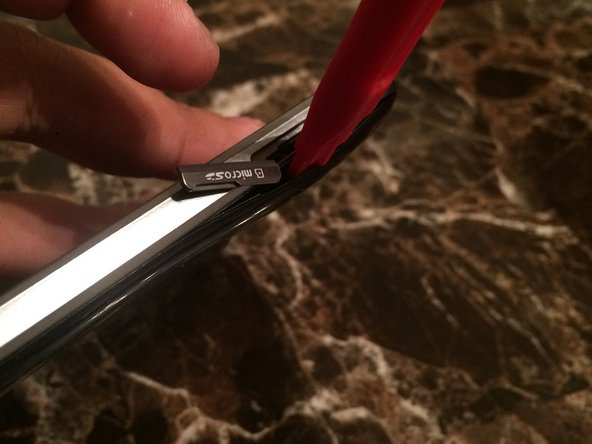
    • use the mini pry bar

    • Shove into the lining between the back and the micro sd card.

    • When its wedged push it all around the sides

  4. Samsung Galaxy Tab 3 7.0 Teardown: Schritt 4, Bild 1 von 1
    • Now that the back is out you are looking at the insides

  5. Samsung Galaxy Tab 3 7.0 Teardown: Schritt 5, Bild 1 von 2 Samsung Galaxy Tab 3 7.0 Teardown: Schritt 5, Bild 2 von 2
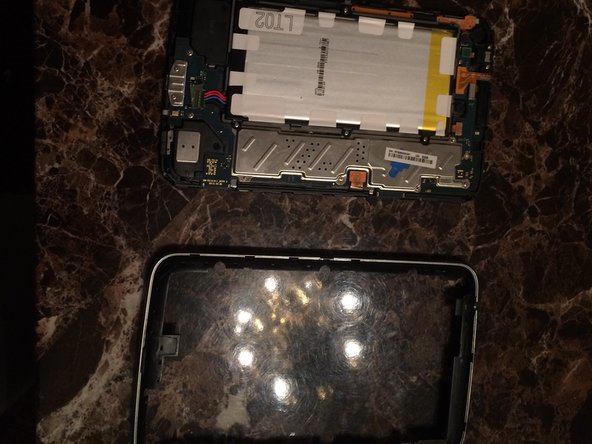
    • turn it around then insert the mini pry bar between the screen and the silver border and slide the pry bar around all sides until the silver lining is poping off the screen

  6. Samsung Galaxy Tab 3 7.0 Teardown: Schritt 6, Bild 1 von 1
    • unscrew the screws around the battery

  7. Samsung Galaxy Tab 3 7.0 Teardown: Schritt 7, Bild 1 von 1
    • Now take out the connectors (all of them)

  8. Samsung Galaxy Tab 3 7.0 Teardown: Schritt 8, Bild 1 von 2 Samsung Galaxy Tab 3 7.0 Teardown: Schritt 8, Bild 2 von 2
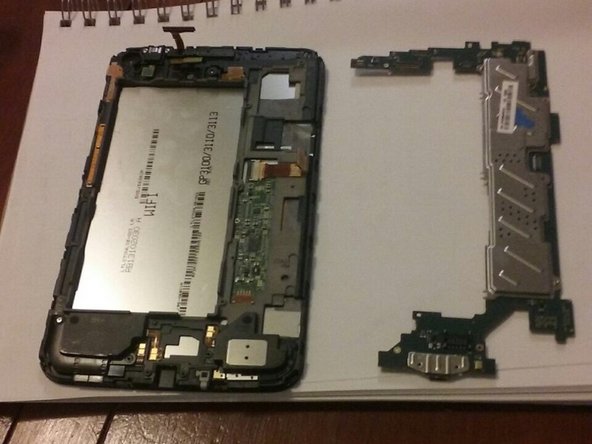
    • now take out all the screws that are all around the edges

    • than you will see that you can just pull the motherboard out

Jordan Senimanora

Mitglied seit: 11/01/16

321 Reputation

1 Anleitung geschrieben

0 Kommentare

Kommentar hinzufügen

Seitenaufrufe:

Letzte 24 Stunden: 0

Letzte 7 Tage: 0

Letzte 30 Tage: 1

Insgesamt: 2,208