Zum Hauptinhalt wechseln

Was du brauchst

Dieser Teardown ist keine Reparaturanleitung. Um dein Samsung T139 zu reparieren, verwende unsere Fehlerbehebungsseite.

  1. Samsung T139 Teardown, Removing the battery and back screws: Schritt 1, Bild 1 von 2 Samsung T139 Teardown, Removing the battery and back screws: Schritt 1, Bild 2 von 2
    • Start by removing the back of the phone. Once that is done you will find 4 Phillips 00 screws two on the top left and right and two on the bottom left and right

    • Take out the battery

  2. Samsung T139 Teardown, Remove the back screws: Schritt 2, Bild 1 von 1
    • You will see 4 phillips 00 screws, two on the top left and right and two on the bottom left and right. Remove them.

  3. Samsung T139 Teardown, Removing the outer border: Schritt 3, Bild 1 von 3 Samsung T139 Teardown, Removing the outer border: Schritt 3, Bild 2 von 3 Samsung T139 Teardown, Removing the outer border: Schritt 3, Bild 3 von 3
    In diesem Schritt verwendetes Werkzeug:
    Jimmy
    $7.95
    Kaufen
    • Take the Jimmy and go around the sides of the phone until the outer border comes off.

    • Be aware of the buttons on the side as they will fall out.

  4. Samsung T139 Teardown, Removing the logic board: Schritt 4, Bild 1 von 2 Samsung T139 Teardown, Removing the logic board: Schritt 4, Bild 2 von 2
    In diesem Schritt verwendetes Werkzeug:
    Spudger
    $2.99
    Kaufen
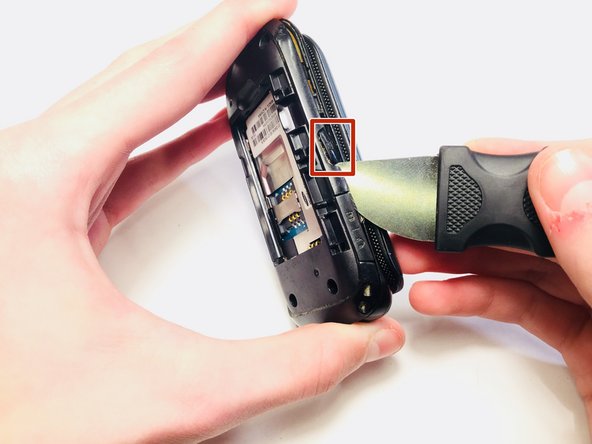
    • Push gently on the side of the screen cable with a Spudger to release

    • Then remove the logic board.

  5. Samsung T139 Teardown, Removing the key pad: Schritt 5, Bild 1 von 1
    In diesem Schritt verwendetes Werkzeug:
    Tweezers
    $4.99
    Kaufen
    • Take the keyboard out by pulling gently on the side with some tweezers

  6. Samsung T139 Teardown, Remove screws: Schritt 6, Bild 1 von 2 Samsung T139 Teardown, Remove screws: Schritt 6, Bild 2 von 2
    • Remove the two black screw covers on the bottom of the screen

    • Remove the two screws that are revealed

  7. Samsung T139 Teardown, Removing the case: Schritt 7, Bild 1 von 2 Samsung T139 Teardown, Removing the case: Schritt 7, Bild 2 von 2
    In diesem Schritt verwendetes Werkzeug:
    Jimmy
    $7.95
    Kaufen
    • Take a Jimmy and go around it until the front case (the one with the smaller screen) comes off.

  8. Samsung T139 Teardown, Looking at the phone: Schritt 8, Bild 1 von 1
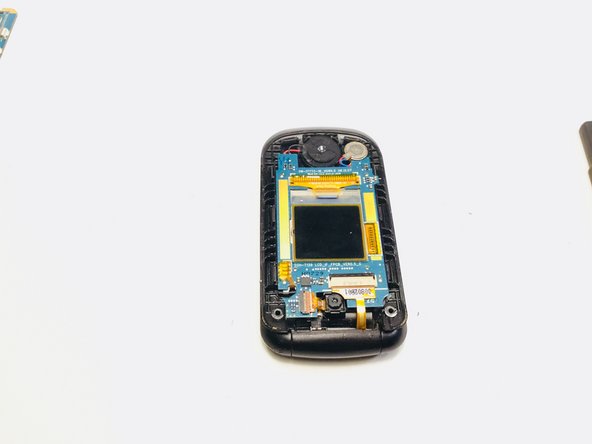
    • After you are done with step six the phone should look like this

  9. Samsung T139 Teardown, Remove the logic board to screen connection: Schritt 9, Bild 1 von 3 Samsung T139 Teardown, Remove the logic board to screen connection: Schritt 9, Bild 2 von 3 Samsung T139 Teardown, Remove the logic board to screen connection: Schritt 9, Bild 3 von 3
    In diesem Schritt verwendetes Werkzeug:
    Spudger
    $2.99
    Kaufen
    • Take a Spudger and push up on the little black bar at the top end of the screen to logic board cable

  10. Samsung T139 Teardown, Remove the camera: Schritt 10, Bild 1 von 1
    In diesem Schritt verwendetes Werkzeug:
    Spudger
    $2.99
    Kaufen
    • Take a Spudger and push up the little red bar over the camera cable.

    • Pull the cable out and remove the camera.

  11. Samsung T139 Teardown, Getting the screen out: Schritt 11, Bild 1 von 1
    In diesem Schritt verwendetes Werkzeug:
    Tweezers
    $4.99
    Kaufen
    • Take a pair of tweezers and lift up to remove the screen.

  12. Samsung T139 Teardown, The finished product: Schritt 12, Bild 1 von 1
    • Congrats! Your done. Let's take a look at what we have.

    • Outer cases

    • Screens

    • Logic board

    • A camera

    • Some button covers

    • A battery

    • A keypad cover

Nathan

Mitglied seit: 09/21/17

386 Reputation

2 Anleitungen geschrieben

0 Kommentare

Kommentar hinzufügen

Seitenaufrufe:

Letzte 24 Stunden: 0

Letzte 7 Tage: 6

Letzte 30 Tage: 16

Insgesamt: 417