Einleitung
Teardown for getting the 5TB hard drive out of a Seagate external caddy (and being able to reuse the caddy)
STEB5000200
Was du brauchst
-
-
Use the metal spudger to open up the device gently, then slide in a credit card and work around the drive gently prying (push the card in to push the clips in and stop them breaking)
-
-
-
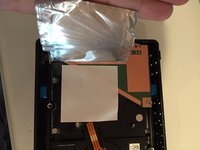
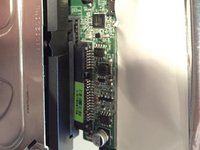
Top now removed you should see the drive and the USB adaptor hidden under the foil.
-
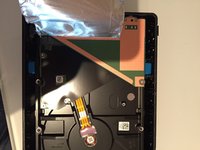
Turn the drive over and let it slide out, use the metal spudger to gently encourage it out if it won't.
-
-
-
Peel the foil back gently. You'll find a white square (no idea what its for!) remove this (its not stuck down). Don't pull the foil off completely.
-
-
-
-
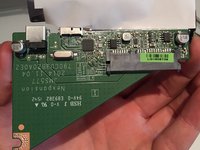
Remove the screw on the underside of the drive, it holds the SATA to USB adaptor in place.
-
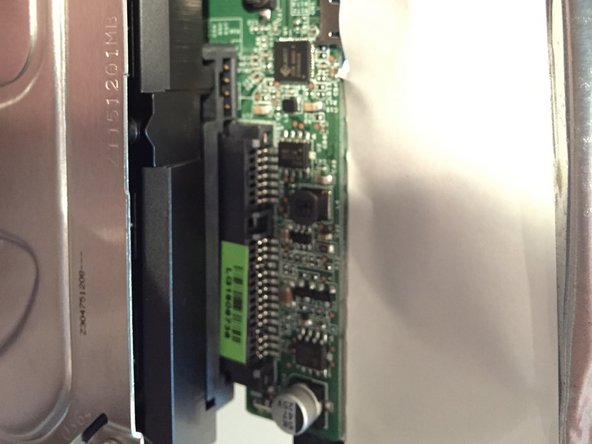
Turn the drive over now the screw is removed and you should be able to gently pull the SATA to USB adaptor away from the Hard Drive.
-
-
-
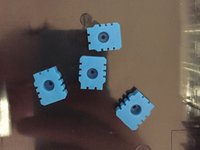
You'll find four blue grommets on each side of the hard drive. These are attached with low stick glue so you can pull these away gently.
-
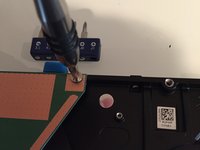
Now you'll find 4 screws that you can remove. They were pretty tightly done up, so be gentle not to strip the heads.
-
-
-
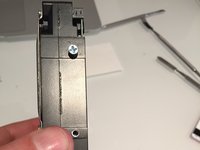
Final drive. Completely torn down. Stick it all back together and it will work without issue. And you have a working 5TB was external now internal drive. Have fun!
-


To reassemble your device, follow these instructions in reverse order.
Rückgängig: Ich habe diese Anleitung nicht absolviert.
7 weitere Personen haben diese Anleitung absolviert.
6 Kommentare zur Anleitung
Does the SATA to USB control board do encryption at all like the awful Western Digital ones do? The drive works perfectly fine out of the enclosure?
I've used these drives on many of my builds, upgrades, make sure your MB BIOS can recognize the full capacity of the drive, or chances are you will run into size issues or data corruption within windows. I had an HP 8100 Elite, that only recognized 585 GB of the drive, I deleted the partitions in Windows Pro x64 and converted it to a GPT. After formatting it Windows recognized it as a legit 5 TB, and I started using it for storage, after a while maybe a month or so, the drive started acting funny, slow access speeds, errors saying not enough space when transferring or copying large files. Then one day the drive just disappeared, I could still see the 585 GB drive in the BIOS but not in Windows. I thought it was DOA. I used recovery software to try to get may data back but most of it was corrupted. I figured I did something wrong or a virus. until it happened again. I used Gparted and drive came back, put it in a different PC that BIOS see's all and it has worked ever since. I may be wrong... But it worked.
Later models don’t have the white square and the foil is only wrapped around a from the controller, over the part of the board where the SATA connector is, and a little bit of the drive. “Minimum Viable EMI protection” would be my guess :-) The rest of the process is unchanged.
@superjames no encryption - however, USB/Sata adapters vary about reporting 4096-byte sectors vs. 512-byte sectors - in my case, the Seagate enclosure reported 512 so the GPT was based on that, but when I stuck it into a Sabrent desktop enclosure, it reported 4096 byte sectors so the operating system couldn’t even *find* the partition table. (Since my goal was to move a bunch of these into a MediaSonic Probox to conserve USB channels, and *that* correctly reported 512, it worked fine - but superuser.com has a bunch of answers about “4k emulation” and “advanced format” if you end up trying to straighten that out. (If you’re not trying to preserve the data, just reformat.)
Easier way to pop the clips:
* start near the usb port with the thin metal spudger
* once you have seperation, “dig down” - don’t try to “pry the top off”, try to pop the *sides* out. This releases the force on the clips, and you can just start lifting up the top with a pointy stick to keep them from going back in.