Einleitung
Dieses iPad wurde an Apples neulicher Veranstaltung mit Schwerpunkt Unterricht vorgestellt. Wir erwarteten also weniger eine "neue heiße Folge" der iPad Serie sondern eher eine "neu editierte Paperbackausgabe mit verbesserten Illustrationen". Die technischen Daten lassen zwei größere Verbesserungen erkennen, einen leistungsfähigeren Prozessor und die Unterstützung eines Pencils. Hat Apple still und heimlich noch mehr aufgerüstet? Mit unserem Teardown werden wir das herausfinden!
Möchtest du der erste sein, der in die neuesten Gadgets hineinguckt? Folge uns auf Facebook, Instagram oder Twitter, und du erhältst die letzten Neuigkeiten aus der Reparaturwelt. Wenn du über Updates unserer Anleitungen informiert werden willst, dann schau in unseren Newsletter.
Was du brauchst
Einführungsvideo
-
-
Guten Morgen, liebe Klasse. Lasst uns einen neuen Mitschüler begrüßen: das iPad 6! <Klatschen> Erzähl uns doch was von dir:
-
Apple A10 Fusion Prozessor mit integriertem M10 Motion Koprozessor
-
9,7" multi-touch Retina Display mit einer Auflösung von 2048 × 1536 (264 ppi) und nicht verklebter Displayeinheit
-
32 GB oder 128 GB Speicher
-
8-Megapixel 1080p iSight Rückkamera + 1,2-Megapixel 720p FaceTime HD Frontkamera
-
802.11a/b/g/n/ac Dual Band MIMO Wi-Fi + Bluetooth 4.2
-
Touch ID Fingerabdruck Sensor + 3-Achsen Gyro + Beschleunigungssensor + Barometer + Umgebungslichtsensor
-
Unterstützung für den Apple Pencil
-
-
-
Im Ausbildungsbereich hat Apple harte Konkurrenz in Form von preiswerten mit Google Technik betriebenen Laptops. Wie wird sich dieses iPad gegen ein Chromebook von HP oder Asus behaupten?
-
Hier unsere Sicht der Dinge unter dem Aspekt, dass Schulkinder durchaus rücksichtslos mit Elektronik umgehen können:
-
Das geklebte Glasdisplay des iPads ist empfindlicher gegen Stürze. Glücklicherweise ist dies das einzige iPad mit einem Luftspalt im Touchscreen - vielleicht optisch nicht so eindrucksvoll wie andere neuere iPads, aber der Austausch einer zerbrochenen Scheibe ist viel günstiger als bei LOCA-verklebten Scheiben.
-
Zubehörteile wie Tastaturen und das Pencil gehen separat. Das erhöht die Kosten und sie sind leichter zu verlieren - sie sind aber auch im Schadenfall einfacher zu ersetzen. (Wir denken an die verlorene Taste auf der Tastatur unseres HP)
-
Neues iPad, neue Modellnummer! Dieses Jahr ist es A1893.
-
-
-
Auch diesmal haben unsere Freunde bei Creative Electron ihre Meisterschaft beim Röntgen bewiesen und das iPad für uns buchstäblich durchleuchtet.
-
Wie erwartet, gibt es nur kleine Unterschiede zur vorherigen Version zu sehen.
-
-
-
An dieser Stelle waren wir ja schon öfter, jetzt gehen wir mittenrein: der iOpener sorgt für die Hitze, der Saugheber und das Plastiköffnungswerkzeug besorgen das Aufhebeln und voilá!
-
Wie von Zauberhand löst sich die Touchscreenscheibe getrennt vom Display - ein gutes Zeichen für die Reparierfreundlichkeit.
-
-
-
-
Wir schätzen wertige Dinge und hier haben wir gleich zwei auf ein Mal: einen Blick auf das neue iPad und einen exklusiven Blick auf die Dinge, die von iFixit demnächst kommen werden!
-
Nachdem wir einige Kreuzschlitzschrauben gelöst haben, können wir das LCD anheben und vom Logic Board trennen.
-
Sicherheit geht vor! Bevor wir weitermachen schieben wir ein Akkutrennstück zwischen Akku und Logic Board, um herumstreunende Elektronen aus unserem Teardown herauszuhalten.
Where can I buy iPad 6 fpc
battery connectors? Is it interchangable with an iPad pro 2g?
-
-
-
Nachdem das Display aus dem Weg ist, können wir den Touchscreen sicher abtrennen.
-
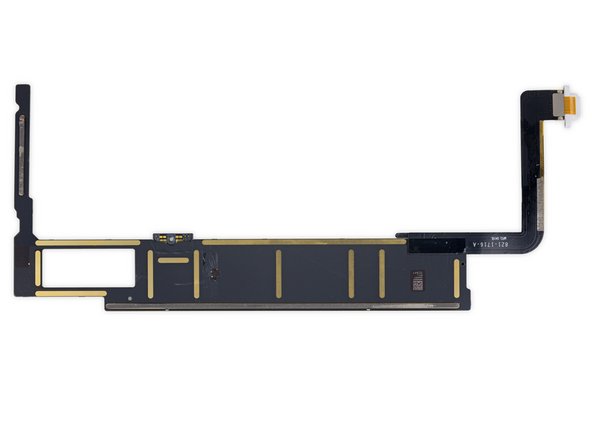
Am Touchscreen befinden sich die gleichen zwei Kabel wie vorher, sie sehen aber doch ein bisschen anders aus als letztes Jahr.
-
Vielleicht wurden sie wegen des Pencils leicht abgeändert?
-
Schau mal, was sich unter einer Abschirmung versteckt hat! Der gleiche NXP 8461A1 Touch ID Chip, den wir schon vom letzten Modell her kennen.
In this step, the photo on the far left shows the two cables that were severed on my iPad by the blue plastic triangle tools. Consequently, my digitizer is FUBAR!
The photo on the far right shows a different iPad than the one I have. Several parts are different or missing altogether. This photo should have a warning.
Hi Bradford,
As stated in the introduction, this is a teardown of the iPad 6, not a repair manual. When actual guides are written for this device, you will find them here.
-
-
-
Das Logic Board ist mit sehr fest mit Gehäuse verklebt, das bekämpfen wir mit flüssigen Fäusten!
-
Wow! Der angriffslustige Klebstoff gibt schnell nach und das Logic Board kommt als Ganzes heraus.
-
... und ein unglückseliges Teil dieser Platine ist der Lightning Connector. Dieses Teil wird intensiv genutzt und wird vermutlich vor dem restlichen Logic Board kaputt gehen. Du musst ein ganz schöner Crack im Mikrolöten sein, um hier eine simple Buchse auszuwechseln.
This is disappointing. I have seen too many iPad Airs with borked charging circuits, with behaviors like battery won’t charge but unit boots or will only boot when powered by a 2.1A block, but won’t sync. Apple has to be aware of this, and it is often attributed to a bad charging controller IC. Considering that many schools are giving iPads to kids to take home, and that parents may be less than judicious about sourcing “good” iPad chargers (Five Below, anyone?) and policing good cable management, this is lamentable on Apple’s part.
-
-
-
Wir hatte bisher ziemliche Schwierigkeiten größere Updates zu finden, aber vielleicht hat Apple doch noch was Lustiges auf dem Logic Board einschleichen lassen:
-
Apple A10 Fusion APL1W24 SoC (wie auch im iPhone 7) mit 2 GB Micron MT53B256M64D2TP-062 L XT:C LPDDR4 SDRAM darunter.
-
Apple 343500203-A0, vermutlich ein PMIC, möglicherweise ein Nachfolger des 343S001441-A0 aus dem iPad 5.
-
2x Broadcom BCM15900B0 Touchscreen Controller wie schon im 10,5" und 12,9" iPad Pro
-
NXP Semiconductor Display Port Multiplexer (vermutlich)
-
Bosch Sensortec Drucksensor
-
Invensense Beschleunigungssensor
-
-
-
Und hier ist der zweite Teil des Chip ID Tests:
-
Toshiba TSB3236LX3536TWNB1 32 GB Flash Speicher
-
USI 339S00448 Wi-Fi/Bluetooth Modul
-
NXP 80V18 PN80V NFC Controller
-
Cirrus Logic CS42L83A low power Audio Codec
-
Cirrus Logic Audioverstärker (vermutlich)
-
Maxim Integrated MAX98357B AB Klasse Audioverstärker x4
-
Verbergen sich auf der Rückseite irgendwelche Bonus Chips? Nope. Wir haben nachgeschaut.
you have scematic ipad 6 this ?
Can I upgrade the flash memory from 32 to 64 or higher
-
-
-
Wir freuen uns, dass Apple hier weiterhin den Akku aus dem iPad 5 verwendet—Modellnummer A1484 mit einer Kapazität von 32,9 Wh.
-
Wir freuen uns allerdings nicht über die große Menge an reparaturbehinderndem Klebstoff genau wie im iPad 5.
-
Es gab Mal einen Hoffnungsschimmer, dass Apple den Austausch des Akkus einfach macht, aber seitdem haben wir nichts dergleichen mehr gesehen.
-
Die gute Nachricht ist, dass du jetzt schon den Ersatzakku haben kannst—und wenn du eine große Organisation bist, die viele iPads beliefert, dann kannst du mit einem Teil verschiedene Modelle versorgen. (Unter der Bedingung, dass du die Originalakkus überhaupt kriegst.)
-
-
-
Unsere Arbeit hier ist getan. Danke für die Teilnahme an diesem Teardown. Jetzt ist Zeit für ein Päuschen!
-
Wenn du diesen Teardown mit nach Hause nehmen willst, dann schaue Mal unser Wallpaper der Innenansicht an sowie das Röntgen- Wallpaper!
Very flawed guide - there is no way to use the pick to start the removal of the digitizer. Ridiculous to think that the suction cup and heat will do anything useful. Further, the lack of explanation and correct detail for the Cellular model resulted in the ruination of my device - karked the cellular module because they lack the documentation for it. Karked the digitizer because again, detail wasn't correct. Wasted money, wasted device. i think the guide was pretty bad at explaining where you can actually go and where you can actually not go. It was also terrible at explaining how to reassemble with the adhesive.
-
- Das LCD ist leicht zu entfernen, wenn die Abdeckscheibe/der Touchscreen einmal abgetrennt ist.
- Die Abdeckscheibe ist durch einen Luftspalt vom LCD getrennt und separat zu ersetzen. Dadurch werden Reparaturen nach Sturzschäden viel günstiger.
- Wie bei allen iPads verhindert eine massive Barriere von sehr starkem Kleber jegliche Reparatur und macht das Aufarbeiten zur klebrigen Übung.
- Praktisch alle Bauteile sind verklebt. Eine besondere Herausforderung ist der Austausch des Akkus.
- Das LCD ist mit geschäumten Klebeband am Frontpanel befestigt. Das erhöht das Risiko, es beim Ausbau zu beschädigen.


Fazit
Reparierbarkeits-Index


(10 ist am einfachsten zu reparieren)
Besonderer Dank geht an diese Übersetzer:innen:
100%

Diese Übersetzer:innen helfen uns, die Welt zu reparieren! Wie kann ich mithelfen?
Hier starten ›
40 Kommentare
Great tear down glad to see separate digitizer!
Same! I support several school districts, and the cost of Air 2 screens have made them unfixable at the current price point.
Hi, which toolkit is represented in step 5?
Looks like a new 112 bit tool kit with two handles! Don’t see it listed in the store yet ;-}
Dan -
I need that kit now!!!!!!!!!
The battery is the same, but will an Air 1/iPad 5 digitizer work? Will it still support pencil?
try it iFixit!?
I don’t think Air 1/iPad 5 digitizer will work on iPad 6, as the connector’s orientation is different.
Gorilla -
Why is the iFixit Adhesive Remover not for sale?
Normally it would be. Currently it’s available as part of several part + toolkit sets, but the standalone product is being updated. Check again soon ;)
oof thats $@$*!&
The LCD is the same as Air 5?
As ever iFixit hates Apple for designing parts that simply don’t go wrong in the first place.
Follow the money. If iFixit can’t sell parts then they give low scores.
As a consumer, not failing beats fixability every day of the week.
That’s an odd claim, the iPad 6 is patterned off of the 5, which also earned a 2, and we sell loads of parts for it. Similarly, our iPad 5 digitizer glass has over 11,000 views to date, that’s a lot of views for something that never goes wrong. Durability is great, but entropy will win eventually, and fixability is a good indicator for recyclability. Glued down batteries are dangerous and time-consuming to recycle, increasing e-waste.
Has anyone seen if digitisers are available yet? too soon I’m guessing, already had a customer in with one dropped the day after he bought it….
So many POSITIVE descriptors for IFIXIT to do these tear downs. . . . . informative, professional, timely, waste-reducing, cost-saving, headache-minimizing and list could go on. BEST in the industry.
Anyone seen the digitizer yet for the 6th generation yet? ETA maybe?
I'm in need of the digitizer and the LCD Screen for the A1893 iPad 2018. Anyone know if the Air 1 LCD will be compatible or where to find a digitizer?
Thank You!
You might try Ali express. Will take forever but they can likely ship you one.
It is way too bad that Apple has used battery this small.I was intending to buy one until I see the horribly tiny battery.Come on,Apple.You are better than this.
wow very interesting
is this the ipad 2018?
yes it is the model from 2018
What kind of adhesive do you use to glue back the glass?
We would recommend pre-cut adhesive strips like these.
My ipad 6 gen does not look like this at all, on the top there is a black rectangular shaped piece where the front camera sits and there is a hole in the back metal casing to make space for it. That plastic piece is the part thats broken, What is it called and where can i buy one?
Also checked my friends ipad 6 gen as well and it has this as well. The back of these ipad 6’s look nothing like the one in this pictures.
Hi Ryan,
I think the iPad model you have is the Wi-Fi + Cellular model, while our teardown unit is the Wi-Fi only model. The black plastic rectangular piece allows for the cellular radios to penetrate through the aluminum case properly to ensure cell service. You may have to replace the entire back cover to fix the broken plastic part.
Does anybody know if the power button assembly can be replaced like the iPad 5 and some other iPads? I have a customer that has damaged their iPad to where that needs to be replaced. I didn’t want to mess with it too much unless I knew there was a part for it but I haven’t seen a power button assembly replacement unless I am not looking good enough.
@car34 Based on the X-ray, that component looks really similar to the one in the previous generation. I’m sure it’s replaceable. Whether or not it’s the same part or compatible with the iPad 5 version, I couldn’t say—my guess would be the button cover is identical, with maybe 50/50 odds the underlying flex cable is the same.
Who made the lcd? Why don’t you mention??
where to get a new display of an ipad 2017 9.7’’ please advice?
My son’s iPad screen shattered. So instead of buying a new iPad I figured I would turn it into a teaching moment for my son. I was replacing both the screen and a new home button.
Warning:
If you have a shattered screen please beware that it can be difficult to remove and leave a lot of tiny shards of glass. It was a mess.
I purchased the “iOpener” kit - which was all I needed.
Time: 4 hours
Recommended Equipment:
- Can of compressed air
- Adhesive or double sided cello tape.
- Soft anti-static and anti scratch cloths
Pro Tip:
If your screen is really shattered, I recommend leaving it in the sun for a half hour or so to really get it loose.
If you’re replacing both the screen and a new home button, don’t forget the washer ring that holds the home button in place. So if you are doing a screen and home button replacement, grab that washer and even the delicate gasket off the old home button otherwise it won’t stay snug in place. I really wish the home button kit shipped with those items intact.
genial por muestrando, quiero repararlo ahora!
I was so glad that there is separate digitizer as my warranty was finished. The screen was cracked so bad i got !#^&@@ and pull off some of it and noticed that the digitizer was separate and my god the LCD was perfectly intact. At that point I decided to get my replacement digitizer from ifixit. I was very happy that it came with the adhesive already around the edges. I followed the repair guide but still it took me almost 2 hours as I was being extra carful not to damage the LCD. For future references tape the broken screen with clear tape then proceeded to remove it as it will keep the little shards from flying over the place and most of all make sure to use protective eyewear as I said those little shards will fly as I got one in the eye.
Thank you ifixit