Zum Hauptinhalt wechseln
Archivierte Anleitung
Diese Anleitung wurde ausschließlich für historische Zwecke erhalten. Verwende die aktualisierte Version dieser Anleitung, um deine Reparatur durchzuführen.

Was du brauchst

Dieser Teardown ist keine Reparaturanleitung. Um dein iPhone 6 zu reparieren, verwende unsere Fehlerbehebungsseite.

  1. iPhone 6 Teardown, iPhone 6 Teardown: Schritt 1, Bild 1 von 3 iPhone 6 Teardown, iPhone 6 Teardown: Schritt 1, Bild 2 von 3 iPhone 6 Teardown, iPhone 6 Teardown: Schritt 1, Bild 3 von 3
    • Unboxing the iPhone 6: yup, it's a phone.

  2. iPhone 6 Teardown: Schritt 2, Bild 1 von 1
    • After removing the familiar two Pentalobe screws we use a suction cup to carefully lift up the screen to give us enough space to run a plastic tool down the edges to release the screen clips

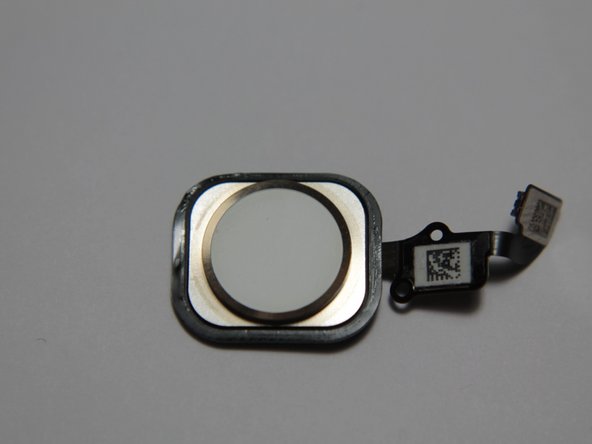
    • Unlike the 5s, The 6 Touch ID cable is now routed up the back of the screen, so we don't have to worry about accidentally ripping the touch ID cable.

  3. iPhone 6 Teardown: Schritt 3, Bild 1 von 2 iPhone 6 Teardown: Schritt 3, Bild 2 von 2
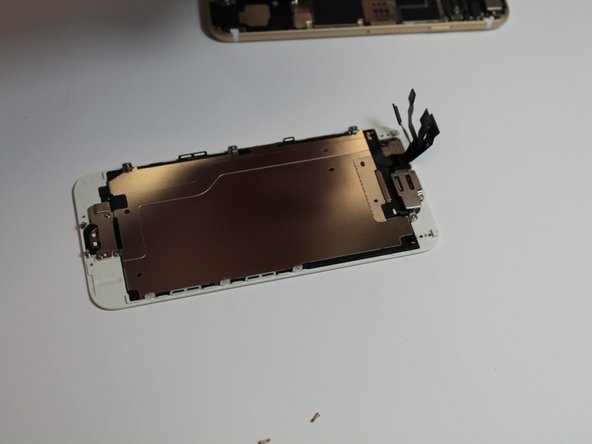
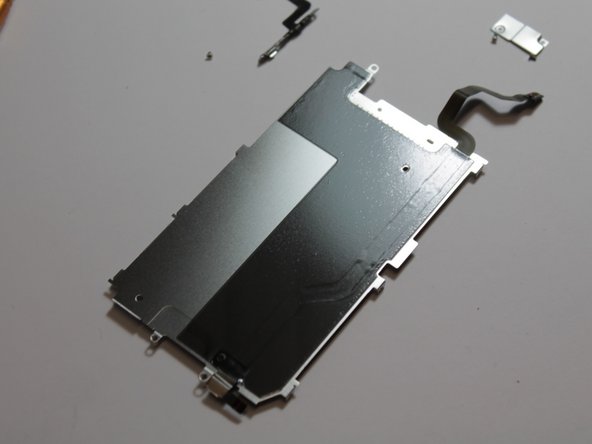
    • The screen connectors are covered by a metal plate, similar to the previous models.

    • This plate is held by 5 screws this time.

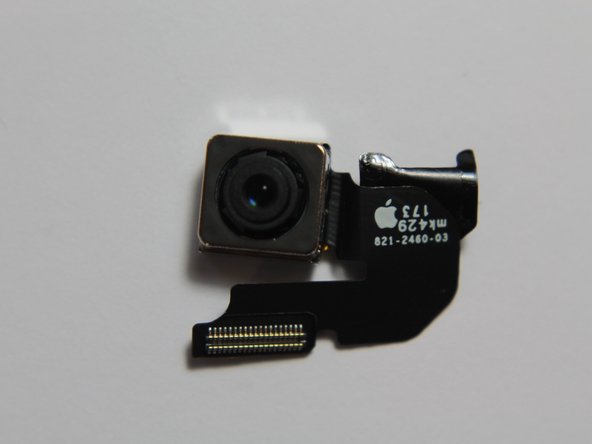
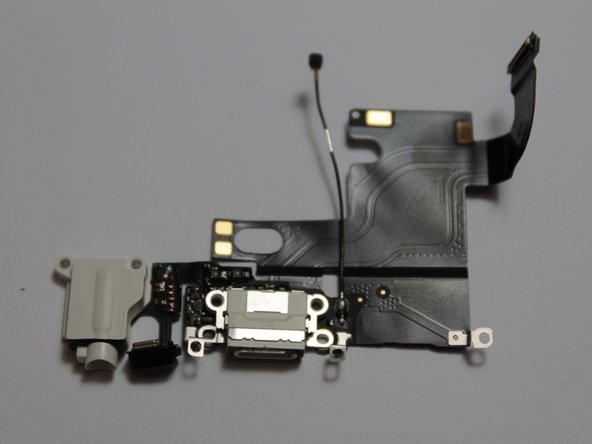
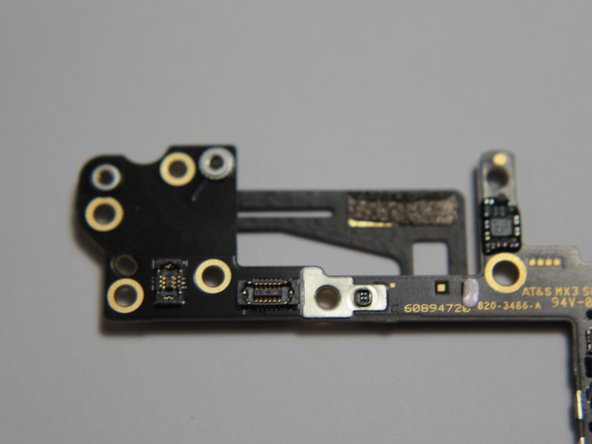
    • There are 5 connectors under this plate: LCD/Touch Sensor/Front Camera, Rear Camera and TouchID.

  4. iPhone 6 Teardown: Schritt 4, Bild 1 von 2 iPhone 6 Teardown: Schritt 4, Bild 2 von 2
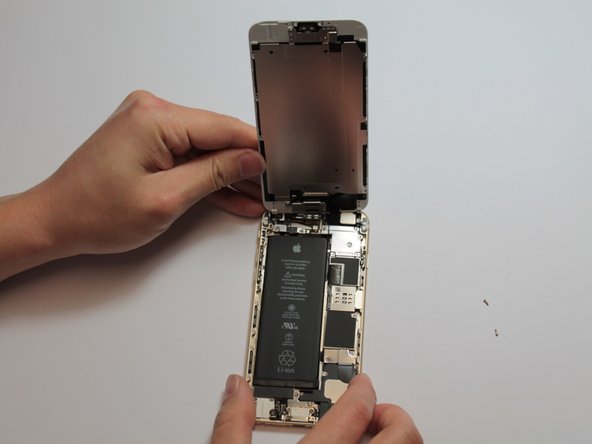
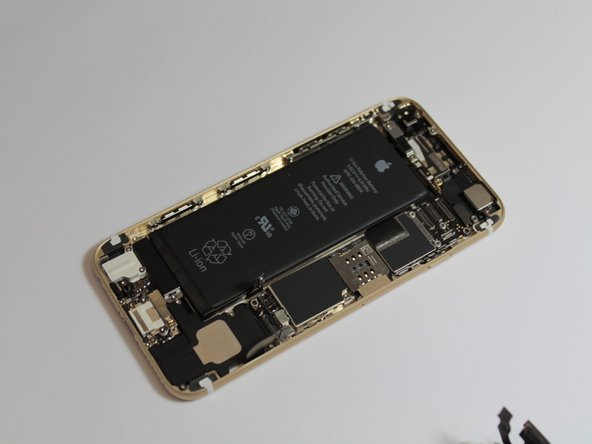
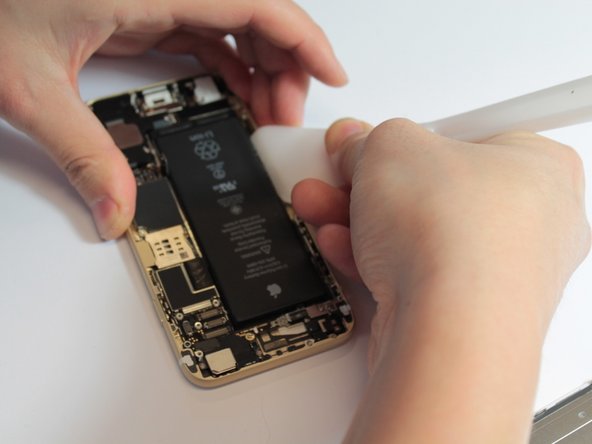
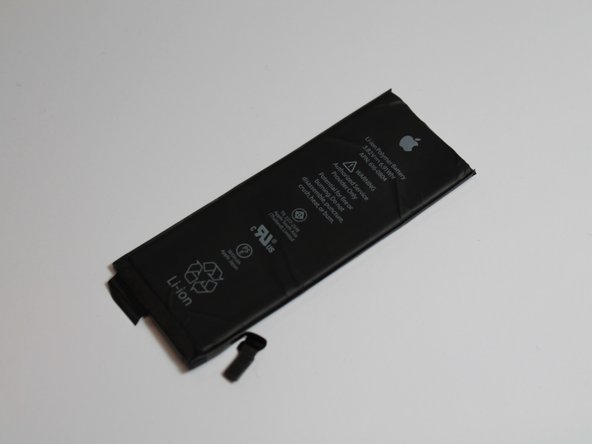
    • The battery is very well stuck in. With a bit of heat and a little deformation of the battery, we were able to get it out. (There's probably a pull tab to remove the battery, but we didn't find it.)

    • The battery is rated at 3.82V, 6.91Whr.

  5. iPhone 6 Teardown: Schritt 5, Bild 1 von 1
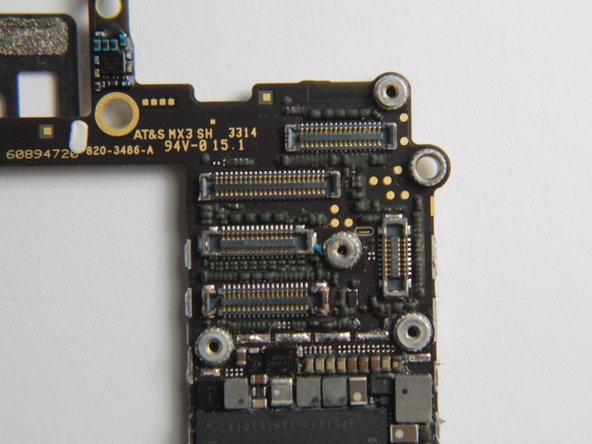
    • Removing the logic board requires the removal of many screws.

    • Fortunately for DIYers, Apple have placed the chips away from most of the screws so there is less risk of tool slip damage.

  6. iPhone 6 Teardown: Schritt 6, Bild 1 von 1
    • The iPhone 6 rear camera: not as big as its optically stabilized brother.

  7. iPhone 6 Teardown: Schritt 7, Bild 1 von 1
    • The iPhone 6 logic board.

  8. iPhone 6 Teardown: Schritt 8, Bild 1 von 1
    • The vibration motor is now inside a metal case!

  9. iPhone 6 Teardown: Schritt 9, Bild 1 von 1
    • The loudspeaker.

  10. iPhone 6 Teardown: Schritt 10, Bild 1 von 1
    • The Lightning port.

  11. iPhone 6 Teardown: Schritt 11, Bild 1 von 1
    • The Touch ID sensor.

  12. iPhone 6 Teardown: Schritt 12, Bild 1 von 1
    • The front camera and proximity sensor flex cable.

  13. iPhone 6 Teardown: Schritt 13, Bild 1 von 3 iPhone 6 Teardown: Schritt 13, Bild 2 von 3 iPhone 6 Teardown: Schritt 13, Bild 3 von 3
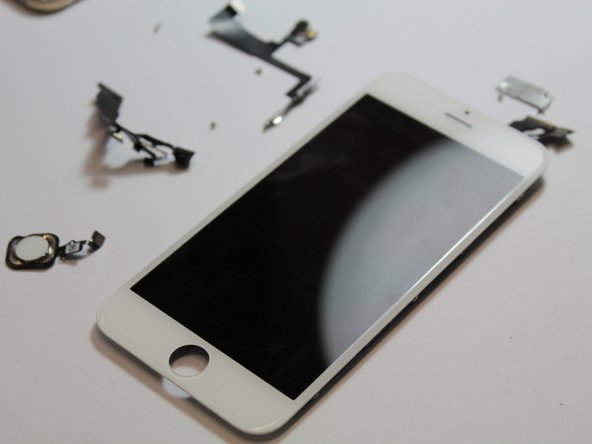
    • The iPhone 6 display assembly. It's thinner than the iPhone 5s/5c/5 screen.

    • The Touch ID Cable runs from the home switch to the top of the screen, adding a 4th connector at the top.

  14. iPhone 6 Teardown: Schritt 14, Bild 1 von 3 iPhone 6 Teardown: Schritt 14, Bild 2 von 3 iPhone 6 Teardown: Schritt 14, Bild 3 von 3
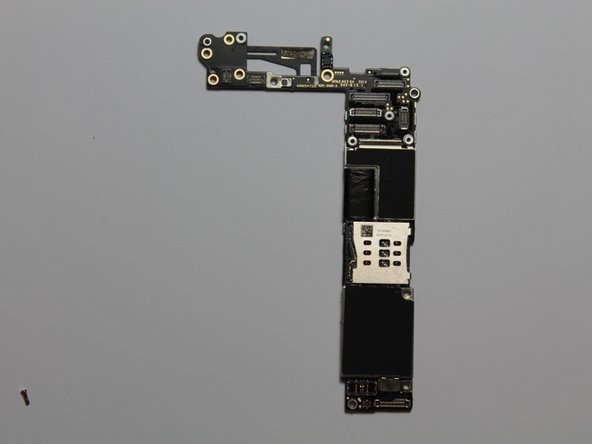
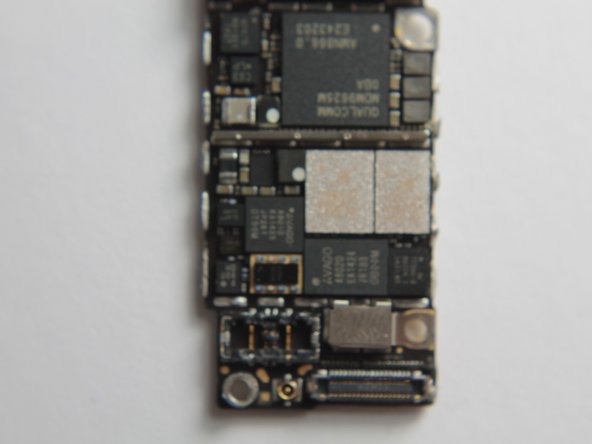
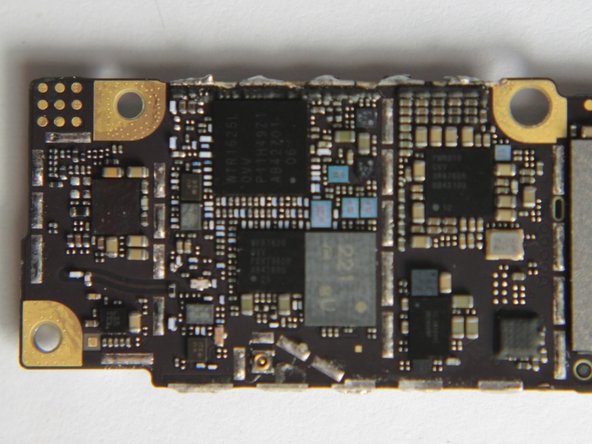
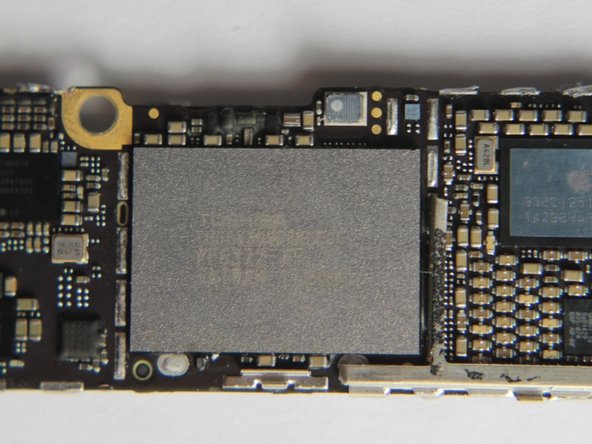
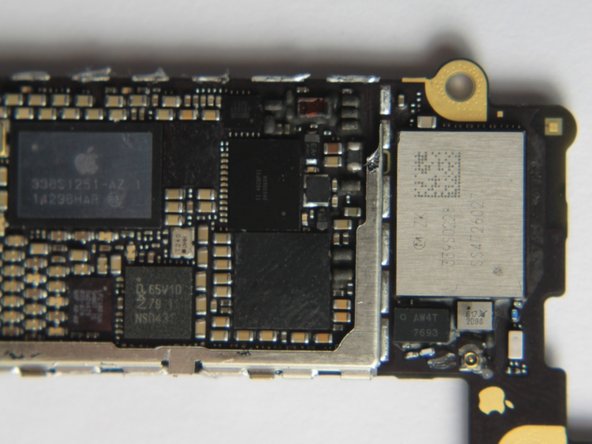
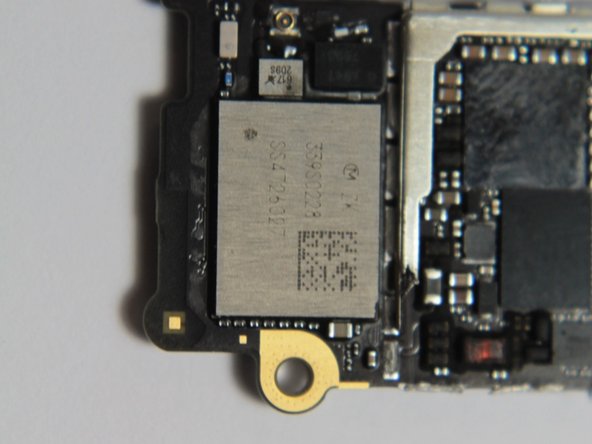
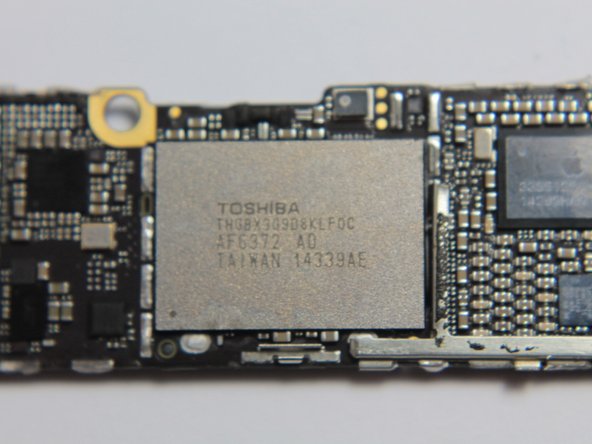
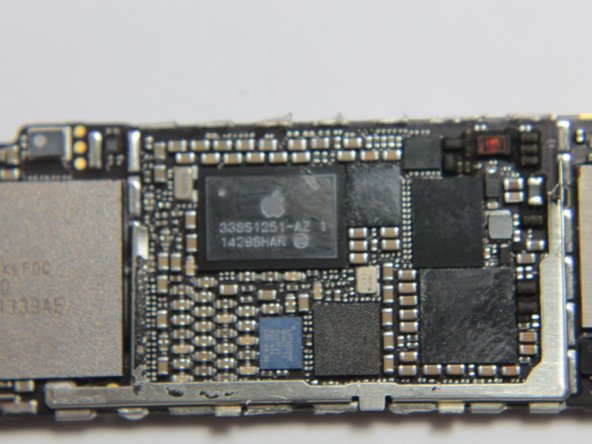
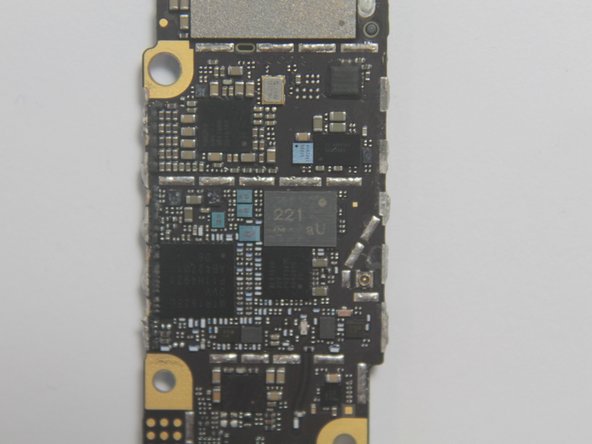
    • After the usual painful desoldering of the shielding, we have the logic board in all its naked glory.

    • Analysis to follow with iFixit's full teardown.

  15. iPhone 6 Teardown: Schritt 15, Bild 1 von 3 iPhone 6 Teardown: Schritt 15, Bild 2 von 3 iPhone 6 Teardown: Schritt 15, Bild 3 von 3
    • More chip pics!

  16. iPhone 6 Teardown: Schritt 16, Bild 1 von 3 iPhone 6 Teardown: Schritt 16, Bild 2 von 3 iPhone 6 Teardown: Schritt 16, Bild 3 von 3
    • Even more ICs.

  17. iPhone 6 Teardown: Schritt 17, Bild 1 von 2 iPhone 6 Teardown: Schritt 17, Bild 2 von 2
    • And that's all she wrote! We'll be back soon with a complete teardown and analysis from iFixit with higher resolution photos.

Patrick Lee

Mitglied seit: 09/19/13

2.605 Reputation

1 Anleitung geschrieben

Team

iExperts Mitglied von iExperts

Business

1 Mitglied

1 Anleitung geschrieben

Ein Kommentar

I have 2 small pieces that fell out and I have no idea where they go. One has this code on it 1-00095A 344. And the other looks like a toggle switch, it is black. Can you help.

linda.lloyd - Antwort

Kommentar hinzufügen

Seitenaufrufe:

Letzte 24 Stunden: 0

Letzte 7 Tage: 2

Letzte 30 Tage: 4

Insgesamt: 87,133