Einleitung
Before working on any other article for replacement, start here to get instructions on how to remove the bottom cover and gain access to the system components.
Was du brauchst
-
-
There are ten 5mm screws surrounding the edge of the cover.
-
A rubber cap covers the eleventh 5mm screw (in the center).
-
Remove the screws using a Phillips #00 screwdriver.
-
-
-
Pry between the casing and cover using a plastic wedge tool.
-
Use the wedge tool to move along the case & slowly pry it open.
-
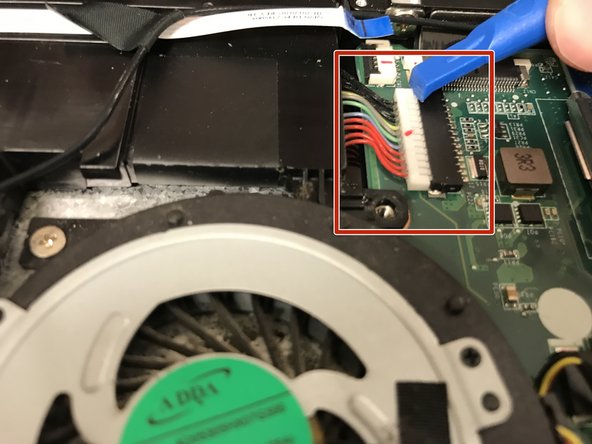
The wire for the 12v charging port connects the cover to the casing.
-
-
-
-
Disconnect this connector from the motherboard to avoid damaging the motherboard or charging port cable.
-
-
-
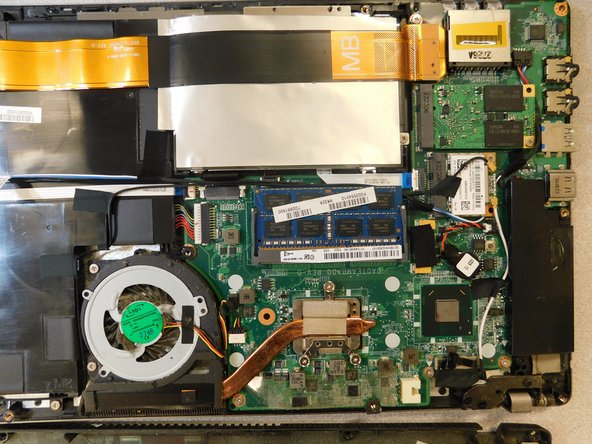
Disconnect the battery.
-
Hold down the power button for ~10 seconds to discharge any stored electricity from the motherboard.
-
-
-
At this point you should be able to:
-


To reassemble your device, follow these instructions in reverse order.
To reassemble your device, follow these instructions in reverse order.
Rückgängig: Ich habe diese Anleitung nicht absolviert.
2 weitere Nutzer:innen haben diese Anleitung absolviert.
Team

Gateway, Team S1-G1, Saknee Spring 2019 Mitglied von Gateway, Team S1-G1, Saknee Spring 2019
GCC-SAKNEE-S19S1G1
4 Mitglieder
5 Anleitungen geschrieben