Zum Hauptinhalt wechseln

iPad 3 Wi-Fi Displayblende Austausch

Hinweis: Du bearbeitest eine grundständige Anleitung. Alle Änderungen, die du vornimmst, betreffen alle 4 Anleitungen, die diese beinhalten.

Englisch
Deutsch

Schritt 1 übersetzen

Schritt 1
iPad 3 Wi-Fi Display Bezel Replacement: Schritt 0, Bild 1 von 3 iPad 3 Wi-Fi Display Bezel Replacement: Schritt 0, Bild 2 von 3 iPad 3 Wi-Fi Display Bezel Replacement: Schritt 0, Bild 3 von 3
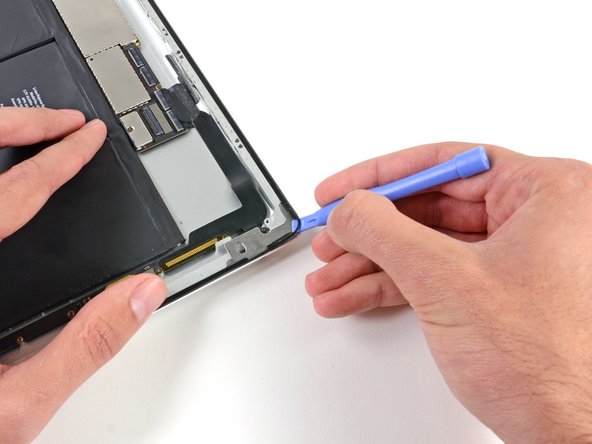
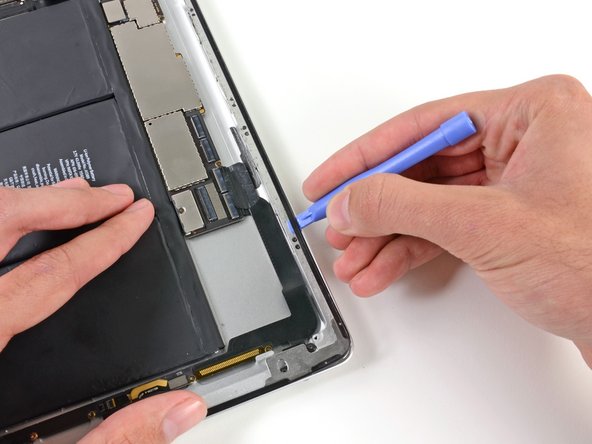
  • Insert the edge of plastic opening tool between the plastic and aluminum frames near one of the corners.

  • Carefully slide the plastic opening tool along the edge of the iPad, releasing the adhesive.

Setze die Kante eines Plastiköffnungswerkzeugs zwischen Plastik und Aluminiumrahmen nahe einer Ecke ein.

Schiebe sorgfältig das Werkzeug um den Rand des iPad. So löst du die Klebeverbindung.

Deine Beiträge sind lizenziert unter der Open-Source Creative Commons Lizenz.