Zum Hauptinhalt wechseln

Upgrade the display panel and replace the display cable

Englisch
Deutsch
Schritt 12
Upgrade the display panel and replace the display cable, Open the right display hinge: Schritt 0, Bild 1 von 3 Upgrade the display panel and replace the display cable, Open the right display hinge: Schritt 0, Bild 2 von 3 Upgrade the display panel and replace the display cable, Open the right display hinge: Schritt 0, Bild 3 von 3
Open the right display hinge
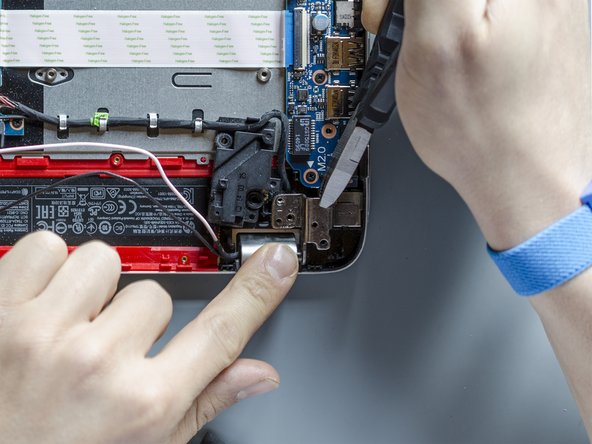
  • Using the small pliers grab the right hinge in the middle and pull it up as far as it opens. Observe the same precautions you followed opening the left display hinge: grab it in the middle only.

  • While the hinge is being pulled, this small centring pin has to come out of it. Keep an eye on it because it can easily break. You could use a metal spudger behind the hinge to hold the plastics down while you're raising the hinge if you like.

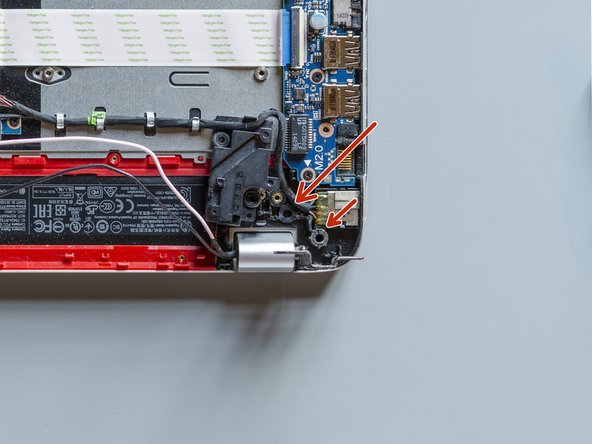
  • Be careful. As you can see sliding from pic#2 to pic#3 I broke the plastic which was holding the golden thread of one screw. When I then reassembled the laptop, I had to glue it back in its position. These screws keep the laptop together, if you broke their threads too, put those back together with glue.

  • On another occasion, when I was probably disassembling or mounting the base enclosure, I also broke the thread pointed by the shorter red arrow. I never managed to find all of its plastic broken pieces to rebuilt it in the end, so, watch out!

Hier Übersetzung einfügen

Hier Übersetzung einfügen

Hier Übersetzung einfügen

Hier Übersetzung einfügen

Deine Beiträge sind lizenziert unter der Open-Source Creative Commons Lizenz.