Zum Hauptinhalt wechseln

Samsung Galaxy Note9 Displayeinheit tauschen

Englisch
Deutsch
Schritt 6
Samsung Galaxy Note9 Display Assembly Replacement: Schritt 0, Bild 1 von 3 Samsung Galaxy Note9 Display Assembly Replacement: Schritt 0, Bild 2 von 3 Samsung Galaxy Note9 Display Assembly Replacement: Schritt 0, Bild 3 von 3
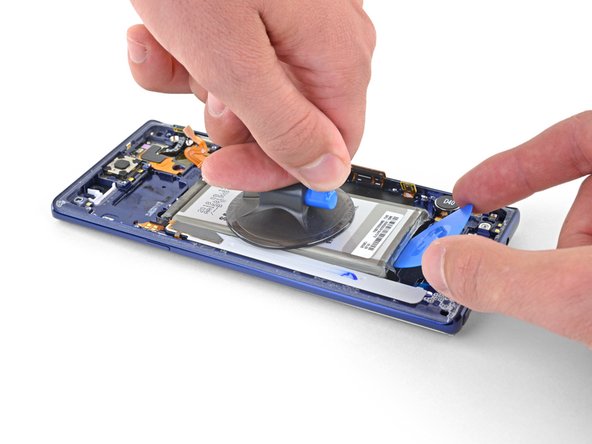
  • Apply a suction cup to the battery.

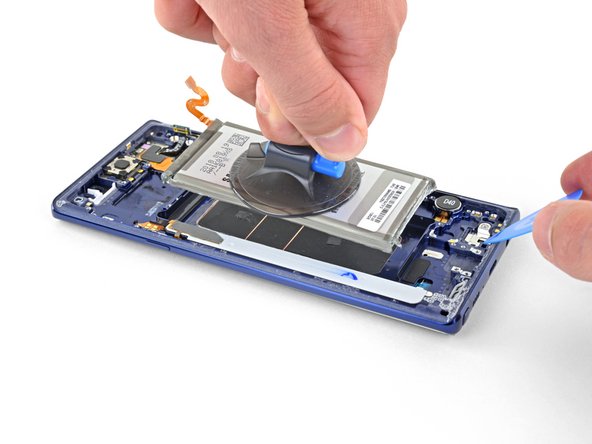
  • Lift the battery straight up until there is a gap large enough to insert the opening pick.

  • Insert an opening pick underneath the bottom edge of the battery and twist to loosen the battery adhesive.

  • Remove the battery.

  • It may take multiple attempts to get the suction cup to adhere. Apply is as close to the center of the battery as possible and avoid the white sticker at the bottom of the battery.

  • Do not bend the battery.

Befestige einen Saugheber am Akku.

Hebe den Akku soweit gerade nach oben, so dass ein Spalt entsteht, in den du ein Plektrum einsetzen kannst.

Setze ein Plektrum unter die Unterkante des Akkus ein und verdrehe es, so dass sich der Kleber am Akku löst.

Entferne den Akku.

Möglicherweise musst du mehrmals versuchen, den Saugheber zu befestigen. Versuche ihn so mittig wie möglich anzubringen und vermeide den weißen Aufkleber unten am Akku.

Verbiege den Akku nicht.

Deine Beiträge sind lizenziert unter der Open-Source Creative Commons Lizenz.