Hinweis: Du bearbeitest eine grundständige Anleitung. Alle Änderungen, die du vornimmst, betreffen alle 2 Anleitungen, die diese beinhalten.
Schritt 3 übersetzen
Schritt 3


-
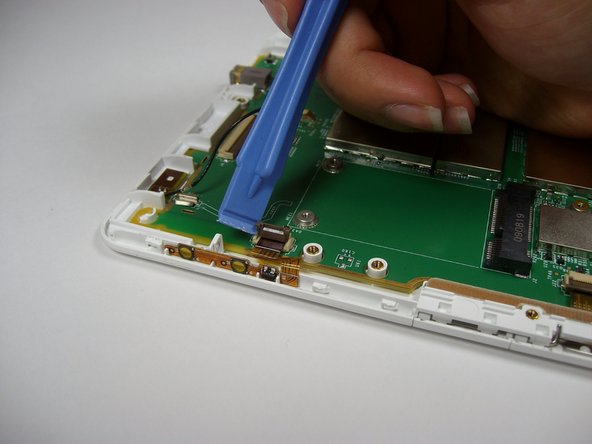
Wedge the opening tool underneath the plastic ribbon and gently pull up to lift the brown connector flap.
-
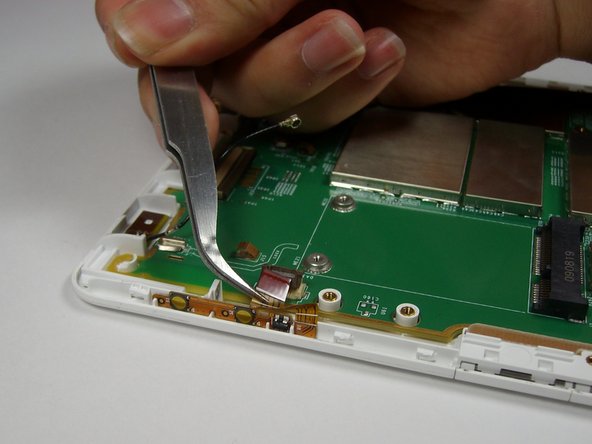
Squeeze the plastic ribbon gently with the tweezers and pull away from the connector to remove it.
| [* black] Wedge the opening tool underneath the plastic ribbon and gently pull up to lift the brown connector flap. | |
| - | [* black] Squeeze the plastic ribbon gently with the tweezers and pull away from the connector to remove it. |
| + | [* black] Squeeze the plastic ribbon gently with the [product|IF145-020|tweezers] and pull away from the connector to remove it. |
Deine Beiträge sind lizenziert unter der Open-Source Creative Commons Lizenz.